Facebook
 Reddit
 Email
Email
Discover everything you need to know about the 3-Star Dungeons in Throne and Liberty and the best tips and tricks to complete them.
Dungeons are the special areas in Throne and Liberty where players can engage in PVE challenges, fight overpowered bosses, and gain valuable rewards. This game designed the Dungeons to challenge the players’ combat skills, teamwork, and strategy. They have level and combat power requirements. Players must work in a team to defeat bosses and complete all objectives. Chapel of Madness, Doomrot Grove, and Twisted Laboratory are some new 3-Star Dungeons. Each of these Dungeons has its own difficulty level and rewards. Each Dungeon has unique boss fights that require learning attack patterns. In this guide, we’ll discuss every 3-Star Dungeon in depth and how to defeat the final bosses along with their mechanics.
Dungeons Overview in Throne and Liberty
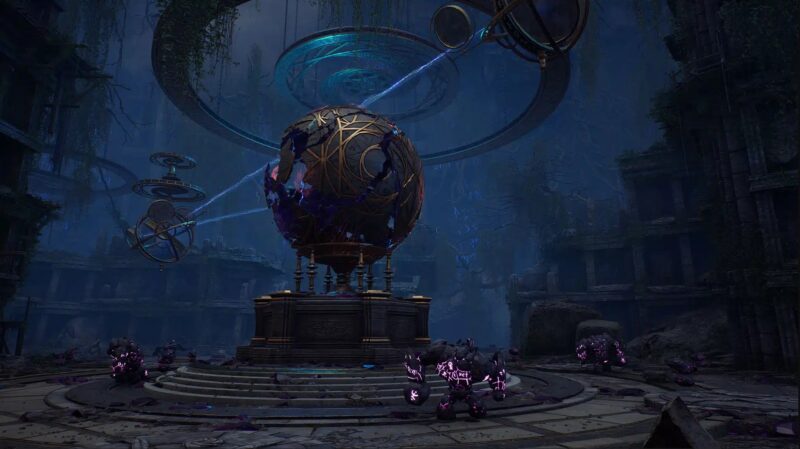
Dungeons in Throne and Liberty feature unique mechanics that players must learn and adapt to. In this 3-star Dungeon, the tank should always face the boss away from the team. Certain red areas require careful navigation to avoid damage or life drain. Secret Dungeons can be explored solo or with groups of up to 6 players, including matchmaking. Access to Secret Dungeons is contingent upon unlocking them through gameplay. Dungeons offers various experiences, including PVE-focused with a PVP twist. Many Dungeons, especially at higher difficulty levels, require effective teamwork and communication. You need to understand the boss’s attack patterns and mechanics. The 3-Star Dungeon offers the most challenging content for experienced adventurers. These Dungeons are designed for players with solid experience. Many bosses have unique mechanics that require specific strategies to defeat them.
Guide to New 3-Star Dungeons
Here are all the 3-Star Dungeons in Throne and Liberty along with the best strategies to complete them and gain useful rewards.
Rancorwood
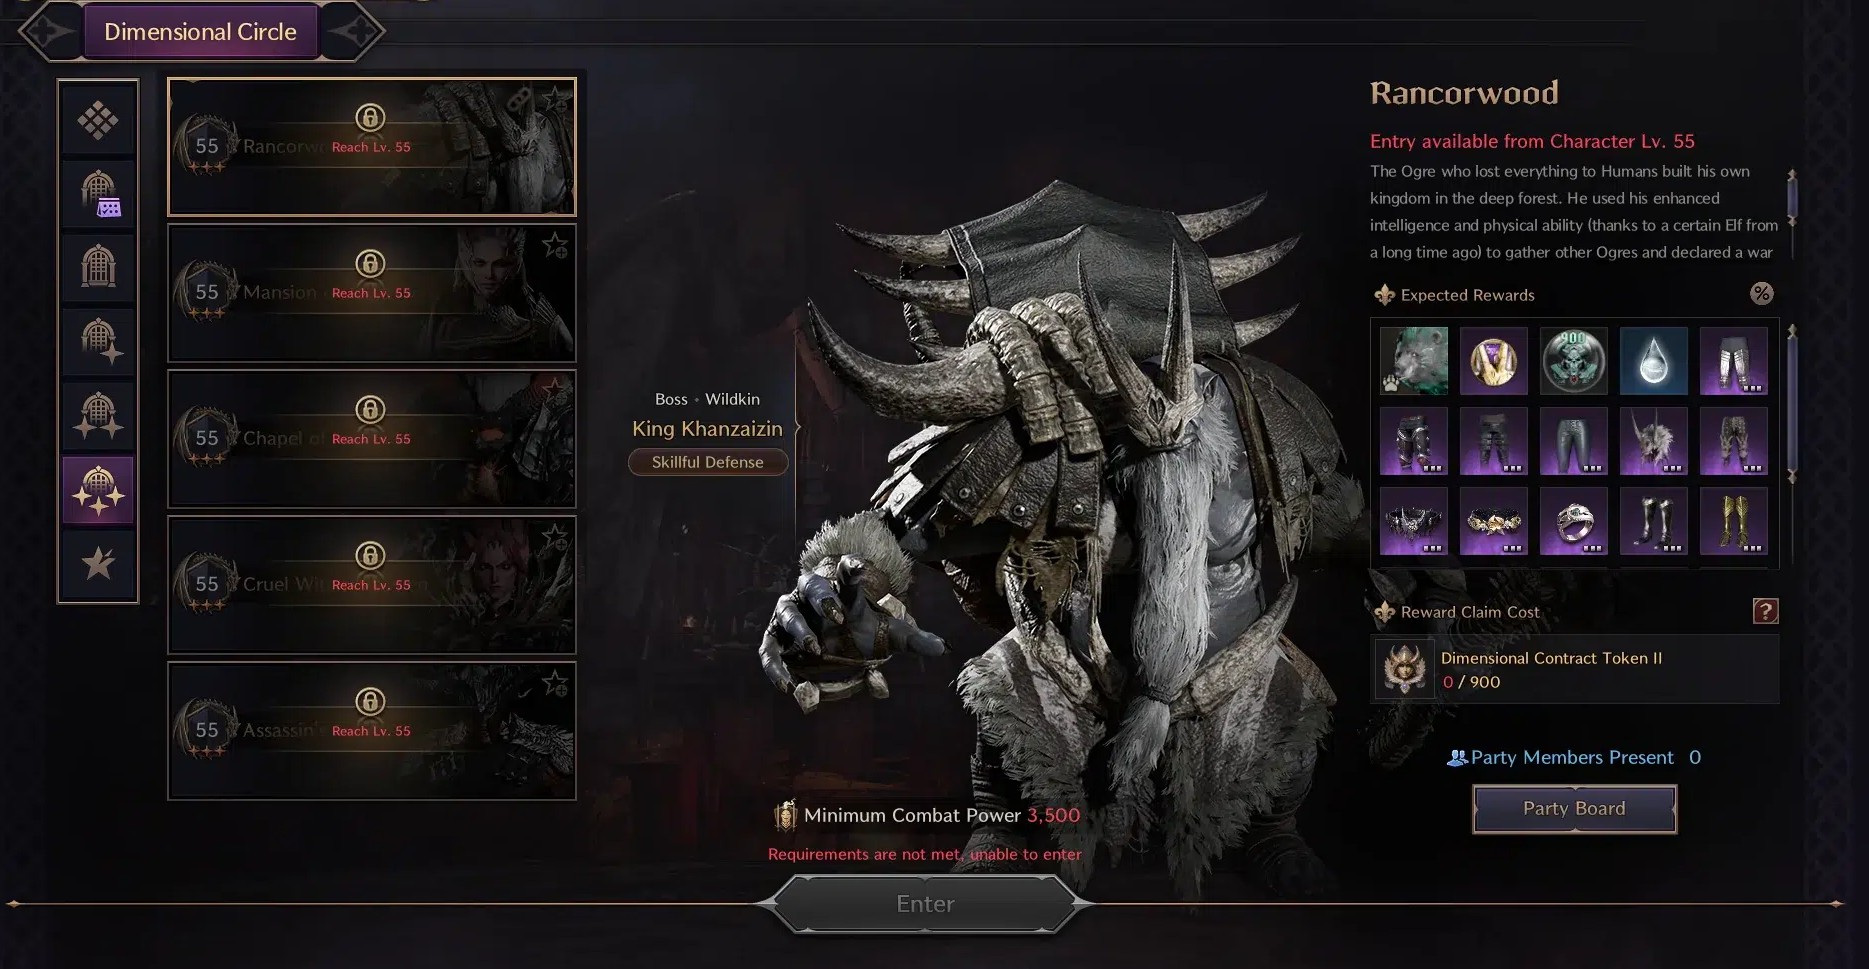
Rancorwood is a challenging 3-star Dimensional Circle Dungeon where players face the King Khanzaizin. You need to understand the mechanics to successfully navigate and conquer this Dungeon. Kill all the marked mobs for elite mob Brock to spawn in the starting area. You need to kill him and walk into the geyser to fly up to the fire bridge. To clear the fire, you need to go back and forth into the geyser to clear it with the water debuff, or just simply fly from the pillar and run. Kill Gugbarg mini-boss to unlock the geyser. Now, you need to defeat Grok to progress to the final boss. Grok has no special mechanics, making it easy to defeat.
King Khanzaizin marks an area and launches a meteor. You need to move out of the marked zone to avoid damage. The boss targets a player with a meteor that can’t be dodged. This can be reduced by standing close to a teammate. The boss performs three wrath attacks followed by a fury attack. You can dodge roll the first attack, and the next two are avoidable by staying out of the marked zone. The boss also has a fire area mechanic ignites a cone-shaped area that spreads fire, inflicting burn damage in the area. You need to jump off the arena to access geysers, which attract them back. Here are all the rewards you can obtain after completing this Dungeon.
Armor
| Armor | Stats |
|---|---|
| Auric Vanguard’s Gaiters | Strength 2 Fortitude 3 Damage Reduction 3 Magic Endurance 40 |
| Crowned Skull of Victory | Dexterity 3 Hit Chance 50 Heavy Attack Chance 30 Mana Cost Efficiency +2% |
| Dead Admiral’s Trousers | Perception 3 Max Health 200 Damage Reduction 6 Collision Resistance |
| Eternal Warlord’s Greaves | Strength 2 Max Health 185 Damage Reduction 3 Ranged Evasion 98 |
| Feral Prophet’s Pants | Dexterity 3 Critical Hit Chance 62 Max Health 150 Mana Cost Efficiency +2.7% |
| Forgotten Lotus Pants | Added Attack Speed +2.6% Dexterity 2 Hit Chance 45 Max Health 150 |
| Ogre Lord Bone Gaiters | Perception 3 Max Health Damage Reduction 7 Endurance 30 |
| Ascended Guardian Shoes | Movement Speed +6.6% Melee Evasion 86 |
| Gilded Raven Boots | Movement Speed +2.4% |
| Phantom Wolf Boots | Movement Speed +2% Melee Evasion Stamina Regen 1.35 |
| Sabatons of the Field General | Movement Speed +2% Strength 4 |
| Shadow Harvester Boots | Strength 1 Perception 3 Bind Chance 21 |
| Shock Commander Sabatons | Movement Speed +1.4% Strength 2 Collision Chance 25 |
| Swirling Essence Shoes | Perception 2 Critical Hit Chance 40 Stamina Regen 1.65 |
Accessories
| Accessories | Stats |
|---|---|
| Cunning Ogre Belt | Strength 1 Wisdom 3 Heavy Attack Evasion 45 |
| Earth Goddess’ Fence | Max Health 450 Melee Evasion 50 Ranged Evasion 90 |
| Moon and Star Ring | Dexterity 3 Perception 1 Mana Cost Efficiency +2% |
Items
- Lizard Scale
- Fermented Rotein
Other Rewards
- Spirit Urs (Morphstone)
- Abyssal Contract Token Points (x500)
- Training Dew: 10,000 Points
Halls of Tragedy
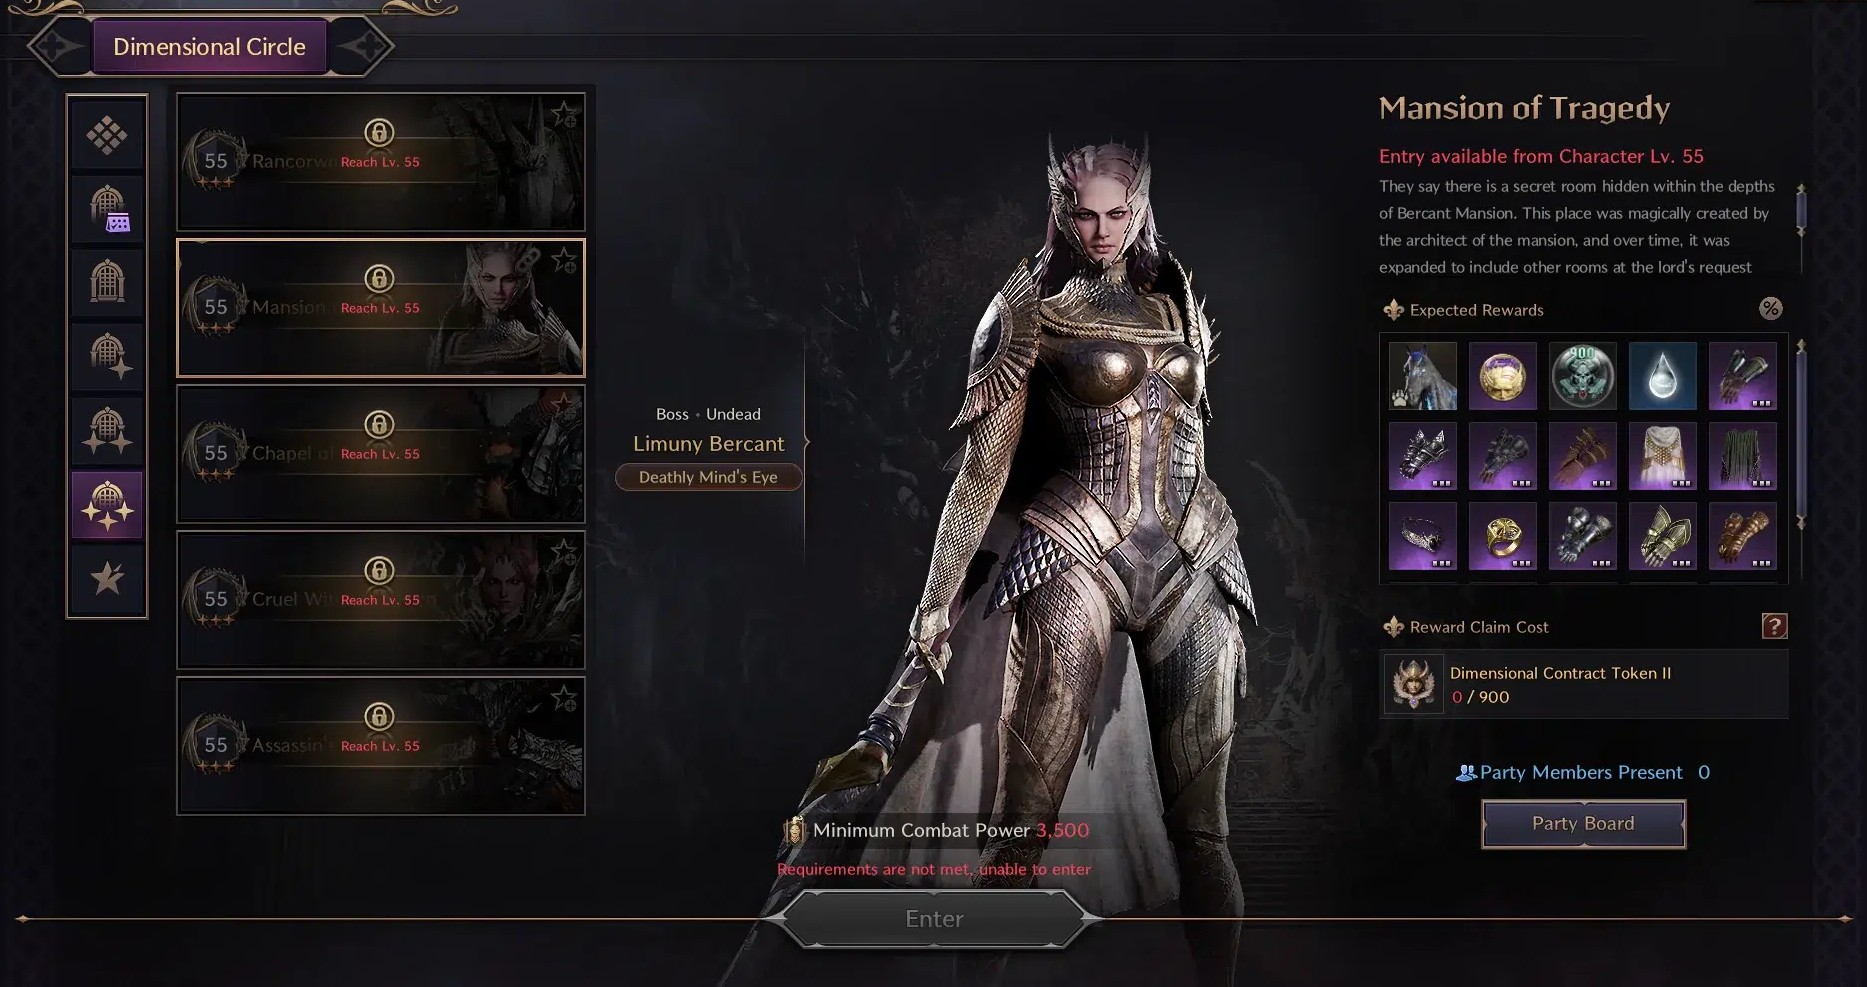
Halls of Tragedy is a 3-Star Dimensional Circle Dungeon that requires you to fight Limuny Bercant. This is one of the easiest 3-star Dungeons. Start by killing mobs until the stairs open. Run up and pull the mobs to the next gate. Kill the mobs until the gate opens up and grapple up. Now, you need to kill the mini-boss. This is the easiest enemy to defeat if you equip the best weapon and use the right strategy.
In the next area, you need to split the party into three on the left and three on the right side. First, interact with each fountain to open the gates, then split. Avoid the red bugs and just ignore everything to interact with the fountain until you reach the second mini-boss. Kill the final batch of mobs and you’re at the final boss. After defeating the final boss, you will get multiple rewards.
Defeating the Boss
The tank should always face the boss away from the team because the boss will make some AOE attacks throughout the fight that are only aimed at the tank. The major mechanics start when the furthest player is getting marked by such a red area. This person will now be constantly damaged. If other players step now into this area, this Mark Player can drain life from the others. So, in the end, just all the players that are inside this red area get constant damage. The Healer just places the AOE heal on the ground and everyone is fine. After a while, one random player will be marked with a green area. You lose that area after a few seconds and place it on the ground.
In this place, it will then deal constant damage. You will always get the debuff after you have been in the red area and left it. If you now go back into the red area with the debuff on, you will take a lot more damage. This is why you should not go back into the red area, once you have left it. A little later, the boss will shout and everyone has to enter the red area. Once you enter it, you will be petrified, which means you can’t move, you can’t use spells, and you can’t do anything. He will do an AE attack which will deal a lot of damage. If you are petrified in this area, you will get almost no damage. It will also directly remove the certification.
Attacks
The only thing that is now changing is when the boss is below 50% HP, he will again mark the furthest player, but this time with a purple area. He does the same stuff. The only difference is that the next two furthest players now have a purple ball over their head. This means only these two should go into the purple area because otherwise, you get a good amount of damage. It’s like you have the debuff on. If you go in there without a purple, you will die fast. Additionally, below 50% HP he will also mark two players with the green stuff, but that’s not changing anything. Here are all the rewards you can obtain after completing this Dungeon.
Armor
| Armor | Stats |
|---|---|
| Auric Vanguard’s Gauntlets | Added Attack Speed 1.3% Dexterity 2 Fortitude 3 Hit Chance 25 |
| Dead Admiral’s Gloves | Added Attack Speed +3% Ranged 2% Dexterity 2 Bonus Damage 6 |
| Eternal Warlord’s Gauntlets | Added Attack Speed +3.2% Perception 2 Hit Chance 20 Weaken Resistance 31 |
| Feral Prophet’s Gloves | Strength 1 Wisdom 3 Hit Chance 62 Weaken Chance 33 |
| Forgotten Lotus Gloves | Added Attack Speed +3% Hit Chance 65 Critical Hit Chance 30 Heavy Attack Chance 20 |
| Opulent Noble’s Mantle | Hit Chance 60 Mana Regen 18.75 Cooldown Speed +2.2% |
| Royal Spineflower Drape | Range 7% Bind Chance 33 Damage Reduction 4 |
| Ascended Guardian Gloves | Perception 4 Mana Cost Efficiency +6.3% |
| Gauntlets of the Field General | Added Attack Speed +2% Perception 4 |
| Gilded Raven Grips | Added Attack Speed +1.1% Dexterity 1 Fortitude 3 |
| Phantom Wolf Gloves | Added Attack Speed +2% Dexterity 2 Ranged Evasion 54 |
| Shadow Harvester Grips | Range +1.7% Dexterity 3 Critical Hit 20 |
| Shock Commander Gauntlets | Range +3% Dexterity 1 Critical Hit 31 |
| Swirling Essence Gloves | Range +3.3% Wisdom 2 Critical 40 |
Accessories
| Accessories | Stats |
|---|---|
| Paladin’s Ring of Devotion | Wisdom 1 Hit Chance 53 Endurance 20 |
| Pitch-black Destruction Necklace | Dexterity 1 Ranged Evasion 50 Magic Evasion 90 |
Items
- Ant Wings
- Fermented Rotein
All Other Rewards
- Dusk Grimchaser (Morphstone)
- Abyssal Contract Token Points (x500)
- Weapon Mastery Seal: 10,000 EXP
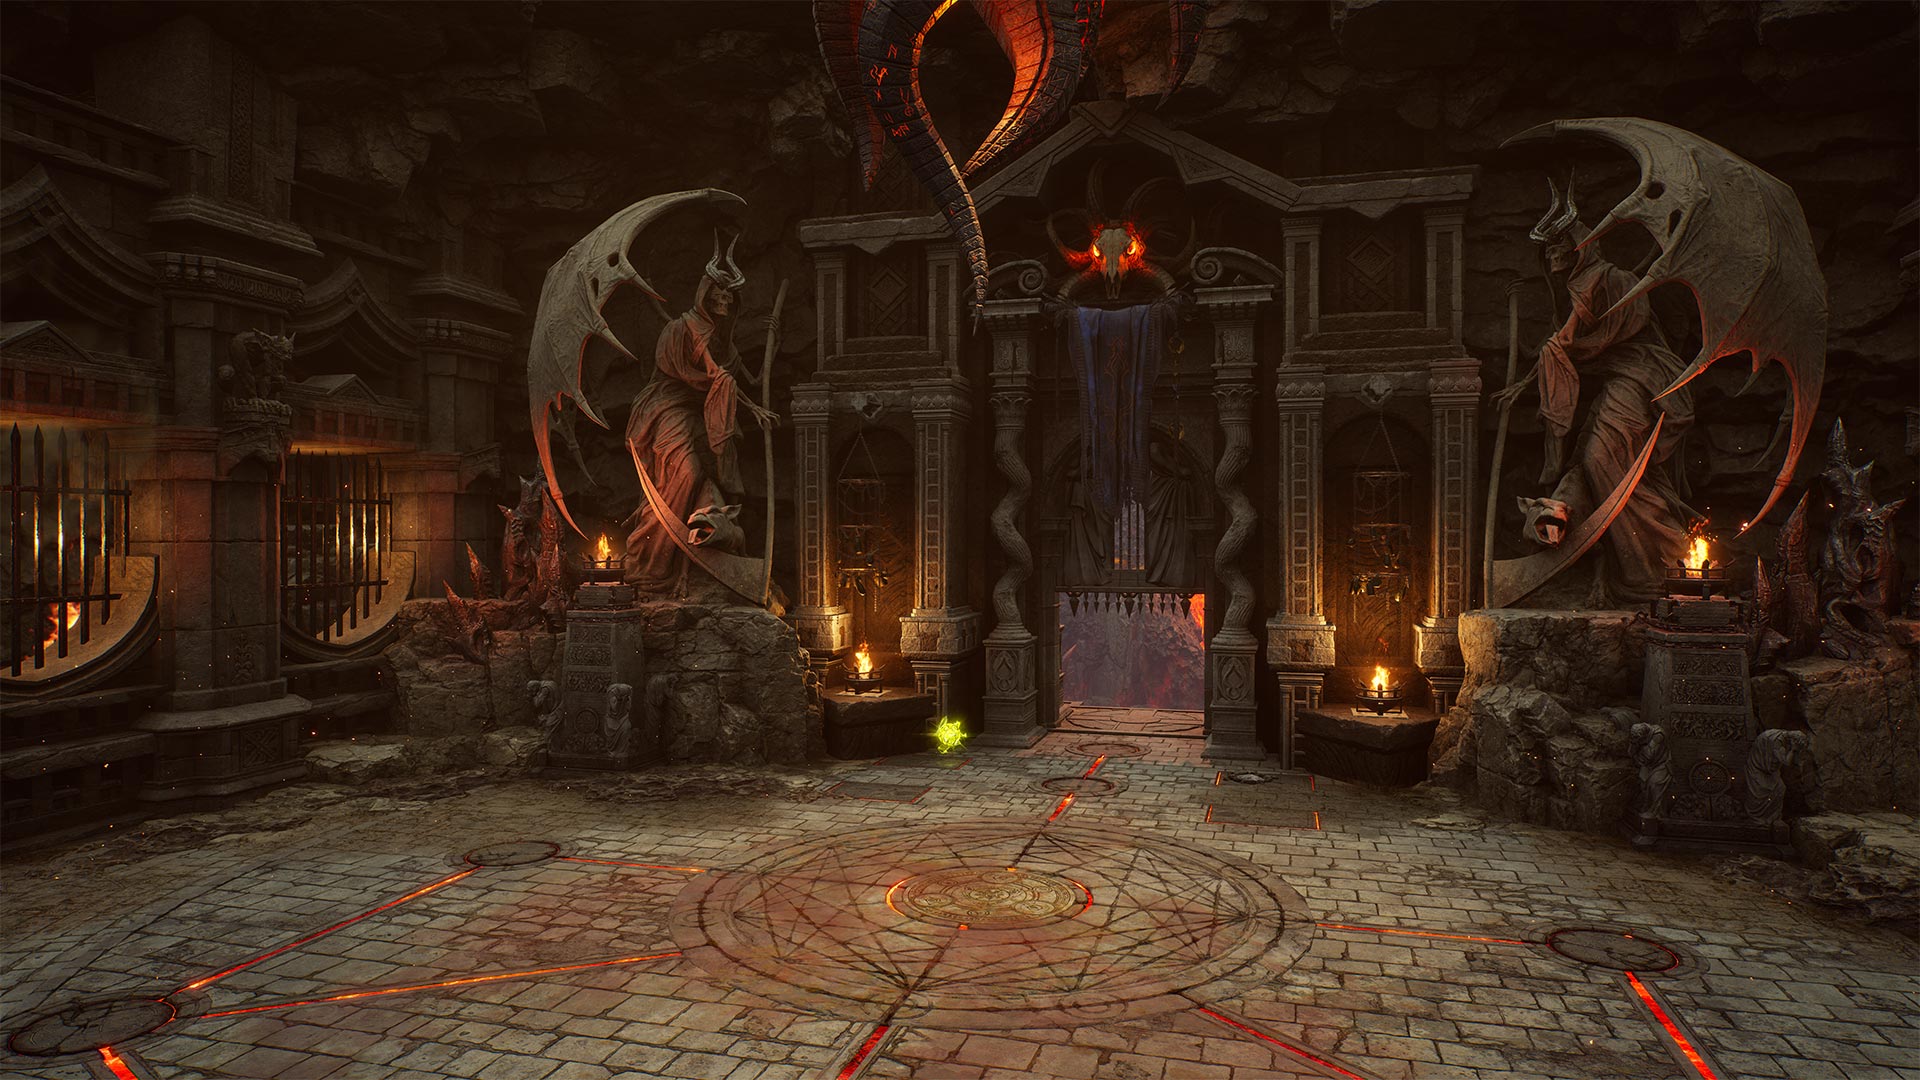
Chapel of Madness
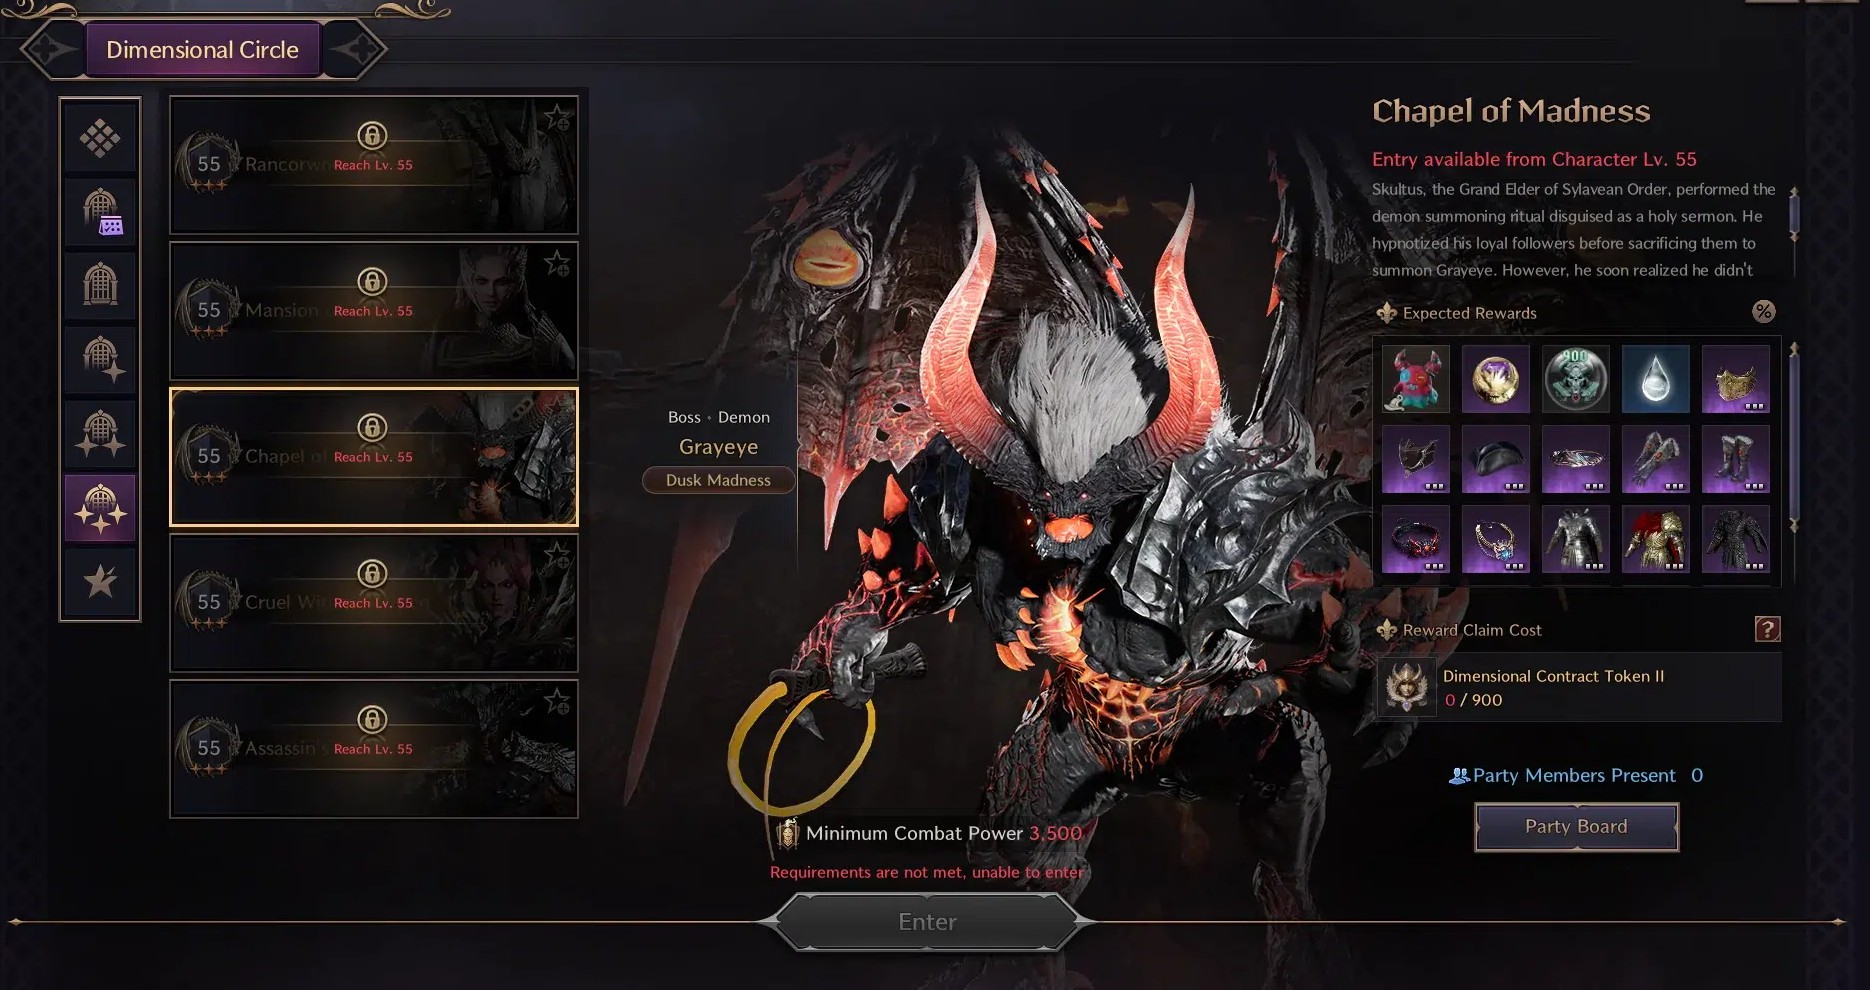
Chapel of Madness is a 3-Star Dimensional Circle Dungeon that challenges the players with its difficult mechanics and powerful enemies. Ignore all the trash mobs, get to the Citadel wizard. You need to kill it and open the door to kill the mobs inside. Now move to the mini-boss. Defeat the Summoning Ritual Chief Pries to progress further in the Dungeon. You need to find a staircase with three landings. Clear the mobs and totems on these landings. Now, enter the room with three Shamans linked to a spirit. Kill all the mobs and the spirit, and glide from the platform. Now, you can enter the boss arena.
Defeating the Boss
You want your tank to face the boss away from the team because the boss will do constant AOE attacks that are only aimed on the tank. Everyone else should also not be directly behind him. Because after he does his AOE attack, he will turn around and do a whop attack directly behind him. The main mechanic starts when the boss shouts, and at that moment, the player who is the furthest away will get the light blue cone in front of them. This cone always points in the direction the player is looking. The problem is if you hit other players with this cone, you will fear them. So, the first thing you should do is look away from the team, and here you must stop attacking the boss.
Otherwise, your character will always turn back towards the boss and you will fear all your teammates. So, either you have a button bind to stop attacking or just more quickly so that your character stops attacking. You have to wait a few seconds until you see that light blue eye over your head fully open. Then, you can aim at the round symbols and search for zombies. You only need to find one pack of zombies here. Once you have found the zombies, all the DPS should try to focus them down. The last zombie will drop the blue area on the ground. Soon after the boss will make a massive attack on the entire Arena, causing massive damage except you on the Blue Area.
Attacks
The next mechanic he will do is to jump towards the furthest player again and do again two attacks with his whip. This does a little bit of damage but nothing special. Shortly after he will jump into the middle again and this time he will scream. Now, he will do the same AOE on the ground. Some areas on the ground will light up red. If you stand on it, you will get a little bit of damage. So, usually, you want to go to the second ring and then wait here to see if you have to move towards or away from the boss. They’re just two different patterns, but it’s also really not a big deal if you get hit by it.
After this mechanic, he will give players the blue cone again. This time not just one player but several players. This depends on how much HP the boss has. When the second time he’s giving players this blue cone, there are no zombies. You don’t have to find any zombies. You simply look away from your teammates to avoid fearing them. Now at the same time, the boss will do some AOE attacks in the arena, but this is also not hurting too much, the Healer just has to heal this. Here are all the rewards you can obtain after completing this Dungeon.
Armor
| Armor | Stats |
|---|---|
| Auric Vanguard’s Barbute | Wisdom 3 Fortitude 3 Max Health 150 Collision Resistance 25 |
| Dead Admiral’s Bicorne | Dexterity 1 Bonus Damage 6 Hit Chance 65 Cooldown Speed +1.5% |
| Eternal Warlord’s Faceguard | Movement Speed +1.3% Strength 1 Max Health 375 |
| Feral Prophet’s Crown | Wisdom 3 Max Mana 450 Mana Regen 20.25 Mana Cost Efficiency +2% |
| Forgotten Lotus Mask | Perception 3 Heavy Attack Chance 27 Mana Regen 15 Cooldown Speed +2.1% |
| Infernal Demonpact Grasp | Added Attack Speed +4.8% Perception 2 Stun Chance 17 Collision Chance 22 |
| Infernal Demonpact Steps | Dexterity 1 Perception 3 Max Health 225 Ranged Evasion 100 |
| Ascended Guardian Raiment | Perception 2 Max Health 300 Stamina Regen 1.65 |
| Gilded Raven Tunic | Fortitude 3 Max Health 150 Ranged Evasion 34 |
| Phantom Wolf Tunic | Strength 2 Weaken Chance 21 Magic Evasion 80 |
| Plate of the Field General | Strength 2 Perception 1 Stun Chance 26 |
| Shadow Harvester Tunic | Bind Chance 41 Ranged Evasion 74 Stamina Regen 1.35 |
| Shock Commander Plate Armor | Strength 4 Damage Reduction 4 |
| Swirling Essence Robe | Dexterity 3 Wisdom 2 Heavy Attack Chance 33 |
Accessories
| Accessories | Stats |
|---|---|
| Lord’s Necklace | Hit Chance 33 Melee Evasion 140 Ranged Endurance 54 |
| Red Demonic Eye Bracelet | Hit Chance 50 Critical Hit Chance 53 Melee Evasion 54 |
Items
- Beast Fang
- Mana Blood
All Other Rewards
- Laughing Jolt (Amitoi Summon Stone)
- Abyssal Contract Token Points (x500)
- Weapon Mastery Seal: 10,000 EXP
Doomrot Grove
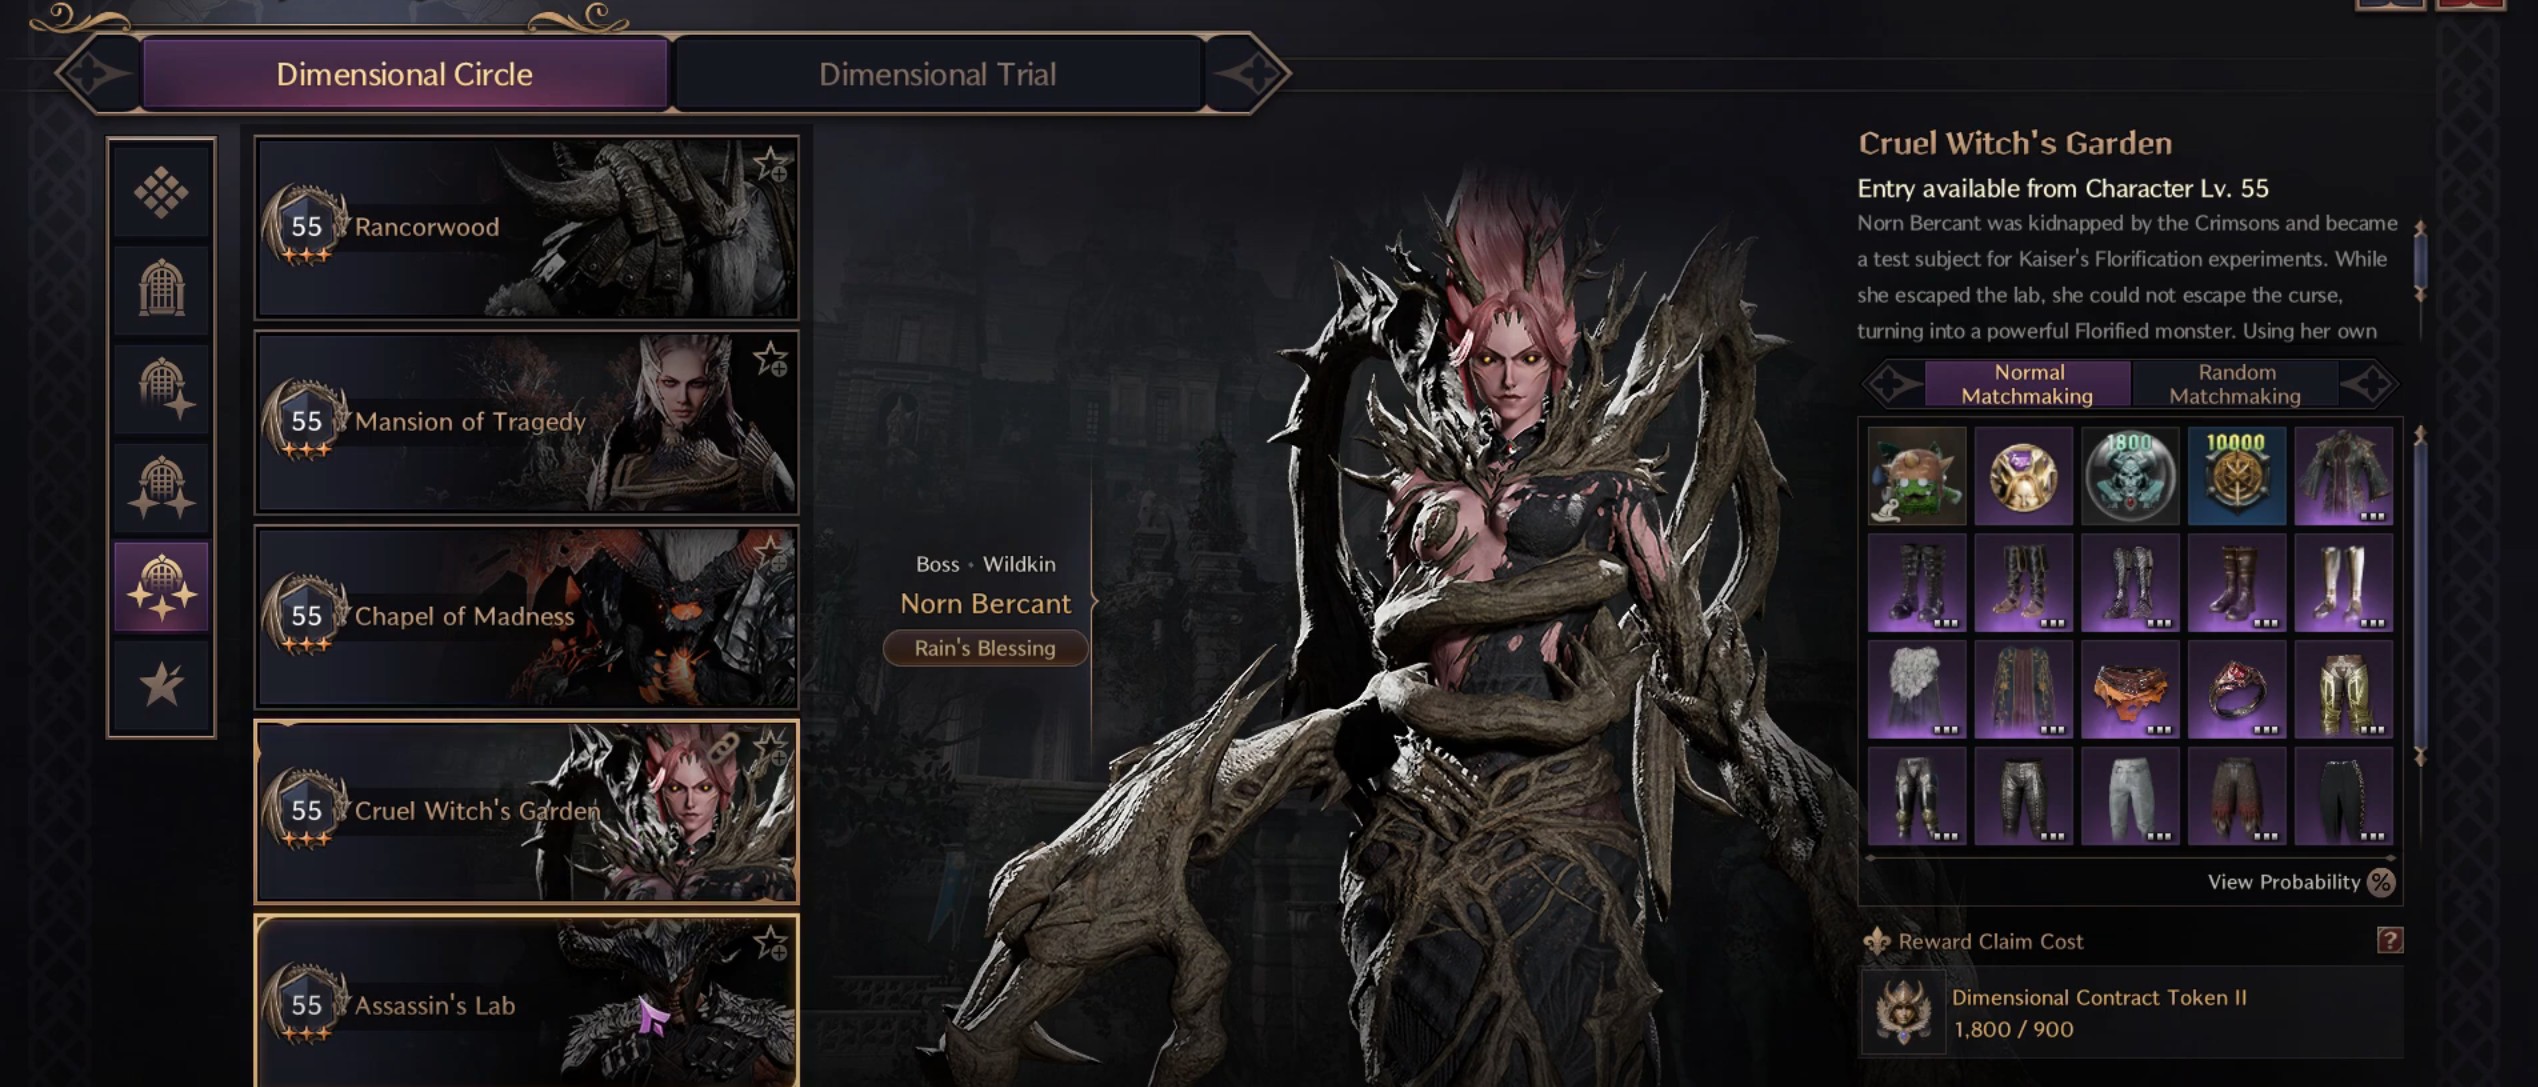
Doomrot Grove is a 3-Star Dimensional Circle Dungeon, requiring you to fight Norn Bercant. Move across the traps and clear all the Dungeons. You need to glide down into the Dungeon. Now, move down the corridor while avoiding the projectiles. There are fire projectiles that glow before shooting. Kill the Thorny Vine Gatekeeper to move forward. This mini-boss has one mechanic, so it’s pretty easy to defeat it. Move into the corridor after defeating it and avoid all the traps. You need to find a perch you can grapple with and keep moving forward while fighting the enemies coming in your path. Eventually, you will locate another dead end with a perch. You can land at the second mini-boss by grappling at the top. Defeat the Thorny Vine Witch.
Defeating the Boss
Before the fight starts, put pin one close to the boss and pin two a bit back but in the line. During the fight, you will want the tank to Agra the boss towards those pins. After several normal attack patterns and fury attacks, the boss will mark four players with a green seed visible above their heads. Two players need to stand at the pin one and two players at the pin two while facing towards the boss. The other two players without the seed should stand in between pins one and two. The boss spawns a thorn wall on both pins to protect the two.
Players in the middle from the AOE attack. This mechanic is always followed by a Dodge roll, Fury attack, jump, or both of them one after another.
When the arena darkens and green waves appear on the outside of the Arena, it indicates the next mechanic. Everyone will be launched into the air and given poison debuff. There will be five Vines shooting a seed toward the boss indicated by the red line on the ground. Land on the ground and just block one of the seeds to remove the poison debuff. During that time, there will be two sets of green poison circles on the ground. So, keep moving and dodging them. Straight after the boss will either do a Dodge roll Fury attack, jump, or both of them one after another.
Attacks
After this, the fight repeats itself with the four seed mechanics, two at Pin One and two at Pin Two. This creates a torn wall while constantly dropping poison AOE on every player, so always keep moving. After 50% HP, the flying mechanic will add poisonous wines on the ground that deal damage when you get close to them. However, the mechanics are the same. Grab the seed to remove the poison debuff, Dodge poison AOE, and prepare for Dodge roll, jump, or both of them one after another. Rinse and repeat until the boss is dead. Here are all the rewards you can obtain after completing this Dungeon.
| Armor | Stats |
|---|---|
| Auric Vanguard’s Plate Boots | Perception 3 Fortitude 2 Hit Chance 18 Max Health 270 |
| Dead Admiral’s Boots | Dexterity 3 Wisdom 1 Mana Regen 32.25 Stun Resistance 33 |
| Eternal Warlord’s Sabatons | Perception 3 Critical Hit Chance 30 Health Regen 13.5 Bind Resistance 45 |
| Feral Prophet’s Shoes | Movement Speed +3.3% Perception 1 Heavy Attack Chance 39 Max Health 525 |
| Florification Curse Uniform | Wisdom 1 Perception 1 Heavy Attack Chance 50 Heavy Attack Evasion 47 |
| Forgotten Lotus Boots | Strength 2 Dexterity 1 Melee Evasion 90 Magic Evasion 80 |
| Grieving Vengeance Cloak | Mana Cost Efficiency +3% Stun Resistance 18 Collision Resistance 25 |
| Silver Fur Decorated Cloak | Critical Hit Chance 70 Heavy Attack Damage 27 Damage Reduction 4 |
| Ascended Guardian Pants | Wisdom 3 Damage Reduction 3 Collision Resistance 41 |
| Gilded Raven Trousers | Fortitude 2 Max Health 225 Magic Evasion 54 |
| Greaves of the Field General | Strength 2 Dexterity 1 |
| Phantom Wolf Breeches | Perception 2 Damage Reduction 4 Magic Evasion 60 |
| Shadow Harvester Trousers | Perception 3 Hit 22 Mana Regen 11.25 |
| Shock Commander Greaves | Strength 2 Damage Reduction 3 |
| Swirling Essence Pants | Wisdom 2 Weaken Chance 41 Mana Cost Efficiency +4% |
Accessories
| Accessories | Stats |
|---|---|
| Chief Shaman’s Belt | Dexterity 2 Wisdom 1 Mana Regen 39.75 |
| Manor Sunset Ring | Strength 1 Wisdom 3 Mana Regen 15 |
Items
- Reaper’s Soul
- Mana Blood
All Other Rewards
- Gardener Koble (Amitoi Summon Stone)
- Abyssal Contract Token Points (x500)
- Weapon Mastery Seal: 10,000 EXP
Twisted Laboratory
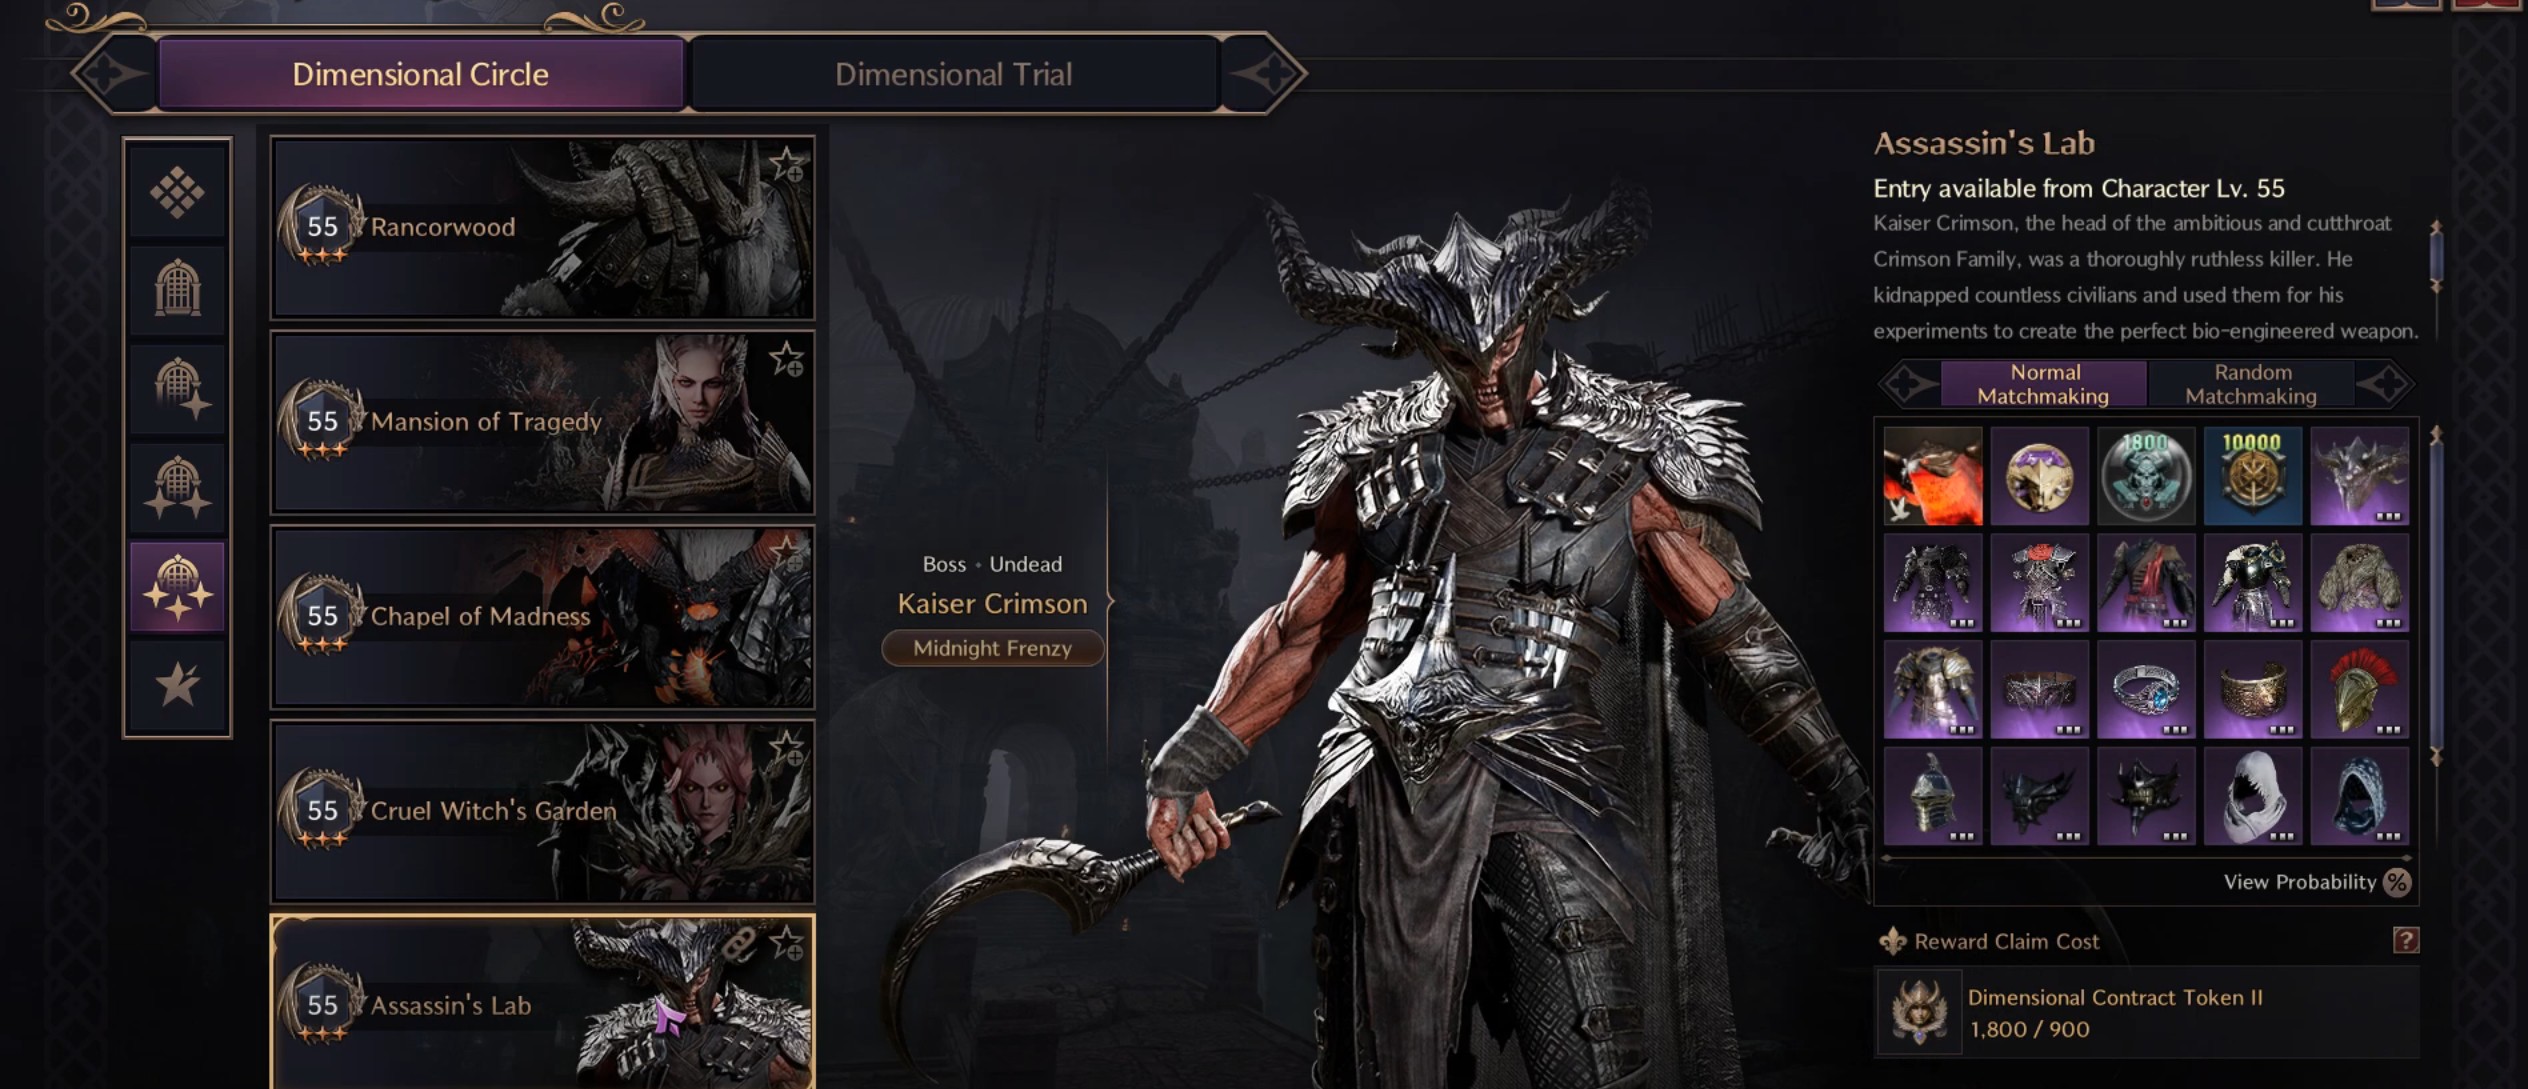
Twisted Laboratory is a 3-Star Dimensional Circle Dungeon, requiring you to fight Kaiser Crimson. You will find three rocks each surrounded by mobs while on the first floor. Disable the locks by dispatching the Arkeum Wizard. Move forward and defeat the Giant Eccentric Chef. This is the first mini-boss that you will encounter in this Dungeon. The ground will fall after defeating it, so you need to glide down slowly to avoid taking damage. You can find the Soul Generators on the lower level. Activate them and defeat the mobs surrounding them. At last, you will you will encounter the Giant Monster Wraith. Grapple over the gap after defeating it to get to the final boss arena.
The tank will hold the aggro and the boss will do a variety of normal attacks, pattern, and fury attacks. Shortly after, he will jump on the furthest player and fear him. Around that player, there will be a purple circle and above his head, orbs. The party members can see the number of orbs above the fear player, but that player can also write it in the party chat to make it easy.
If there are four orbs, that means that three players need to quickly run in the purple circle. If there are three orbs, then two players need to enter. Otherwise, the feared player will die. If you pass this mechanic, the dark slayer’s memory will spawn. At the same time, instantly after fear, the boss will do a dagger throw Fury attack at the furthest player. The player needs to stand away from the memory and block it.
Defeating the Boss
The boss will then dash a few times and do a red AOE that applies the bleeding indicated above your head if you get hit. To cleanse it, stay inside the memory spawn. The boss does several normal attacks and fury attacks. You will also notice the blue expanding AOE around the memory. It indicates the timer towards the end of the mechanic. Then the boss will teleport to the center, disappear, and mark two players with red orbs. Those two players need to move away from the memory as the red orbs will drop three big AOE on the ground.
At the same time, everyone else needs to spread out and dodge two sets of small red AOE appearing on the ground. After 50% HP, the boss marks three players with red orbs and does four sets of small dropping AOE. Instantly, after that, the boss appears at the center and starts channeling a normal Fury attack at the furthest player away. This is also indicated by a red mark above that player’s head.
Attacks
The Marked player needs to stand close to the memory and block the fury attack. This will parry the dagger Troll and spawn the corn-shaped safe Zone behind the boss. Everyone needs to run into the Safe Zone, otherwise, you wipe. If you fail the block, you wipe. After that, it’s rinse and repeat the same patterns until the boss is dead. It does sound simple, but it can be very complicated if one person doesn’t know what to do. Here are all the rewards you can obtain after completing this Dungeon.
Armor
| Armor | Stats |
|---|---|
| Assassin Noble’s Chain Mail | Strength 2 Dexterity 1 Stun Chance 37 Damage Reduction 5 |
| Auric Vanguard’s Full Plate | Strength 3 Fortitude 1 Damage Reduction 5 Ranged Endurance 40 |
| Dead Admiral’s Uniform | Perception 3 Critical Hit Chance 25 Max Health 225 Mana Cost Efficiency +4.5% |
| Eternal Warlord’s Plate | Hit Chance 30 Max Health 225 Bind Resistance 30 |
| Feral Prophet’s Overcoat | Hit Chance 57 Weaken Chance 36 Sleep Chance 75 Max Health 245 |
| Forgotten Lotus Garb | Strength 3 Wisdom 2 Mana Regen 22.5 Melee Evasion 60 |
| Murderous Noble’s Demonic Helm | Strength 2 Dexterity 1 Critical Hit Chance 35 Cooldown Speed +1.5% |
| Ascended Guardian Hood | Perception 4 Cooldown Speed +3.1% |
| Gilded Raven Mask | Strength 2 Fortitude 2 Mana Regen 12.75 |
| Helm of the Field General | Perception 1 Stun Chance 37 Max Health 230 |
| Phantom Wolf Mask | Dexterity 3 Mana Regen 13.5 Cooldown Speed +0.9% |
| Shadow Harvester Mask | Dexterity 2 Wisdom 1 Cooldown Speed +1.8% |
| Shock Commander Visor | Strength 3 Cooldown Speed +2.5% |
| Swirling Essence Hat | Wisdom 2 Weaken Chance 50 Cooldown Speed +1.6% |
Accessories
| Accessories | Stats |
|---|---|
| Cruel Beast’s Bracelet | Hit Chance 50 Heavy Attack Chance 27 Mana Regen 39.75 |
| Master Assassin’s Belt | Strength 3 Dexterity 1 Health Regen 24.75 |
| Song of the Night Sky Bracelet | Max Health 185 Ranged Endurance 40 Magic Endurance 90 |
Items
- Orc Heart
- Fermented Rotein
All Other Rewards
- Weapon Mastery Seal: 10,000 EXP
- Ember Firebird (Morphstone)
- Abyssal Contract Token Points (x500)
Dungeon Mechanic
3-Star Dungeons in Throne and Liberty are also known as T3 Dungeons. These Dungeons are specifically designed for players who have reached level 55 and possess a Combat Power (CP) of at least 3500. Each Dungeon presents unique challenges and mechanics. Rancorwood Dungeon features deadly fire mechanics and punishing attacks. In Chapel of Madness, you need to navigate complex environments and face powerful enemies. Strategic positioning and crowd control are crucial to complete the challenges.
Understanding these mechanics is essential for success. Each Dungeon has a boss fight that requires players to learn unique attacks. They offer traps, puzzles, and environmental challenges that urge you to make strategic planning. Halls of Tragedy feature complex environments, Rancorwood offers deadly fire mechanics, and other secret Dungeons like Taedal’s Tower and Gate of Infinity offer unique challenges. 1 and 2-star Dungeons require 1600 CP and 2500 CP to get inside. The 3-star Dungeons have all new powerful bosses and each one drops unique rewards upon defeating them.
Best tips and tricks for Dungeons in Throne and Liberty
Here are the best tips and tricks for Dungeons in Throne and Liberty.
- Collect all the rewards after defeating the bosses.
- Observe and learn the distinct attack sequences of each boss, allowing you to dodge easily.
- Get ready for the traps, puzzles, and other environmental challenges to progress in the Dungeons.
- Regularly maintain your gear to make it more effective in tough encounters with the normal enemies.
- Equip gear that counters specific Dungeon threats, allowing you to avoid the incoming damage.
- Equip the weapon that suits your playstyle and complement your build.
- Make sure you have health regen consumables in your inventory before entering any Dungeon.
- Use a dagger if you want stealth takedown, allowing you to defeat any enemies without alarming nearby threats.
FAQs about Dungeons in Throne and Liberty
What are 3-Star Dungeons in Throne and Liberty?
In this 3-star Dungeon, the tank should always face the boss away from the team. Certain red areas require careful navigation to avoid damage or life drain.
Which are the new Dungeons in Throne and Liberty?
Rancorwood, Halls of Tragedy, Chapel of Madness, Doomrot Grove, and Twisted Laboratory are the new Dungeons added in Throne and Liberty.
What is the secret Dungeon in Throne and Liberty?
The secret Dungeon in Throne and Liberty includes the Gate of Infinity and Taedal’s Tower. The bosses in Gate of Infinity rotate two bosses every week from Taedal’s Tower.
Looking For More About Throne and Liberty?
Thank you for reading the Throne and Liberty New 3-Star Dungeons guide. We provide the latest news and create guides for Throne and Liberty, Enshrouded, ESO, Baldur’s Gate 3, and More. Also, watch Deltia play games on Twitch or visit his YouTube channel!