 Facebook
 Reddit
 Email
Email
In Hogwarts Legacy, armor traits are one of many ways to make your character stronger and better in the fight, but finding all traits’ locations is time-consuming. Let’s take a look.

This guide will help you easily find all armor traits to prepare your character for more challenging fights. We included a complete list of all available traits and some tricks you can perform to get the trait you need.
All Hogwarts Legacy Traits
All armor traits can be obtained through in-game challenges or Bandit camps spread on the world map. There are 75 locations, and some may be challenging because multiple powerful enemies guard them. Also, don’t worry if you have already completed the main story quest. After that, you can still collect items, complete challenges, and do side quests. As a result, nothing in Hogwarts Legacy is lost or missable. It’s a reasonable idea to complete the main story and do all side quests later.
What are Gear Traits
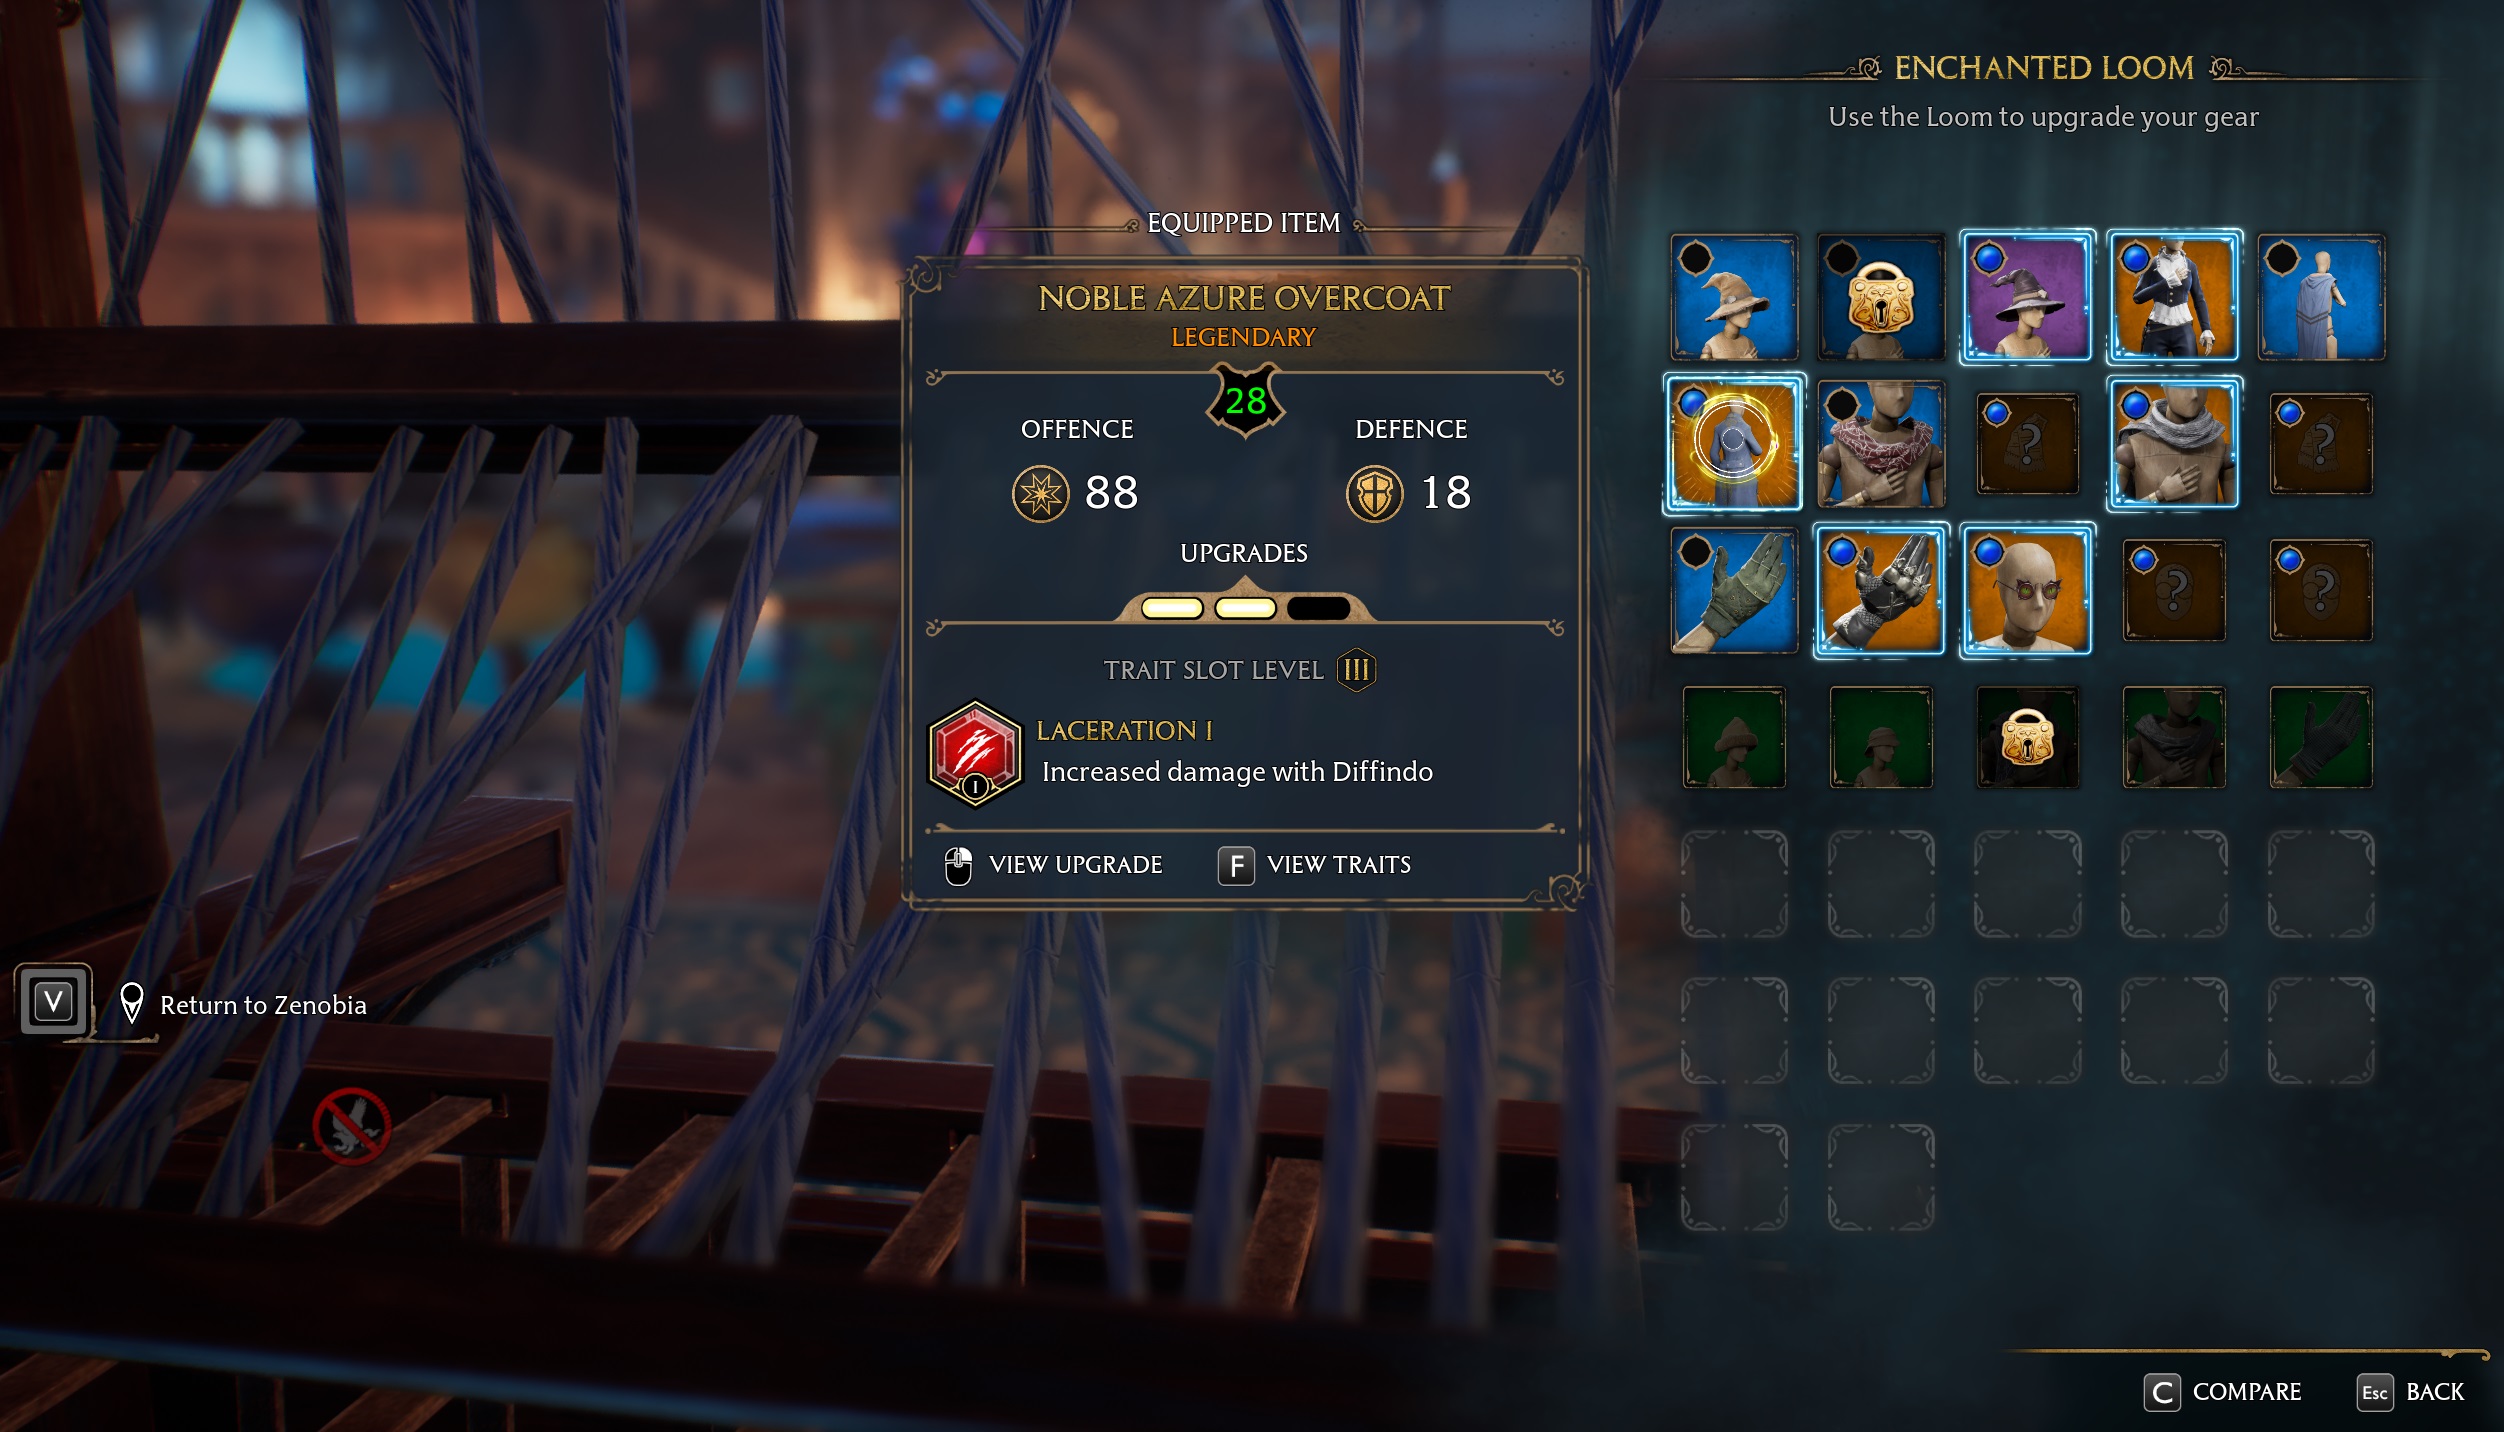
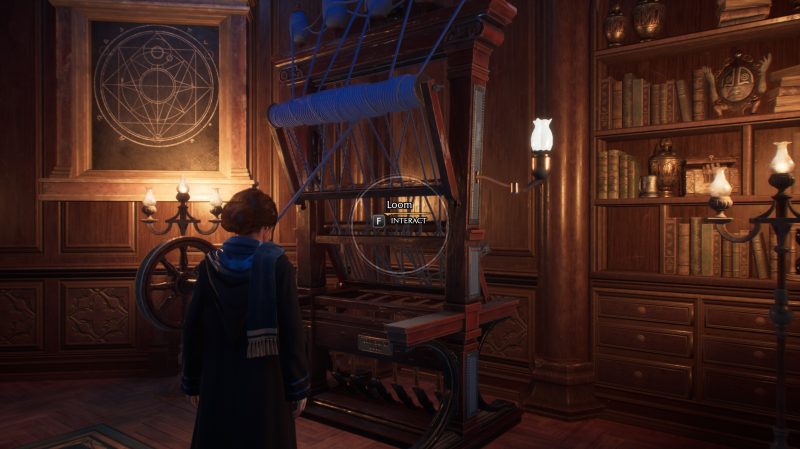
Armor and gear traits are bonuses, and players can apply them to their gear after unlocking the Loom in the Room of Requirement during The Elf, The Nab-Sack, and the Loom Quest. However, you can start collecting the gear traits early in the game as soon as you gain access to the world map and complete introduction quests.
You can track your progress in acquiring any item in the collection menu and combat challenges menu to check what activities you need to do to get the next trait. Also, after completing the challenge associated with traits, you need to claim your reward.
Quest Reward traits
Only one trait is unlocked during the introduction to gear upgrades and trait bonuses. Follow the quest tasks to unlock it.
- Scorching I (Increased damage with Incendio)
- Unlocked automatically during The Elf, The Nab-Sack, and the Loom Quest
Challenges Triats
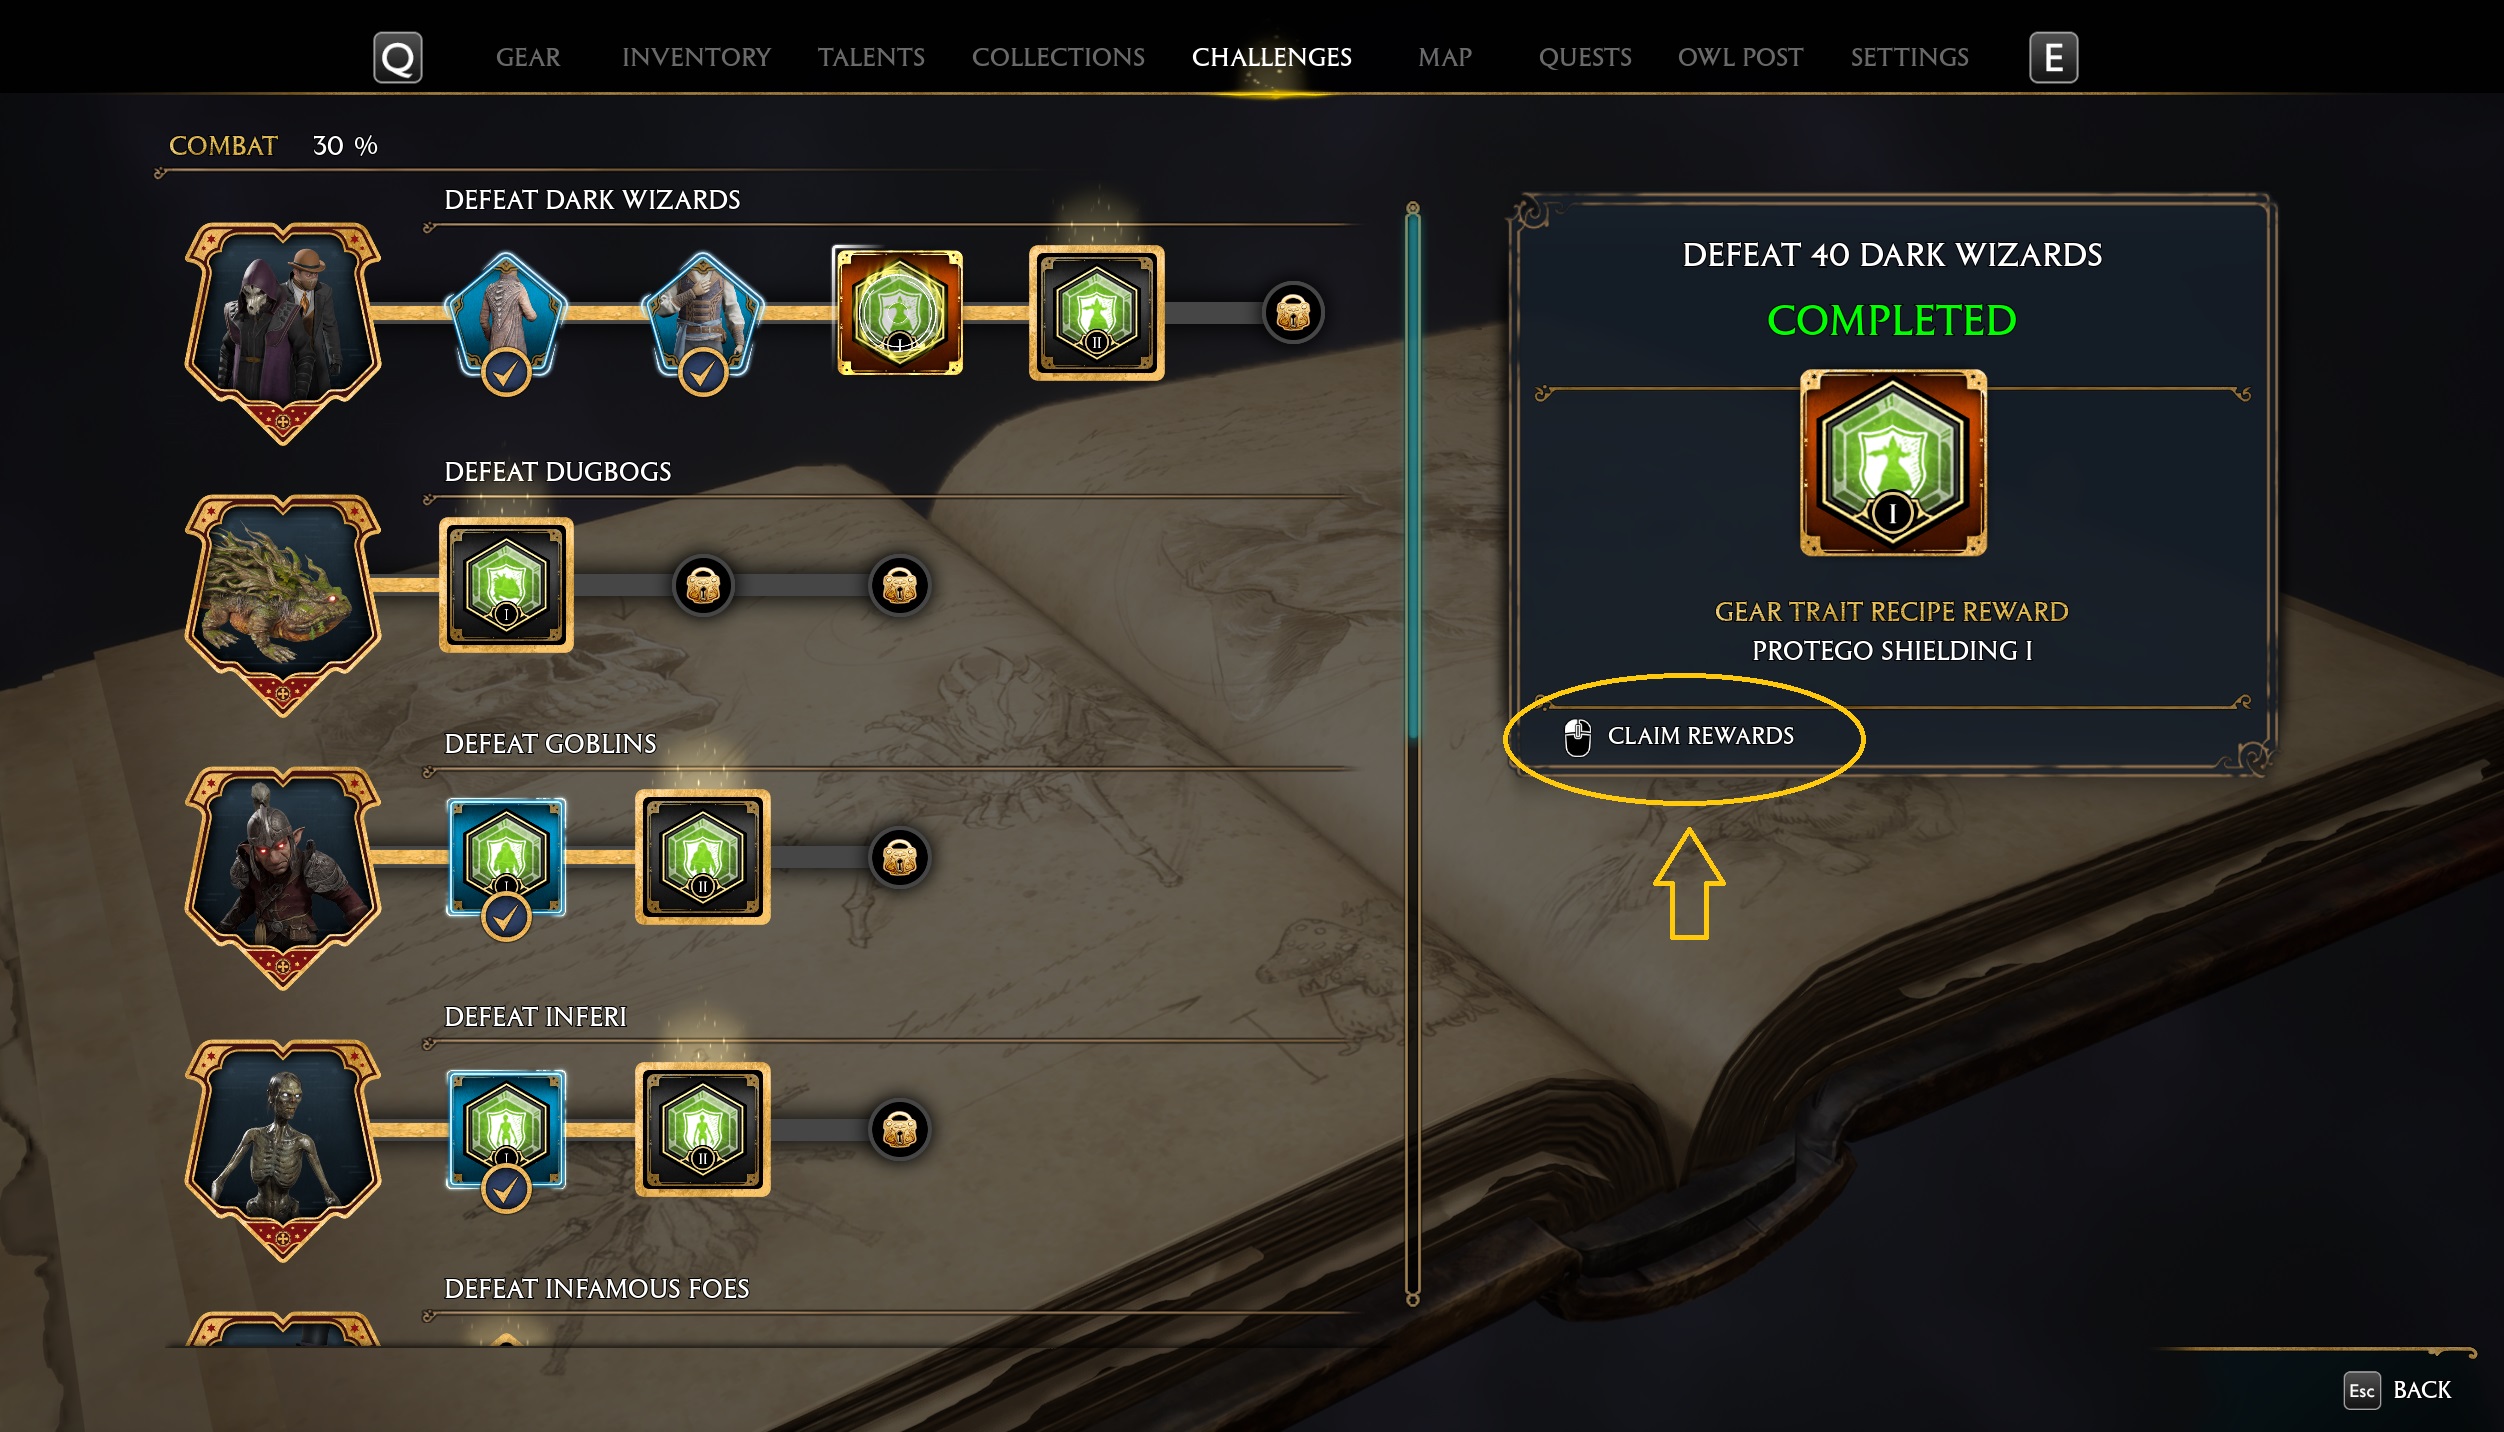
The following list presents Hogwarts Legacy traits located in the Challenges menu—those traits rewards you need to claim manually.
Combat Challenges Rewards (A-G)
- Amphibial Protection I (Decreased damage taken from Dugbogs)
- Combat Challenge: “Defeat Dugbogs” Tier 1
- Amphibial Protection II (Greatly decreased damage taken from Dugbogs)
- Combat Challenge: “Defeat Dugbogs” Tier 2
- Amphibial Protection III (Significantly decreased damage taken from Dugbogs)
- Combat Challenge: “Defeat Dugbogs” Tier 3
- Anti-Venom I (Decreased damage taken from spiders)
- Combat Challenge: “Defeat Spiders” Tier 3
- Anti-Venom II (Greatly decreased damage taken from spiders)
- Combat Challenge: “Defeat Spiders” Tier 4
- Anti-Venom III (Significantly decreased damage taken from spiders)
- Combat Challenge: “Defeat Spiders” Tier 5
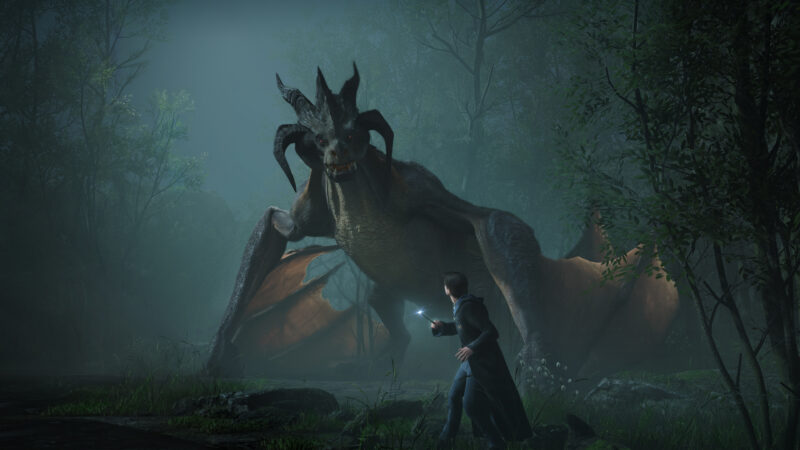
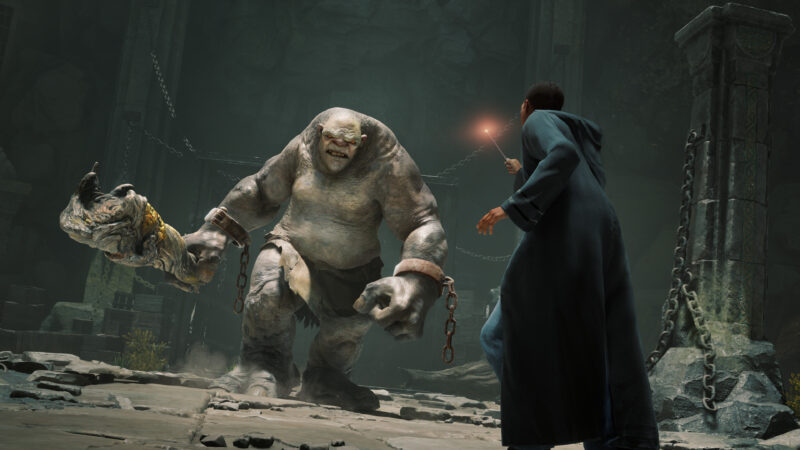
- Cushioning I (Decreased damage taken from trolls)
- Combat Challenge: “Defeat Trolls” Tier 1
- Cushioning II (Greatly decreased damage taken from trolls)
- Combat Challenge: “Defeat Trolls” Tier 2
- Cushioning III (Significantly decreased damage taken from trolls)
- Combat Challenge: “Defeat Trolls” Tier 3
- Goblin-Silver Resistance I (Decreased damage taken from goblins)
- Combat Challenge: “Defeat Goblins” Tier 1
- Goblin-Silver Resistance II (Greatly decreased damage taken from goblins)
- Combat Challenge: “Defeat Goblins” Tier 2
- Goblin-Silver Resistance III (Significantly decreased damage taken from goblins)
- Combat Challenge: “Defeat Goblins” Tier 3
Combat Challenges Rewards (L-Z)
- Lupus Protection I (Decreased damage taken from Dark Mongrels)
- Combat Challenge: “Defeat Mogrels” Tier 1
- Lupus Protection II (Greatly decreased damage taken from Dark Mongrels)
- Combat Challenge: “Defeat Mogrels” Tier 2
- Lupus Protection III (Significantly decreased damage taken from Dark Mongrels)
- Combat Challenge: “Defeat Mogrels” Tier 3
- Necromantic Protection I (Decreased damage taken from Inferi)
- Combat Challenge: “Defeat Inferi” Tier 1
- Necromantic Protection II (Greatly decreased damage taken from Inferi)
- Combat Challenge: “Defeat Inferi” Tier 2
- Necromantic Protection III (Significantly decreased damage taken from Inferi)
- Combat Challenge: “Defeat Inferi” Tier 3
- Protego Shielding I (Decreased damage taken from Dark Wizards) Combat
- Challenge: “Defeat Dark Wizards” Tier 3
- Protego Shielding II (Greatly decreased damage taken from Dark Wizards)
- Combat Challenge: “Defeat Dark Wizards” Tier 4
- Protego Shielding III (Significantly decreased damage taken from Dark Wizards)
- Combat Challenge: “Defeat Dark Wizards” Tier 5
Room of Requirements Challenges Rewards
- Ancient Magic I (Increased damage from Ancient Magic)
- The Room of Requirement Challenge: “Upgrade Your Gear” Tier 1
- Ancient Magic II (Greatly increased damage from Ancient Magic)
- The Room of Requirement Challenge: “Upgrade Your Gear” Tier 2
- Ancient Magic III (Significantly increased damage from Ancient Magic)
- The Room of Requirement Challenge: “Upgrade Your Gear” Tier 3
Traits from Chests in Bandit Camps
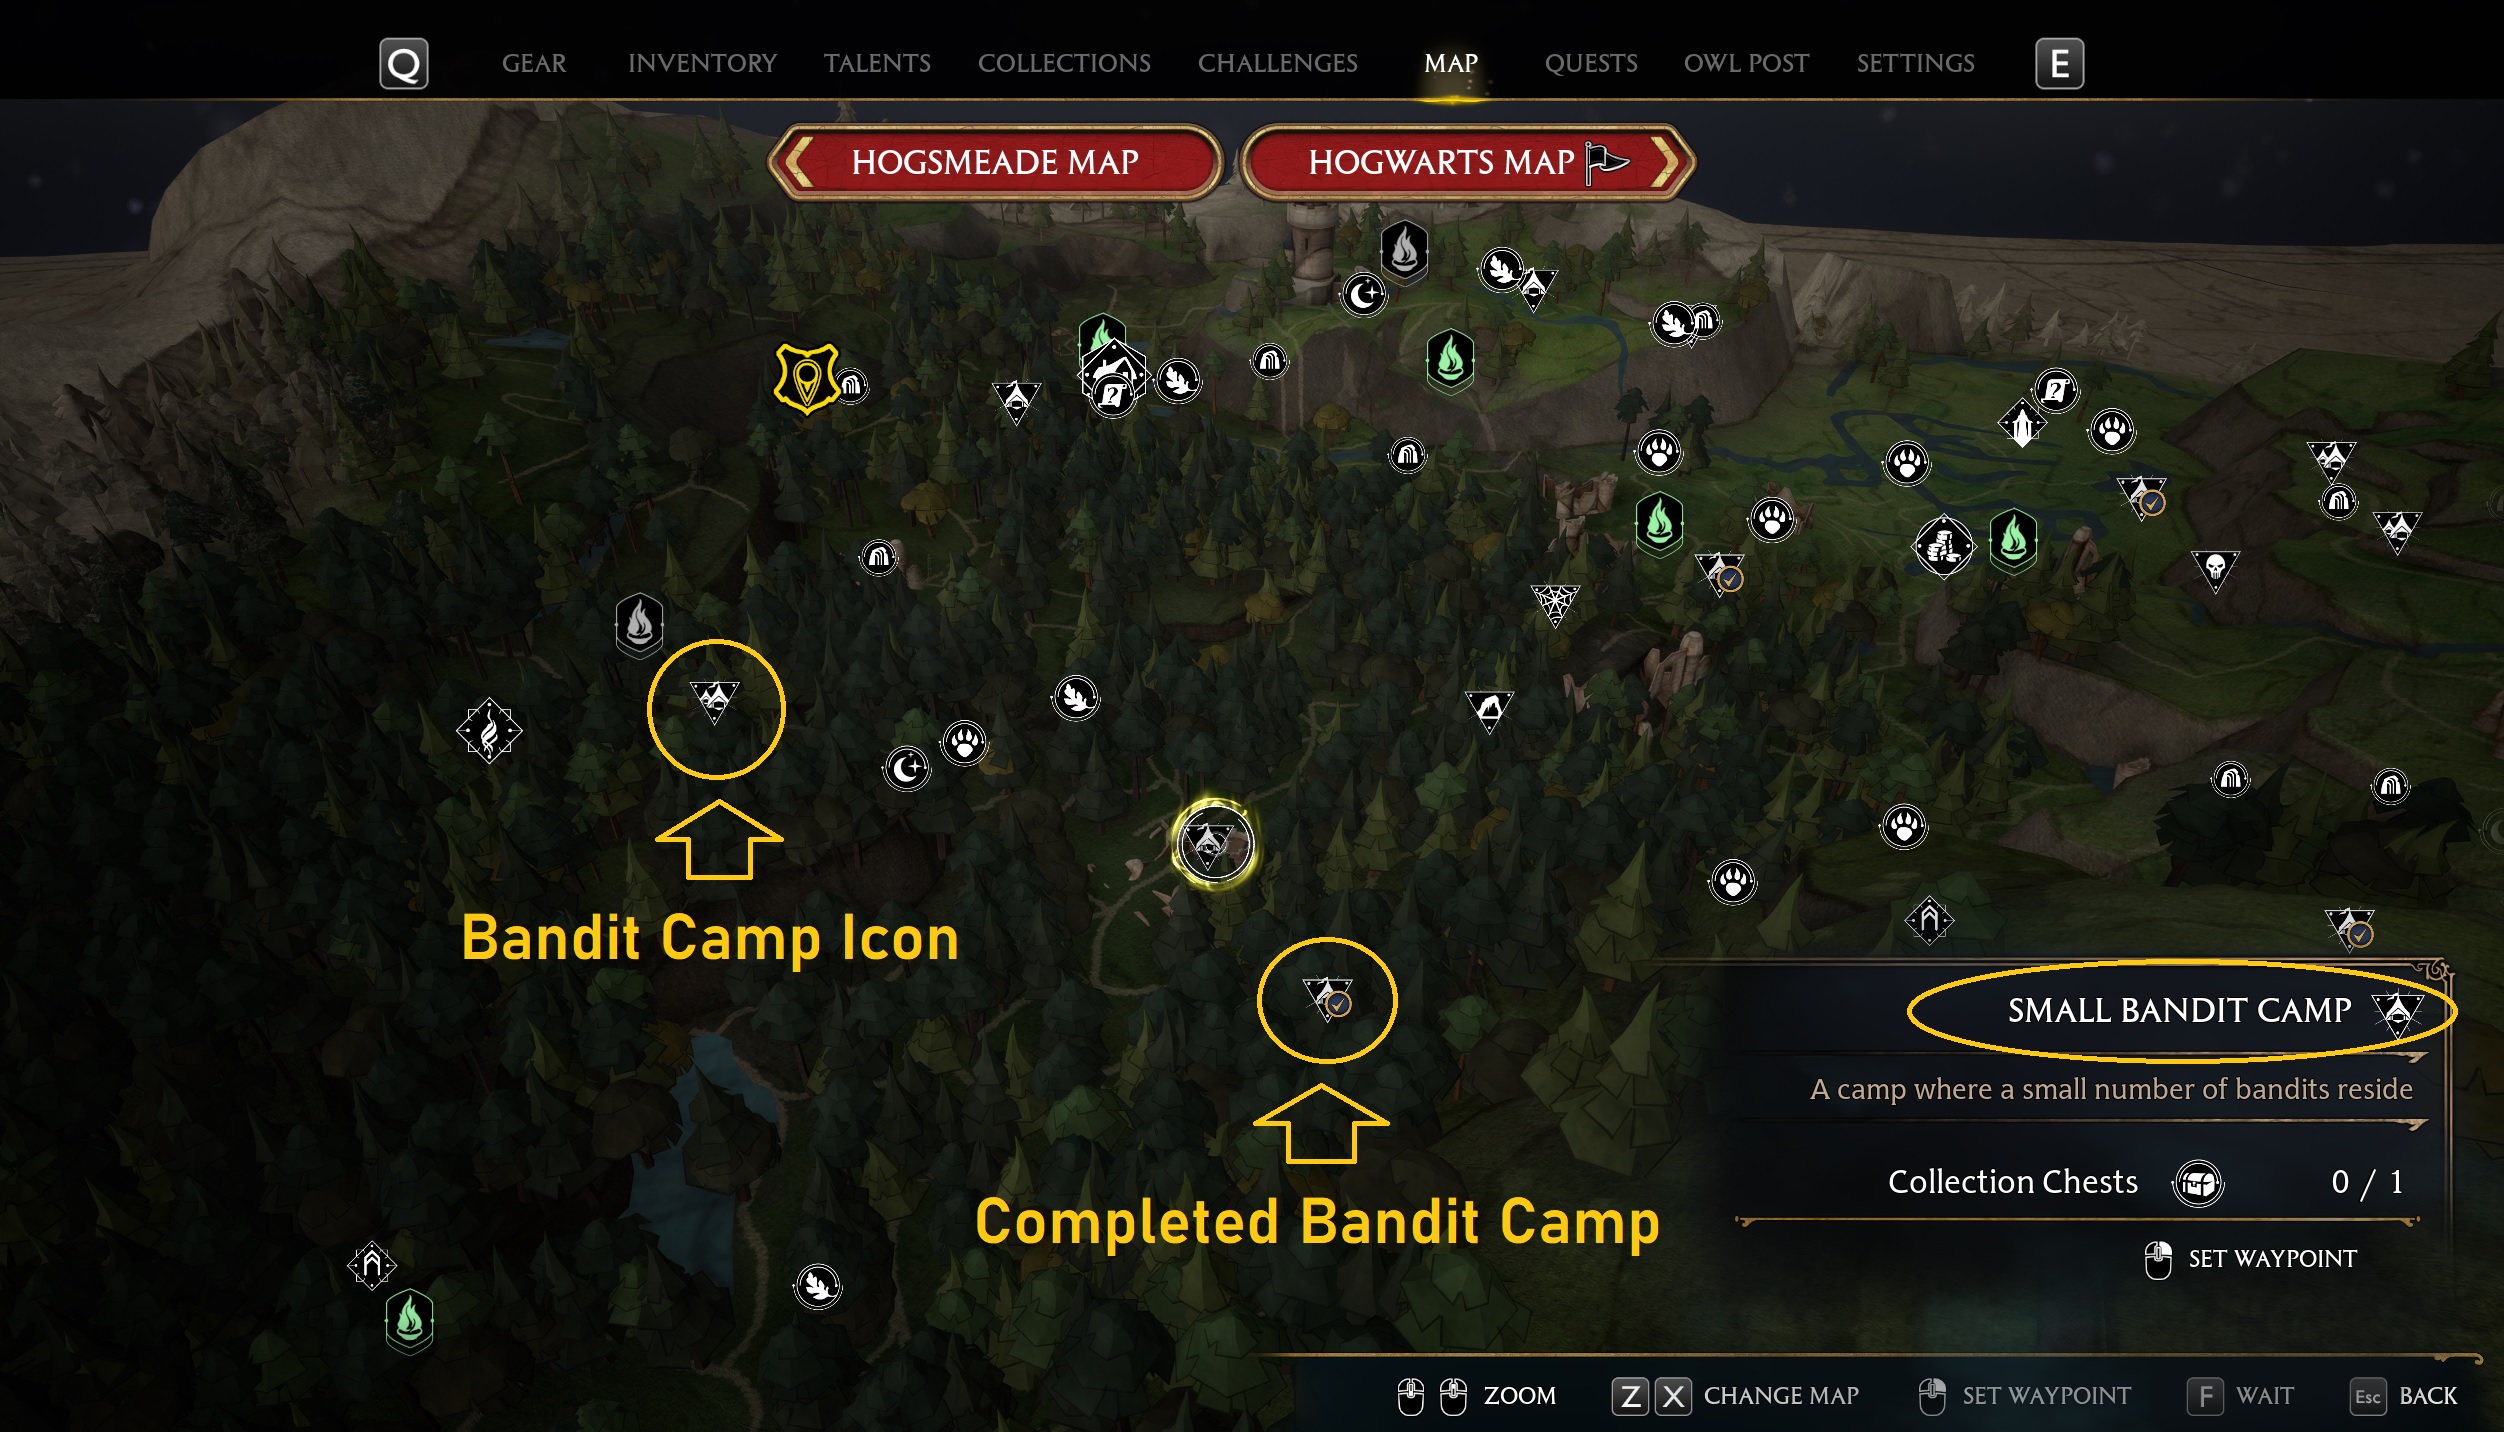
In Hogwarts Legacy, Traits also can be found in the bandit camps locations. Each Bandit camp has at least one chest that randomly drops one trait. You never know what trait you’ll receive next, so acquiring the exact trait you need for your character’s build may be tricky.
Bandit camps are marked with the tent icon on the map. When you loot a chest that contains a trait from a specific location, the bandit camp icon on the map will have a golden check mark next to it, and you won’t get any more traits from it. As a result, it may take a lot of time to defeat all enemies guarding bandit camps and loot the chest to get the trait you need.
Save and Load the game method.
To help our luck in gaining desired traits, you can save the game just before you open the chest. Nextly, loot the chest, and if you won’t receive any good traits, load the saved game and open the chest again. This is a tested method, and each time traits you’ll receive will be random.
The following list has all gear traits from bandit camps. Remember that each of those locations has enemies who guard the chest. Two of many solutions to that issue may be to use the Disillusionment spell and sneak into the camp to open the chest quietly. Also, you can kill enemies with the Petrificus Totalus spell while sneaking from behind or facing bandits in an open fight.
List of the Traits from Chests
- Ambush I (Increased spell damage while concealed by Disillusionment)
- Ambush II (Greatly increased spell damage while concealed by Disillusionment)
- Ambush III (Significantly increased spell damage while concealed by Disillusionment)
- Ancient Magic Focus I (Increased Ancient Magic Meter fill rate)
- Ancient Magic Focus II (Greatly increased Ancient Magic Meter fill rate)
- Ancient Magic Focus III (Significantly increased Ancient Magic Meter fill rate)
- Binding I (Increased damage with Petrificus Totalus)
- Binding II (Greatly increased damage with Petrificus Totalus)
- Binding III (Significantly increased damage with Petrificus Totalus)
- Concentration I (Increased damage of all Damage spells)
- Concentration II (Greatly increased damage of all Damage spells)
- Concentration III (Significantly increased damage of all Damage spells)
- Control I (Increased damage with Ancient Magic Throw)
- Control II (Greatly increased damage with Ancient Magic Throw)
- Control III (Significantly increased damage with Ancient Magic Throw)
- Cruelty I (Increased damage with Crucio)
- Cruelty II (Greatly increased damage with Crucio)
- Cruelty III (Significantly increased damage with Crucio)
- Deafening I (Increased damage with a Mandrake)
- Deafening II (Greatly increased damage with a Mandrake)
- Deafening III (Significantly increased damage with a Mandrake)
- Destruction I (Increased damage with Confringo)
- Destruction II (Greatly increased damage with Confringo)
- Destruction III (Significantly increased damage with Confringo)
- Disarming I (Increased damage with Expelliarmus)
- Disarming II (Greatly increased damage with Expelliarmus)
- Disarming III (Significantly increased damage with Expelliarmus)
List of the Traits from Chests
- Explosive I (Increased damage with Bombarda)
- Explosive II (Greatly increased damage with Bombarda)
- Explosive III (Significantly increased damage with Bombarda)
- Fangs I (Increased Chinese Chomping Cabbage damage)
- Fangs II (Greatly increased Chinese Chomping Cabbage damage)
- Fangs III (Significantly increased Chinese Chomping Cabbage damage)
- Herbology I (Increased damage by all plants)
- Herbology II (Greatly increased damage by all plants)
- Herbology III (Significantly increased damage by all plants)
- Laceration I (Increased damage with Diffindo)
- Laceration II (Greatly increased damage with Diffindo)
- Laceration III (Significantly increased damage with Diffindo)
- Manipulation I (Imperio target does extra damage)
- Manipulation II (Imperio target does greatly increased damage)
- Manipulation III (Imperio target does significantly increased damage)
- Scorching II (Greatly increased damage with Incendio)
- Scorching III (Significantly increased damage with Incendio)
- Unforgivable I (Increased damage dealt to cursed targets)
- Unforgivable II (Greatly increased damage dealt to cursed targets)
- Unforgivable III (Significantly increased damage dealt to cursed targets)
- Venom I (Increased Venomous Tentacula damage)
- Venom II (Greatly increased Venomous Tentacula damage)
- Venom III (Significantly increased Venomous Tentacula damage)
More Hogwarts Legacy
Thank you for reading Hogwarts Legacy: All Traits and Locations Guide! Also, watch me play the game on Twitch and ask questions or visit my YouTube channel!
Looking For More About Hogwarts Legacy?
Thank you for reading “” Guide. We provide the latest news and create guides for Hogwarts Legacy. Also, watch me play games on Twitch or visit my YouTube channel!