Facebook
 Reddit
 Email
Email
The dynamic story in Baldur’s Gate 3 hinges on the choices you make – here are the most crucial decisions and consequences!
The story is Baldur’s Gate 3 can be played and replayed in countless different ways. From the first choice of Origin in the character creator until your final fight with the Absolute, your choices will influence the story your experience. Some decisions will have a more lasting impact than others, however. Therefore, this guide will break down the top 10 most crucial decisions and their consequences in Baldur’s Gate 3.
- Save the Druid Grove or Help the Goblins (Act 1)
- Accept or Reject the Hag’s Offer (Act 1)
- Save or Kill the Nightsong (Act 2)
- Accept or Reject Raphael’s Deal (Act 3)
- To Ascend Astarion or Not (Act 3)
- Accept or Reject Bhaal (Act 3)
- Save or Kill Shadowheart’s Parents (Act 3)
- Free Wyll or His Father (Act 3)
- Side with the Emperor or Orpheus (Act 3)
- Choose a Mind Flayer Volunteer (Act 3)
Top 10 Crucial Decisions and Consequences in Baldur’s Gate 3
The most crucial decision in Baldur’s Gate 3 will happen towards the end of the game before you make the final assault on the enemy. Most of the noteworthy decisions happen during the final act of the game. However, many of these choices are built up with smaller ones earlier on. Therefore, there are plenty of dialogue and story choices to make all along the way in Baldur’s Gate 3,
Here are the Top 10 Most Crucial Decisions and Consequences in Baldur’s Gate 3:
- Choose a Mind Flayer Volunteer
- Side with the Emperor or Orpheus
- Free Wyll or his Father
- Save or Kill Shadowheart’s parents
- Accept or Reject Bhaal
- To Ascend Astarion or Not
- Accept or Reject Raphael’s Deal
- Save or Kill the Nightsong
- Accept or Reject the Hag’s Offer
- Save the Druid Grove or Help the Goblins
Warning: There are massive spoilers ahead if you are unfamiliar with the story and ending of Baldur’s Gate 3.
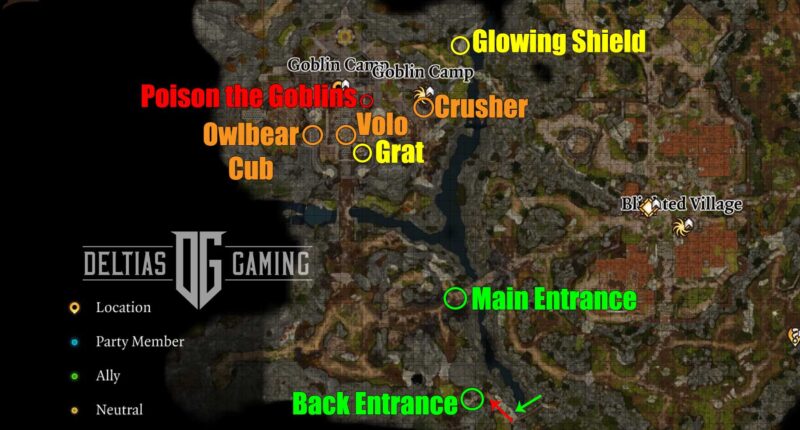
10. Save the Druid Grove or Help the Goblins (Act 1)
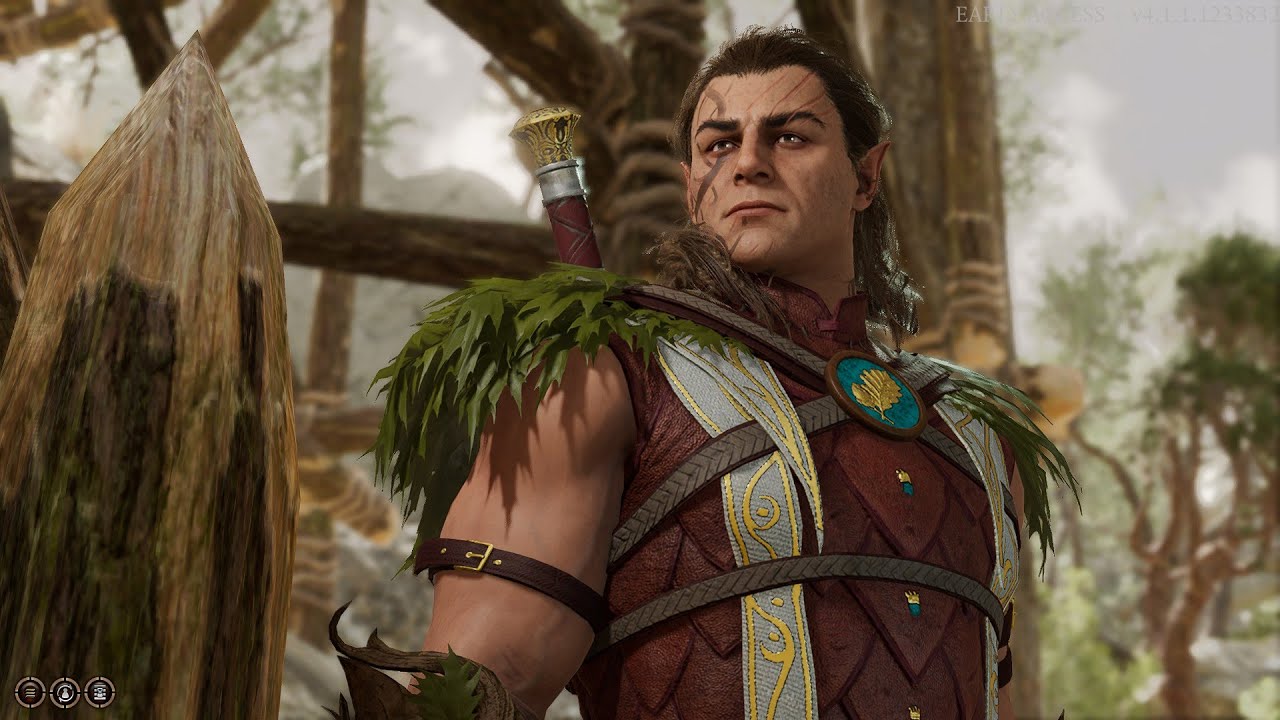
The most important choice, and also the central conflict, of Act 1 is whether to save the Druid Grove by wiping out the Goblins or help the Goblins wipe out all the inhabitants of the Druid Grove. Consequently, this decision is one of the most obvious good vs. evil choices in the game. Therefore, in a ‘regular’ play-through, you may choose to help the Druids and Tieflings, while in a second play-through with a Dark Urge character, you may side with the Goblins.
However, this choice will have serious repercussions for the rest of your game. Choosing to save the Druid Grove will get you started on recruiting Halsin in Act 2, and the Tiefling refugees will continue to play a part in the second Act. Dammon, particularly, is very important to Karlach’s story and as a vendor offering new gear.
On the other hand, helping the Goblins attack the Druid Grove will remove all of the future side content you can get from the Tieflings. This means a loss of gear, side quests, a possible achievement, and a minor permanent bonus. Moreover, this choice will upset some potential companions so much that they will refuse to travel with you anymore and leave the party. However, this can be at least partially offset by being able to recruit Minthara in Act 2.

Consequences of Saving the Druid Grove:
- Dammon will continue to appear and will offer better gear each Act
- Tieflings will also appear in the following Acts, particularly Arabella
- Can earn a Tiefling-based achievement in Act 2
Consequences of Helping the Goblins Attack:
- Easier to recruit Minthara in Act 2
- Lose Karlach, Halsin Wyll, and possibly Gale if you previously recruited them
- Lose the Tieflings and Dammon
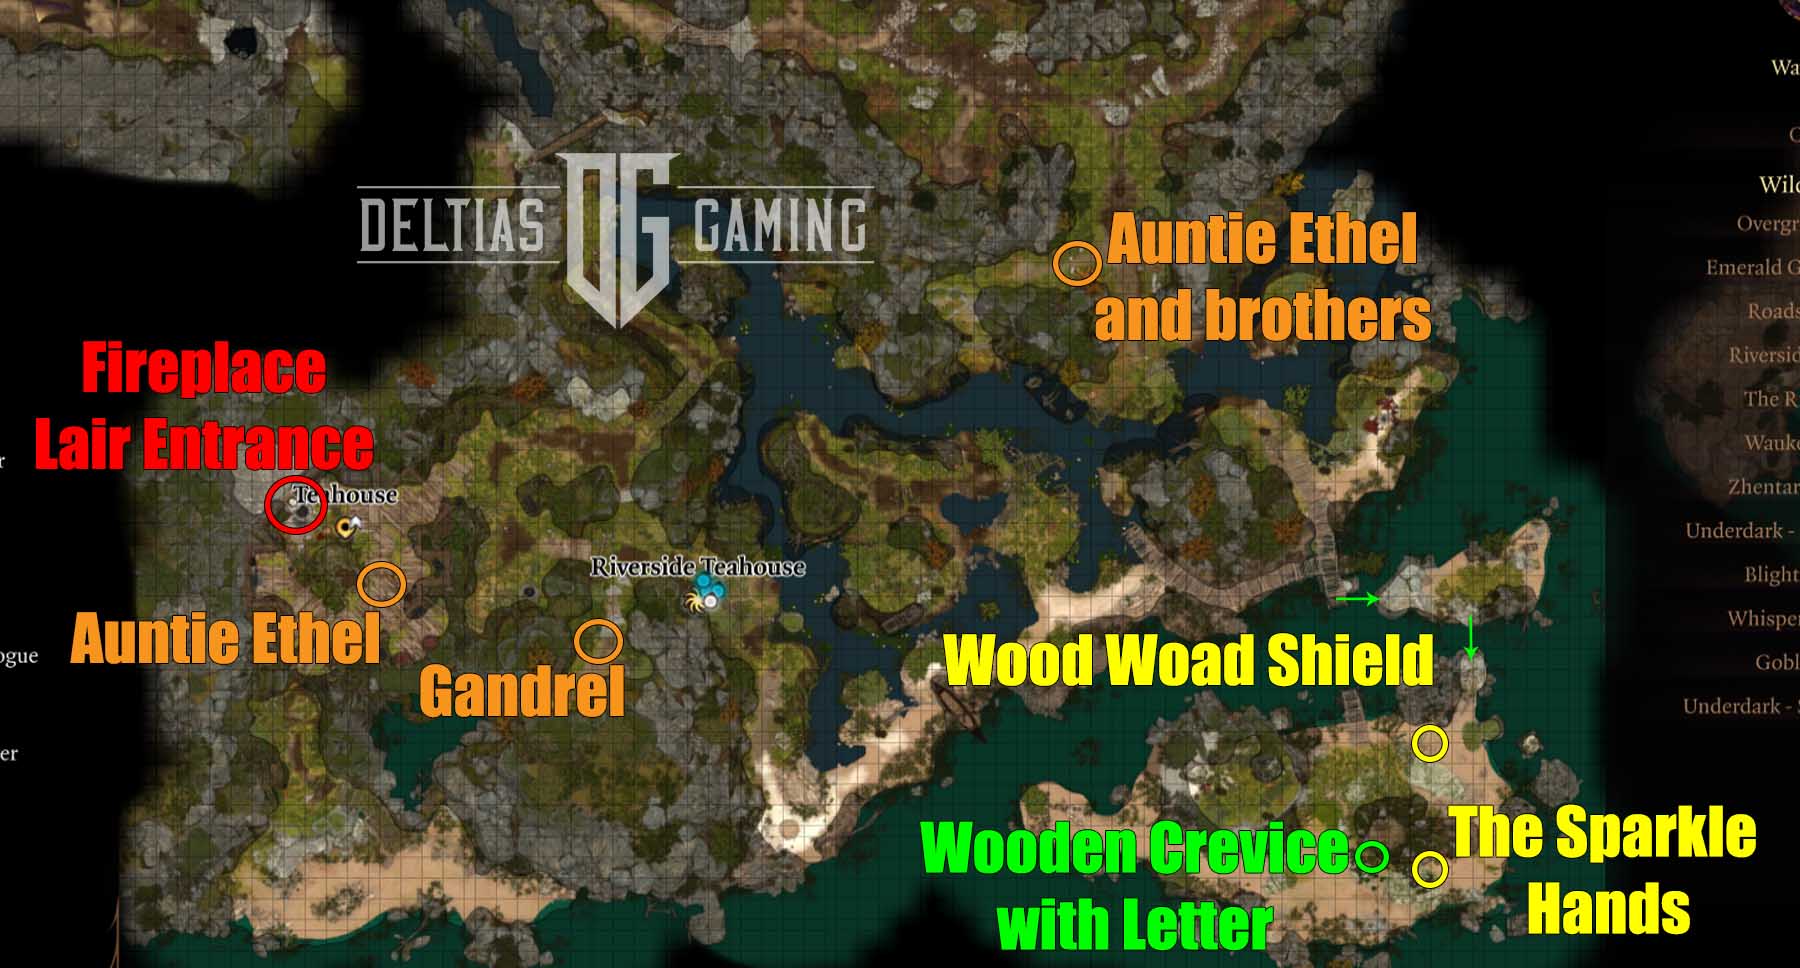
9. Accept or Reject the Hag’s Offer (Act 1)

If you are fully exploring the map in Act 1, at some point, you will eventually stumble upon the Sunlit Wetlands in the southwest corner of the map. There you will encounter Auntie Ethel, a kindly-seeming spinster lady who operates a woodsy Teahouse. However, you can uncover her carefully guarded secret when you discover the entrance to her lair at the back of the fireplace.
If you’re brave enough, you can enter her lair and fight her to free Mayrina. Once her HP drops low enough, the Hag will make you an offer. Let her go, and she will give you a piece of her hair, which offers +1 to any ability score. Reject the offer, and the fight will resume until she or your party is dead.
However, the Hag will return in Act 3 regardless of whether or not she was ‘killed’ in Act 1. Consequently, even though this may present itself as a difficult decision if you don’t know the outcome, there is no reason not to take the Hag’s offer.
Consequences of Accepting the Hag’s Offer:
- Get a permanent +1 to any ability score for one character
- If you fail a dialogue dice roll, she will take Mayrina with her
- If that happens, Mayrina will not appear in Act 3
- The Hag Survivors group should still be active, however
- You can encounter the Hag again in Act 3
Consequences of Rejecting the Hag’s Offer:
- Kill the Hag and save Mayrina
- Mayrina will appear in Act 3 with the Hag Survivors group
- The Hag will still return in Act 3 for the same quest content
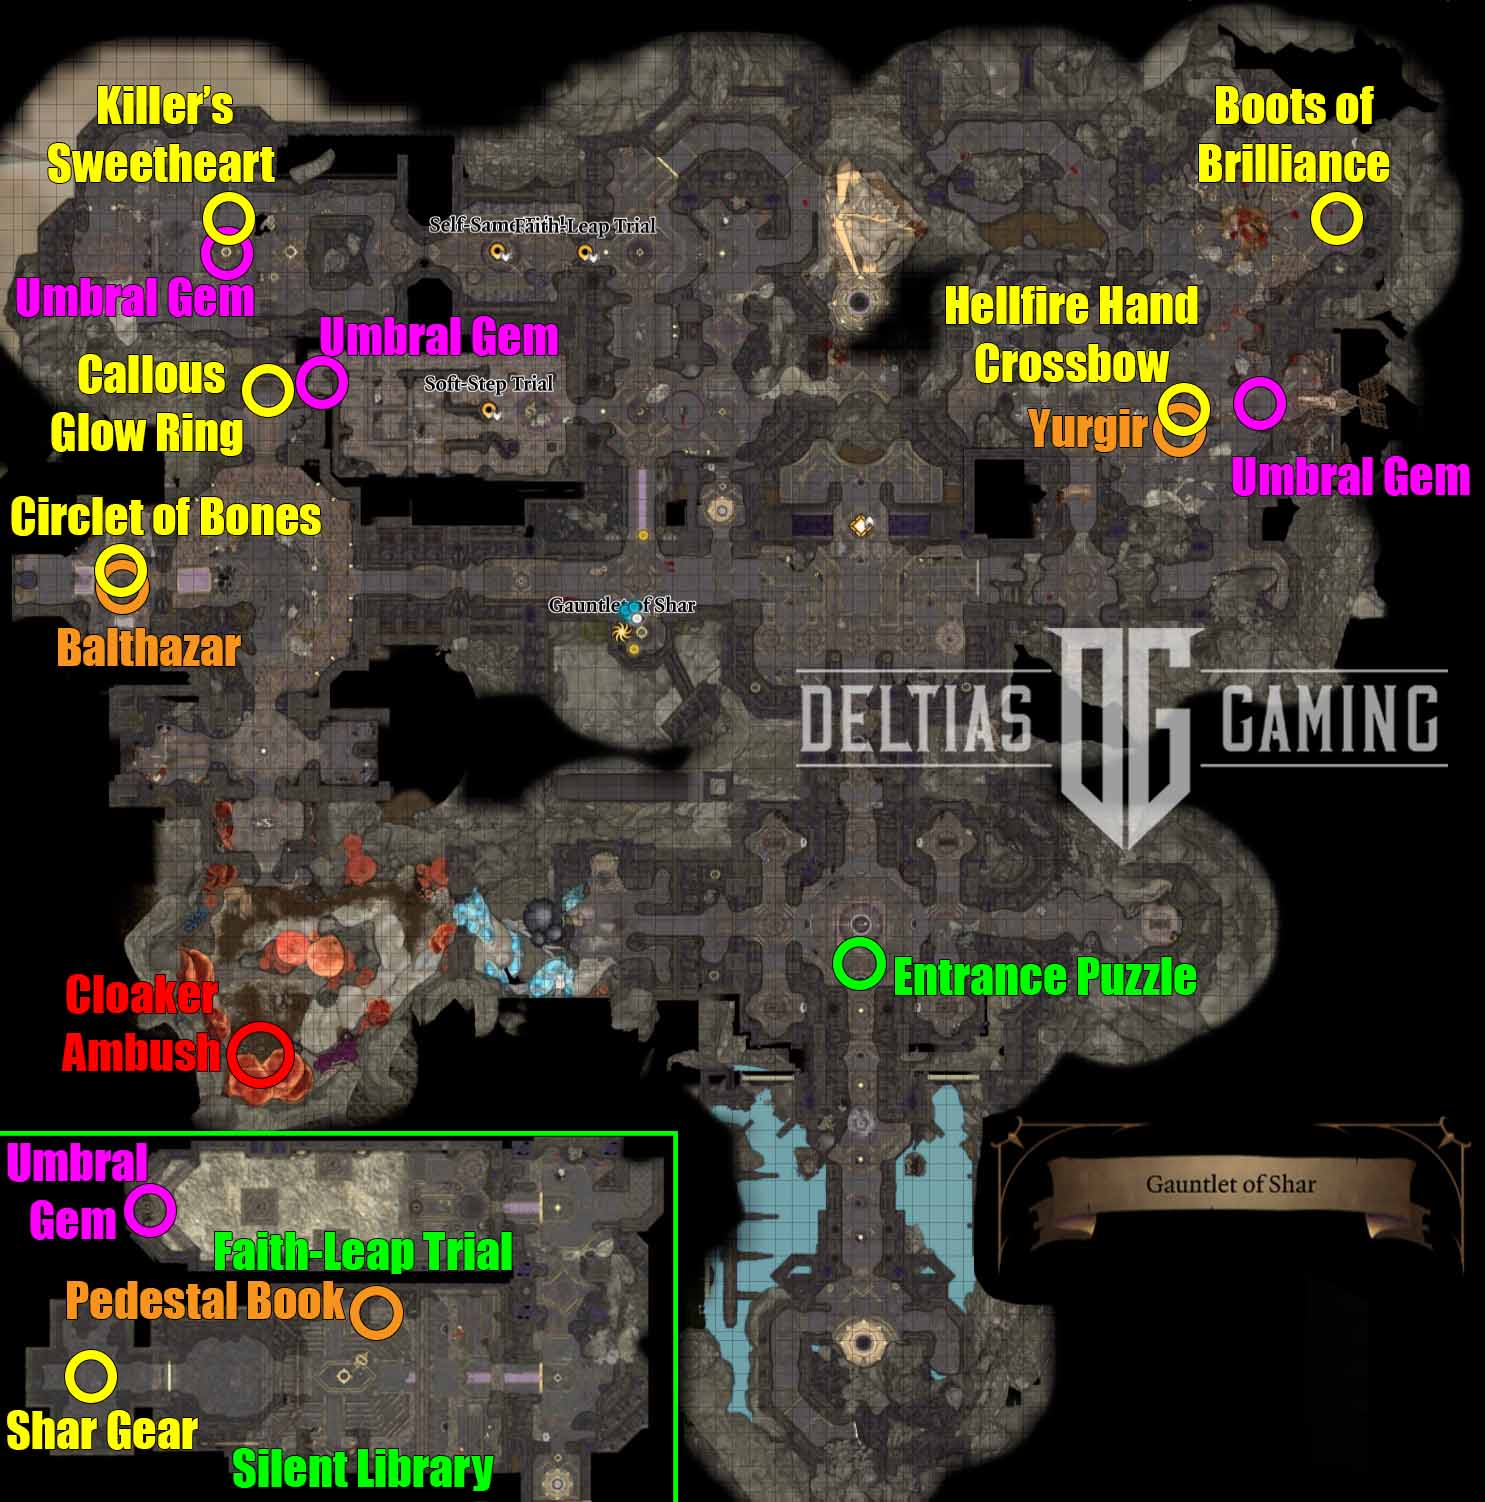
8. Save or Kill the Nightsong (Act 2)
The Nightsong plays a major role in the climax of Act 2, and the choice you make regarding her fate is also pivotal to Shadowheart’s character arc. To find the Nightsong you will first have to discover the Gauntlet of Shar, and then complete three trials. We highly recommend that you save the Gauntlet of Shar until you are finished with everything else in Act 2.
Saving the Nightsong will lead to a redemption path for Shadowheart, where she will turn from Shar and eventually accept Selune. The Nightsong will come to aid you in the fight against Ketheric Thorm, and can also aid you in battle during the final Act 3 fight. Additionally, Shadowheart will get a chance to confront her past at the House of Grief in Act 3.
On the other hand, killing the Nightsong will cement Shadowheart as a devout follower of Lady Shar. She’ll be elevated to a Dark Justiciar. Additionally, her return to the House of Grief in Act 3 will be in triumph. She will take over the leadership there, and Shar will demand that she execute her parents to prove her fealty. This is one decision you can’t go back on, and that’s why this is on our Most Crucial Decisions and Consequences in Baldur’s Gate 3 list.
Consequences of Saving the Nightsong:
- Shadowheart will turn from Shar
- The Nightsong will become an ally in the final Act 2 fight
- The Nightsong can become a camp follower for most of Act 3
- The Nightsong can also become an ally in the final Act 3 battle
- Shadowheart can return to the House of Grief and confront the Sharran followers in Act 3
Consequences of Killing the Nightsong:
- Shadowheart becomes a Dark Justiciar
- The shield over the Last Light Inn will shatter – everyone inside will be killed
- Jaheira will be lost
- Shadowheart can return to the House of Grief and become the leader of the Sharrans in Act 3
7. Accept or Reject Raphael’s Deal (Act 3)
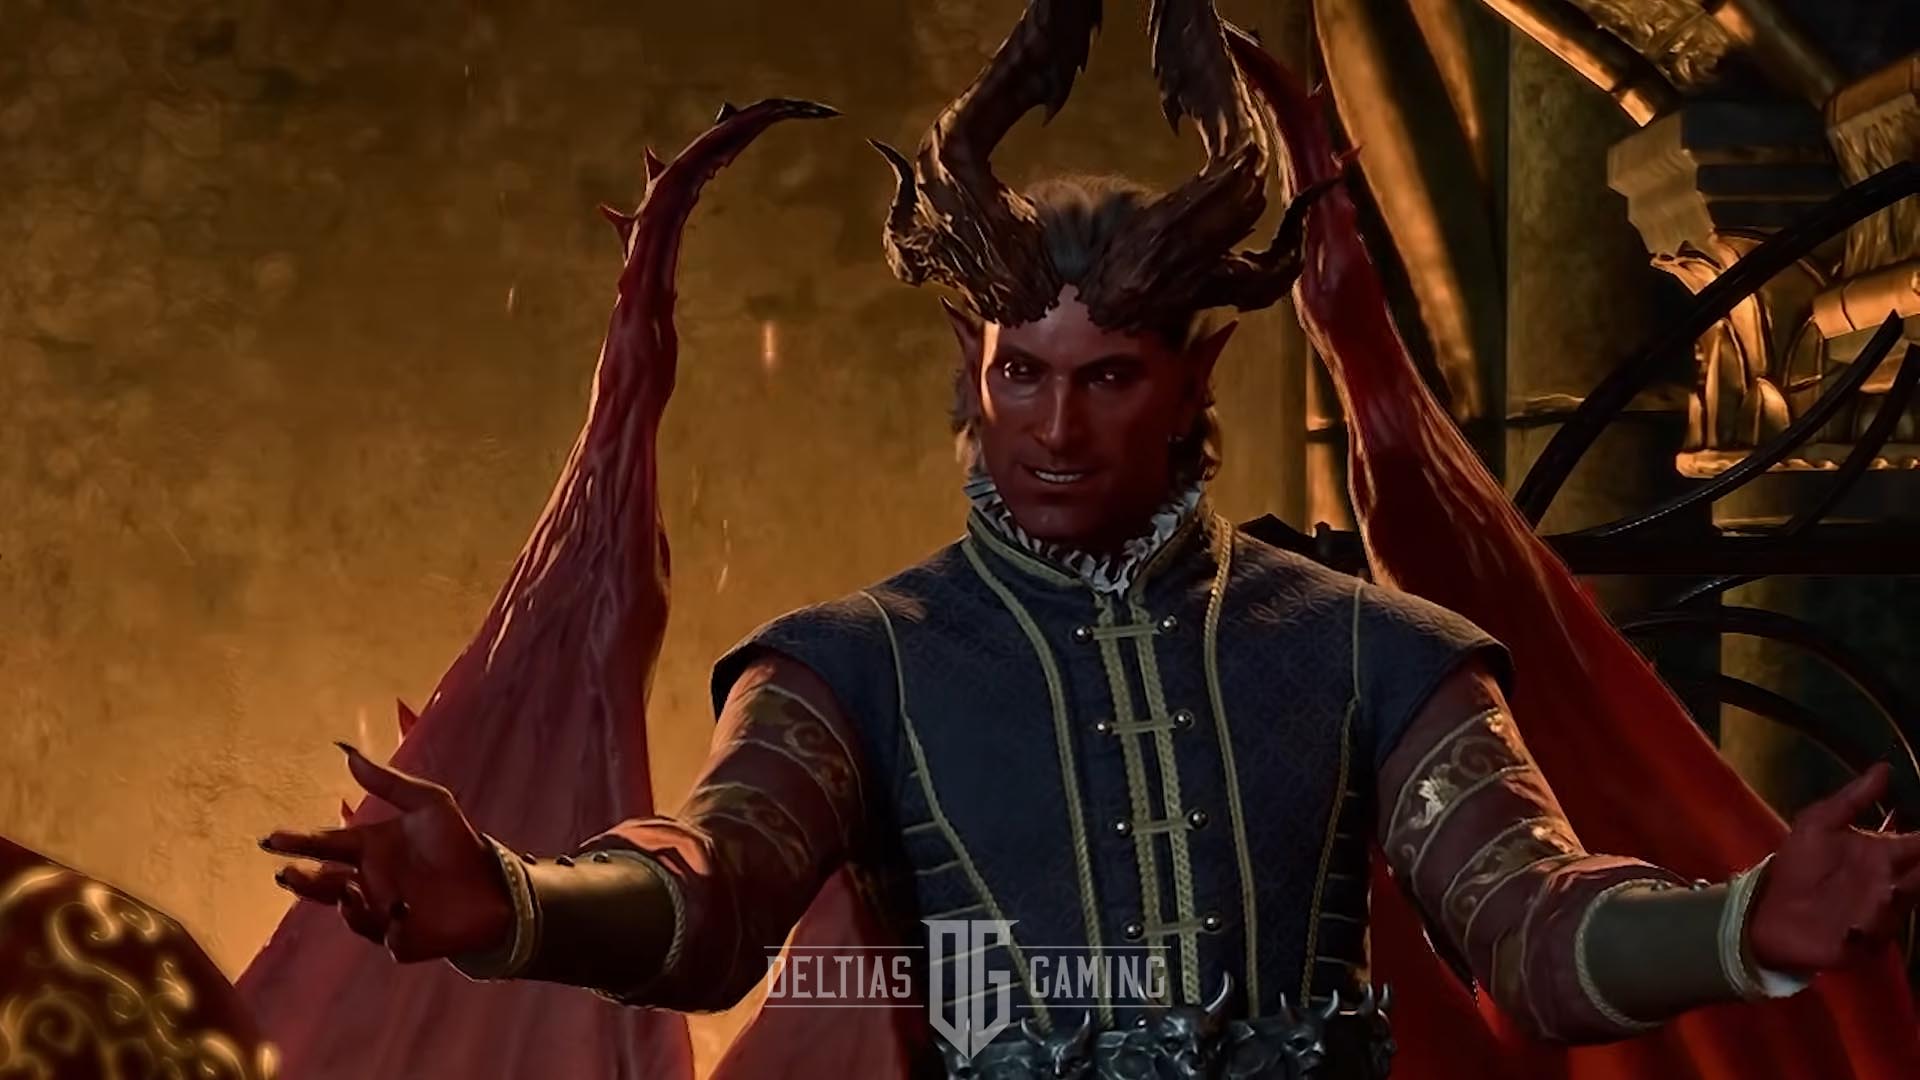
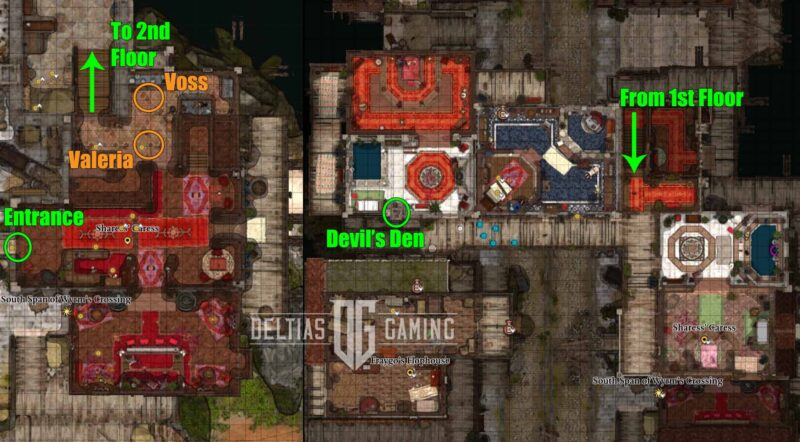
Early on in Act 3, you can visit Sharess’ Caress and find the always-scheming cambion Raphael in one of the luxury rooms called the Devil’s Den. He’s very interested in the Crown of Karsus and wants to make a trade. His offer is thus: After you defeat the Elder Brain, you give him the Crown. In exchange, he will give you the Orphic Hammer now, which you can use to free Prince Orpheus, who is the key to defeating the Elder Brain.
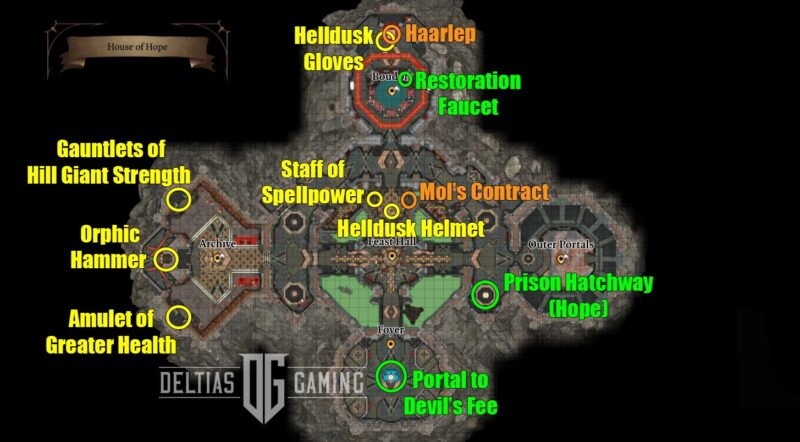
You can subvert the consequences of accepting this deal by discovering how to enter the House of Hope. There, you can take the contract binding you to the deal and break it.
Moreover, if you choose to reject the deal, you can use the same means to enter the House of Hope and take the Orphic Hammer. Additionally, you’ll find a lot of other very good loot in the House of Hope. Furthermore, you can earn the Gloves of Soul Catching if you can keep Hope alive during the final battle against Raphael.
Consequences of Accepting Raphael’s Deal:
- Easily acquire the Orphic Hammer
- Bound to give Raphael the Crown by contract
- Contract can be broken by entering the House of Hope and finding it
- Doing so will cause a final confrontation with Raphael
- If you give Raphael the Crown, he will use it to conquer the Hells…and possibly more
Consequences of Rejecting Raphael’s Deal:
- Can only acquire the Orphic Hammer by entering the House of Hope
- Doing so will cause a final confrontation with Raphael
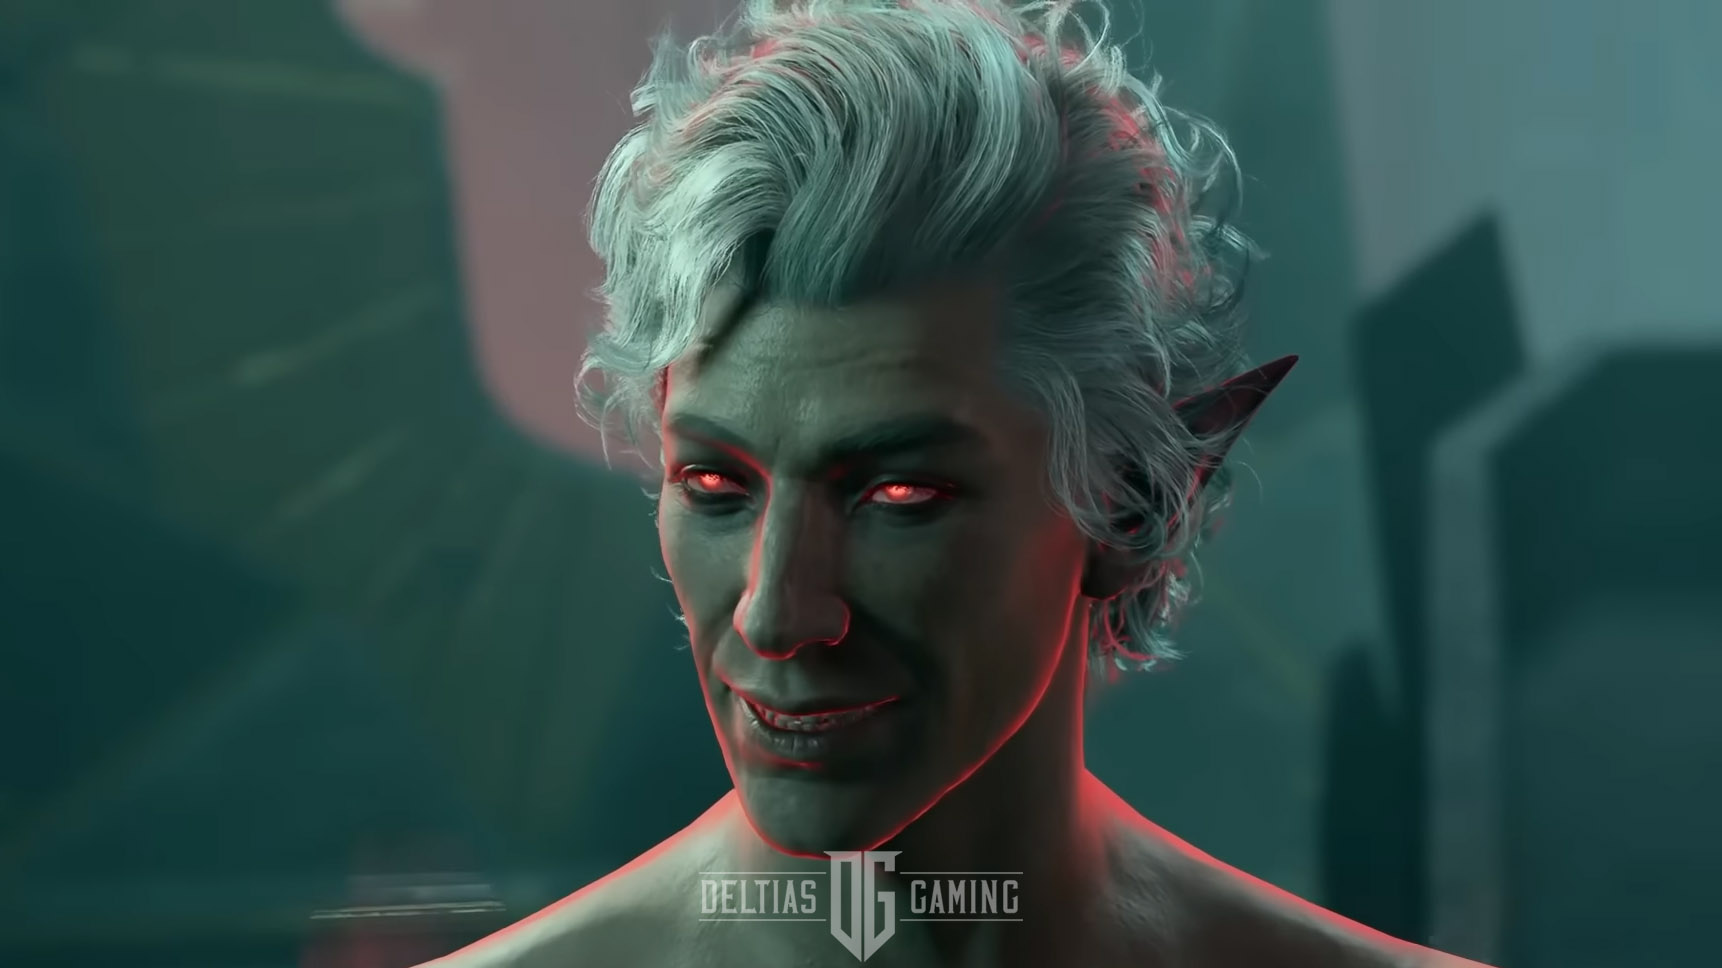
6. To Ascend Astarion or Not (Act 3)
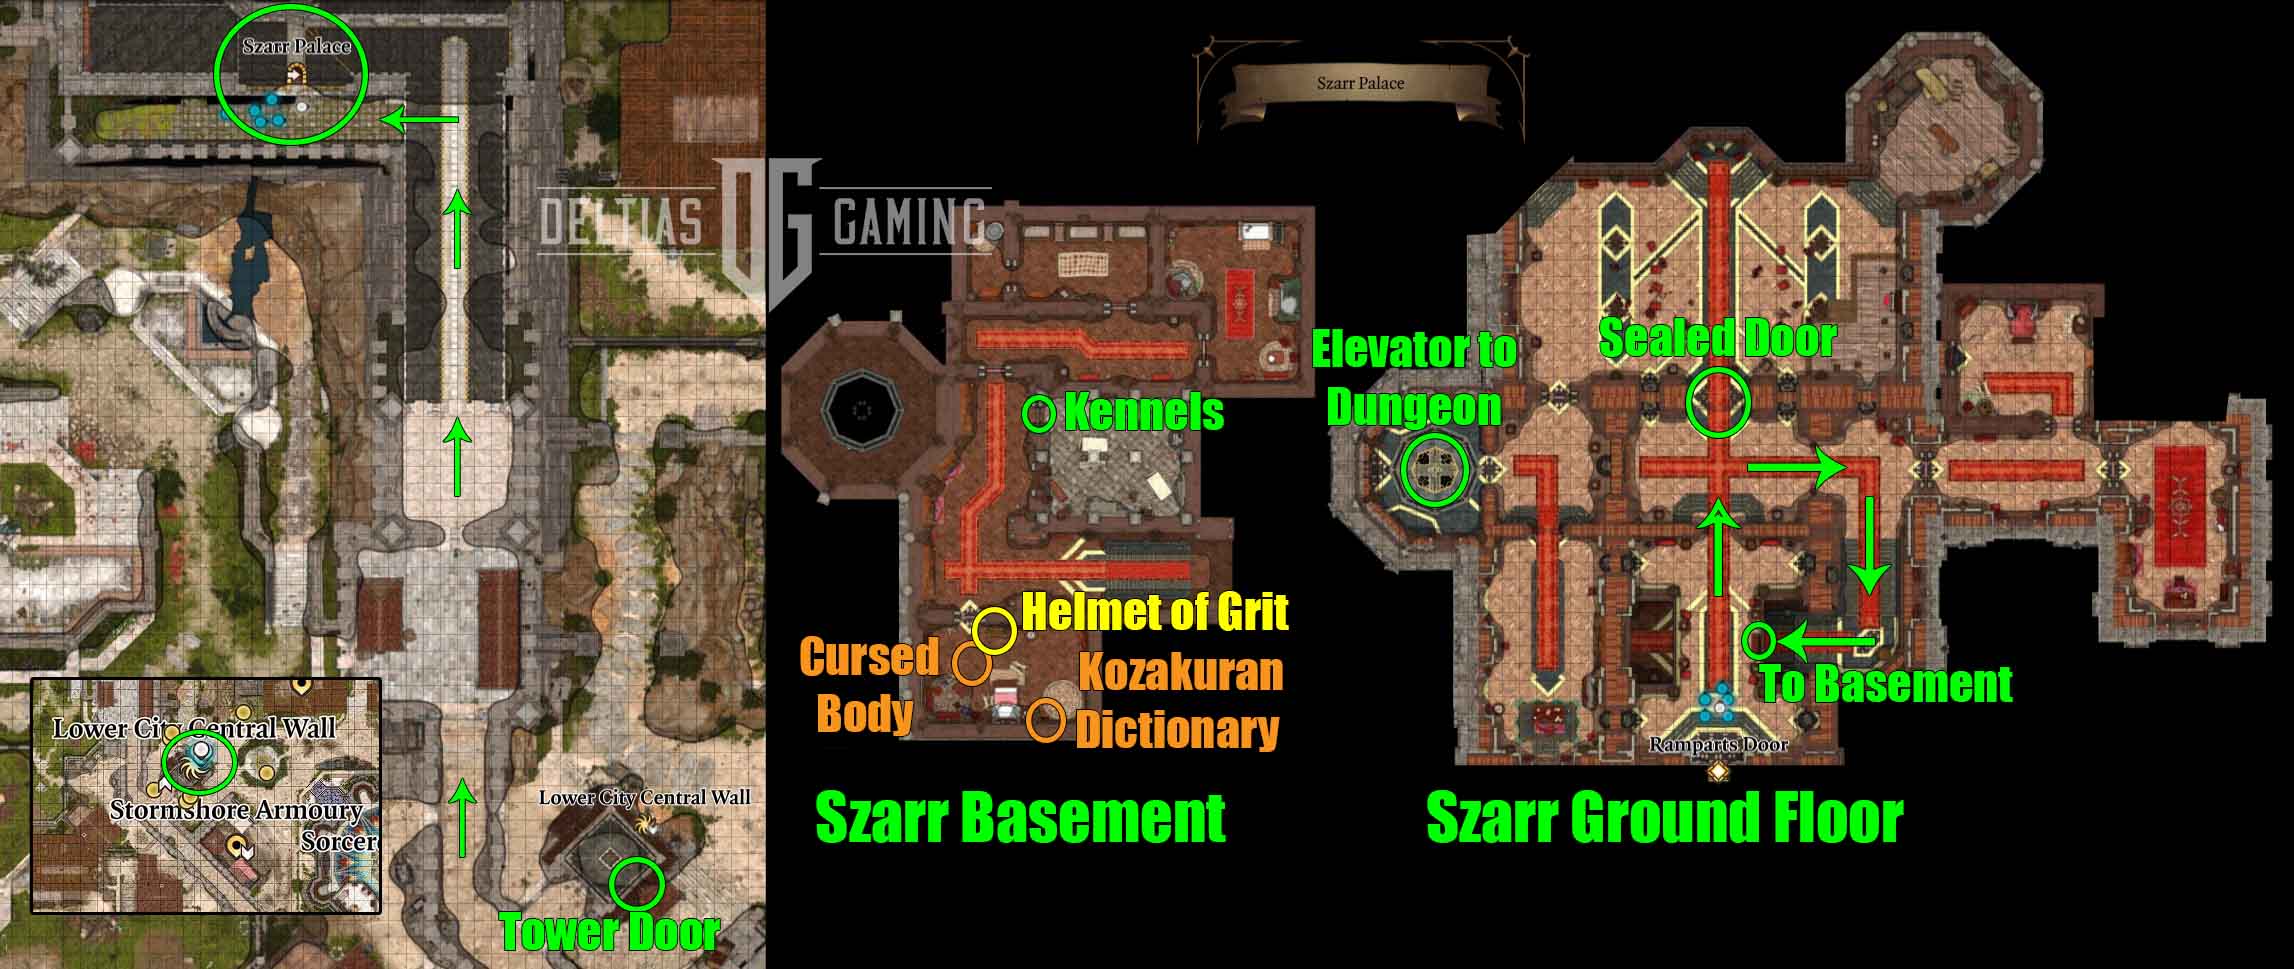
To reach the point where Astarion can attempt to become a powerful Vampire Ascendant, you’ll need to discover the Szarr Palace in the Lower City of Baldur’s Gate. First, you’ll need to locate the Lower City Central Wall waypoint, then head up inside the tower the arcane mark is on.
Once inside the Palace, you must head downstairs to find the Kozakuran Dictionary. Then, explore the Kennels to get a Szarr Family ring. You can now open the sealed door back upstairs and take the elevator to the dungeon.
You’ll have to fight Cazador before dealing with the ritual, and defeating him will reward you with the Rhapsody dagger. After the fight, Astarion will want to complete the ritual. Therefore, he can only be persuaded otherwise if you pass a high 18 DC Persuasion check. If you refuse to let him complete the ritual, then Astarion will leave the party.
Consequences of Ascending Astarion:
- The ritual will complete, killing Cazador, the other spawn, and 7,000 other souls
- Vampire Ascendant Astarion will gain the following abilities:
- +1d10 Necrotic Damage to unarmed and weapon Attack rolls.
- Ascendant Bite: Grants additional healing and deals necrotic damage. Target becomes Bloodless, and Astarion gains +1 for all attack rolls, saving throws, and most ability checks.
- Misty Escape: Transform into a small mist cloud. Have Advantage on Constitution, Dexterity, and Strength Saving Throws.
- With his newfound power, the dark side of Astarion’s personality will grow. His attitude and behavior will become more evil, much like Cazador was.
- If you’re in a romance with him, he will begin to treat you like a pet or possession rather than a partner.
Consequences of Not Ascending Astarion:
- Astarion will kill Cazardor, and you will need to decide the fate of the other spawns
- Astarion’s abilities will remain the same
- While initially upset at the lack of new powers, Astarion will realize that they would have only made him a monster like Cazador.
- If you’re in a romance with him, at the next Long Rest will be a special cutscene where Astarion takes you to his grave and thanks you for giving him a chance.
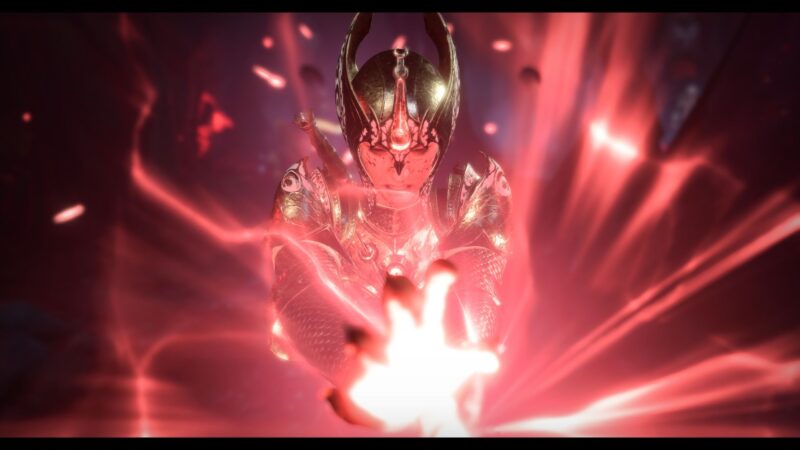
5. Accept or Reject Bhaal (Act 3)
Choosing the Dark Urge origin at the beginning of the game will put a dramatically different spin on the main story of Baldur’s Gate 3. It won’t be until Act 3 that you discover the true nature of the Dark Urge and the history of where your character comes from.
Throughout the game, you will have many chances to resist the urges plaguing you or give in to them. None of these decisions will lock you into a specific path yet. However, they can inform your character and final decision for later.
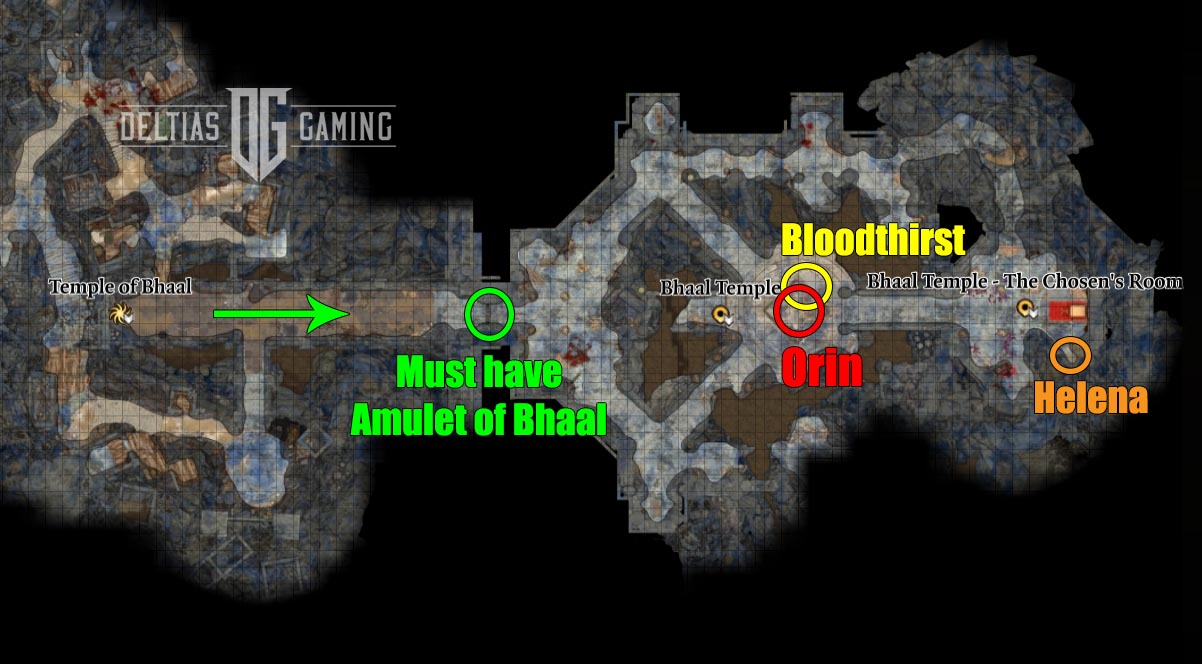
Consequently, it won’t be until you face Orin the Red in Bhaal’s temple that you discover your true nature as Bhaalspawn. Defeating Orin is a must on the way to the Elder Brain and will also net you the Bloodthirst dagger. Finally, after the fight, your Dark Urge will have to decide if they want to accept Bhaal or reject him. There’s no turning back now and that’s why this is number four on our Most Crucial Decisions and Consequences in Baldur’s Gate 3 list.
Consequences of Accepting Bhaal:
- Keep the Slayer form if you already have it, or gain it if you do not.
- Also, receive Power Word: Kill. This is a Level 9 spell that compels an enemy with 100 Hit Points or fewer to die instantly. Can only be used once.
- If you recruited Jaheira and Minsc they will confront you as you leave the temple in a fight to the death.
Consequences of Rejecting Bhaal:
- Bhaal will kill you.
- Well, he tries. Withers steps in to save you, and you are now free of the Dark Urge.
4. Save or Kill Shadowheart’s Parents (Act 3)

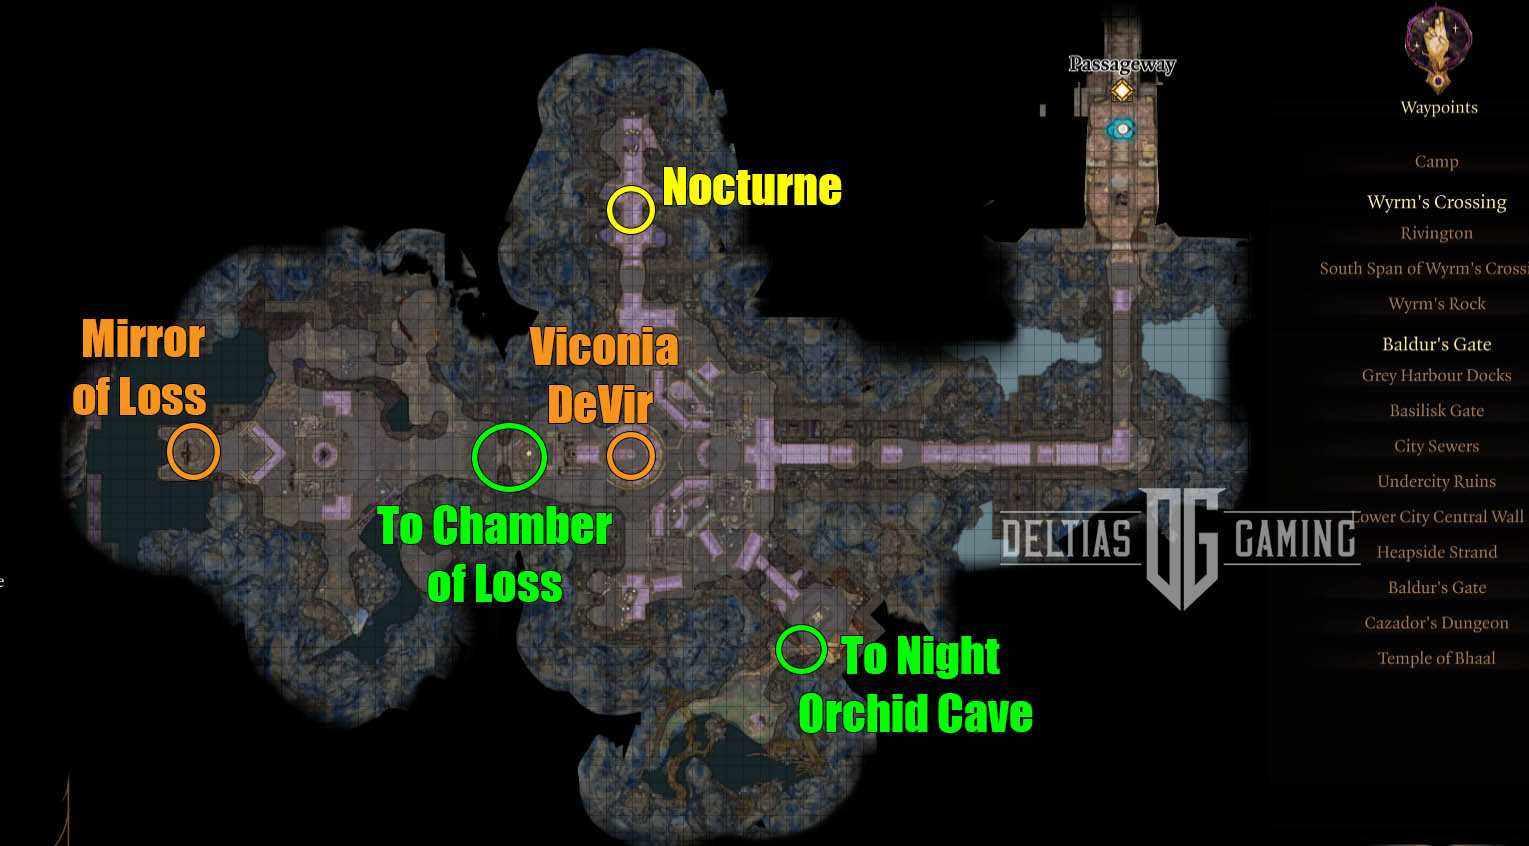
Following her decision regarding the Nightsong, Shadowheart will then need to find the cult of Sharrans to finally wrap up her character arc. You’ll want to look for the House of Grief in the Lower City of Baldur’s Gate. It can be found in the far northwestern corner of the map. Inside the Cloister of Sombre Embrace, Shadowheart will confront Viconia DeVir and other Sharran followers.
If she becomes a Dark Justiciar, Shadowheart will challenge her leadership. If she now follows Selune, then the challenge will be more straightforward. Either way, it means a fight. Afterward, use the Silver Key looted from Sharran Fidelian Lamona to open the Chamber of Loss. There, Shadowheart will find her parents and confront Lady Shar herself.
Finally, before you leave this space, don’t forget to use the Mirror of Loss for a possible +2 ability score bonus in exchange for a temporary penalty if done correctly.
Consequences of Saving Shadowheart’s Parents:
- If Shadowheart is a Dark Justiciar, defying these orders is a rejection of Shar. Shar will give Shadowheart more memories of her torturing her parents and leave the curse in place. However, Shar will let Shadowheart’s parents leave.
- If Shadowheart turns from Shar, she can call upon Selune’s power to free her parents. They will join you as camp followers, though Shadowheart’s mother sometimes struggles with her mental health.
Consequences of Killing Shadowheart’s Parents:
- If Shadowheart is a Dark Justiciar, killing her parents elevates her to Shar’s Chosen. As a ‘blessing,’ Shar will remove her memories again, so she no longer remembers her parents. Additionally, the Dark Justiciars will become allies in the final battle.
- If Shadowheart rejects Shar and saves the Nightsong, killing her parents will remove Shar’s curse. They transform into moon motes by Selune and travel with Shadowheart as light and comfort.
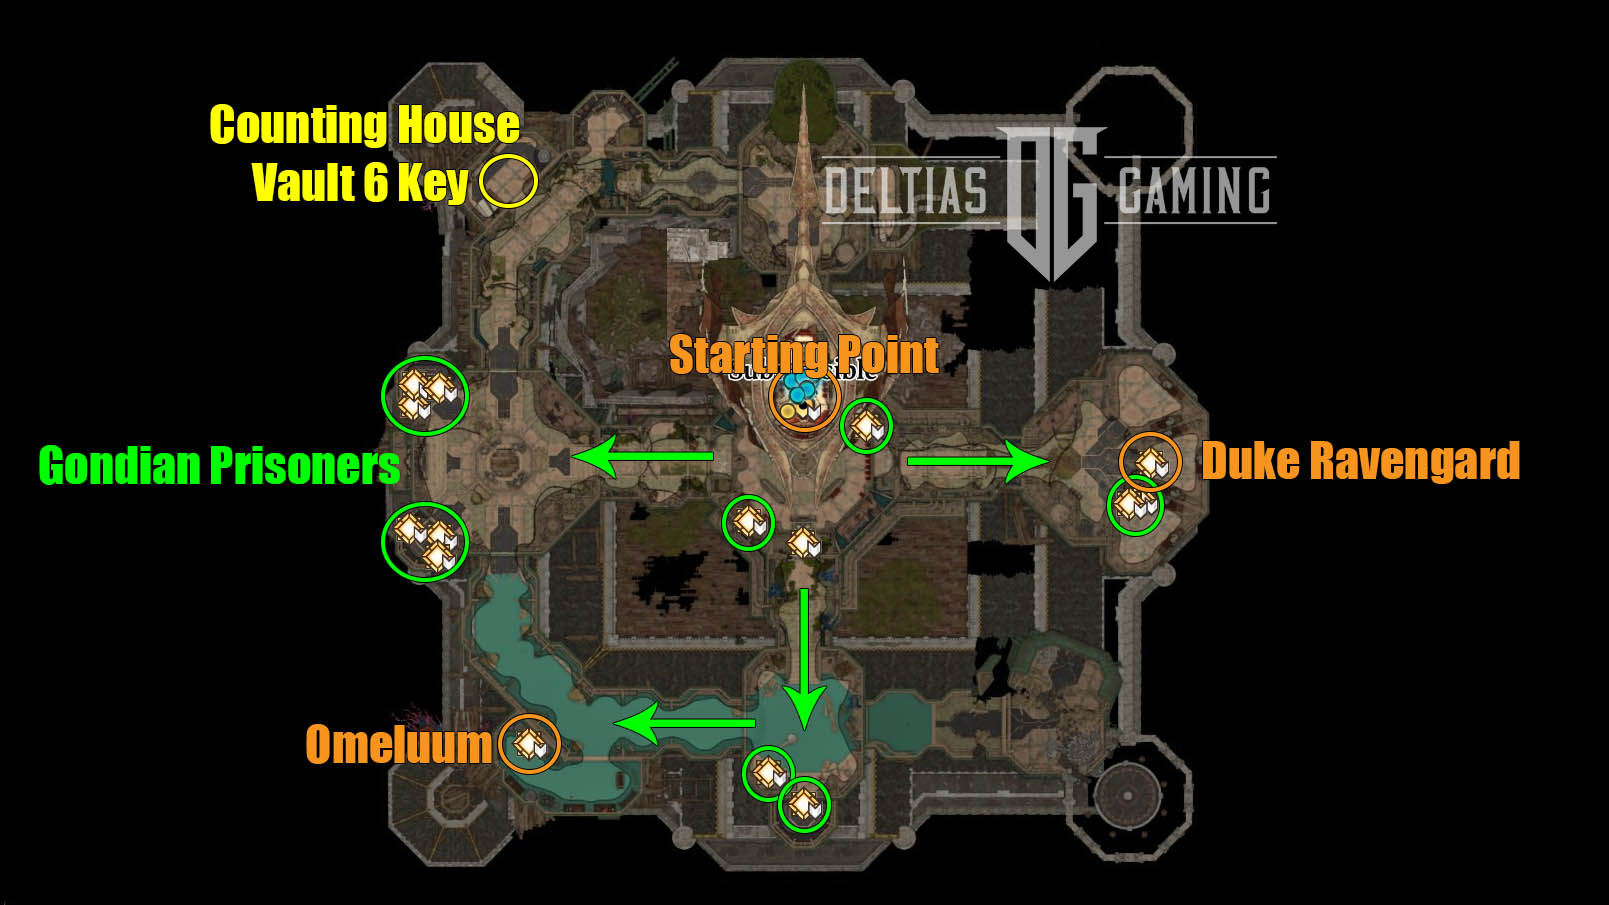
3. Free Wyll or His Father (Act 3)
Although you first learn of Wyll’s father Duke Ravengard during Act 1, you’ll have to wait until Act 3 to finally interact with him. Unfortunately, by that point he will have had a tadpole in his brain and is under the control of Gortash. He has been taken away to an undisclosed location, with no clear way of finding him
However, Wyll’s patron, Mizora, is willing to help. She offers Wyll a choice: Accept a new eternal contract, and she will tell him where his father is. Wyll can also have his freedom, but she will not reveal where his father is.
Consequences of Freeing Wyll:
- Duke Ravengard will perish
- Wyll can choose to step up as the leader of Baldur’s Gate at the end of the game.
- If you discover the Duke’s location (start your search at the Water Queen’s House), you can still attempt to find a way in and free him. However, Mizora is not happy about it and will attempt to stop all of you from escaping.
Consequences of Saving Duke Ravengard:
- Duke Ravengard will join you in camp and learn the truth about his son’s ‘betrayal.’
- The Duke will tell you about Ansur, the city’s guardian dragon.
2. Side with the Emperor or Orpheus (Act 3)
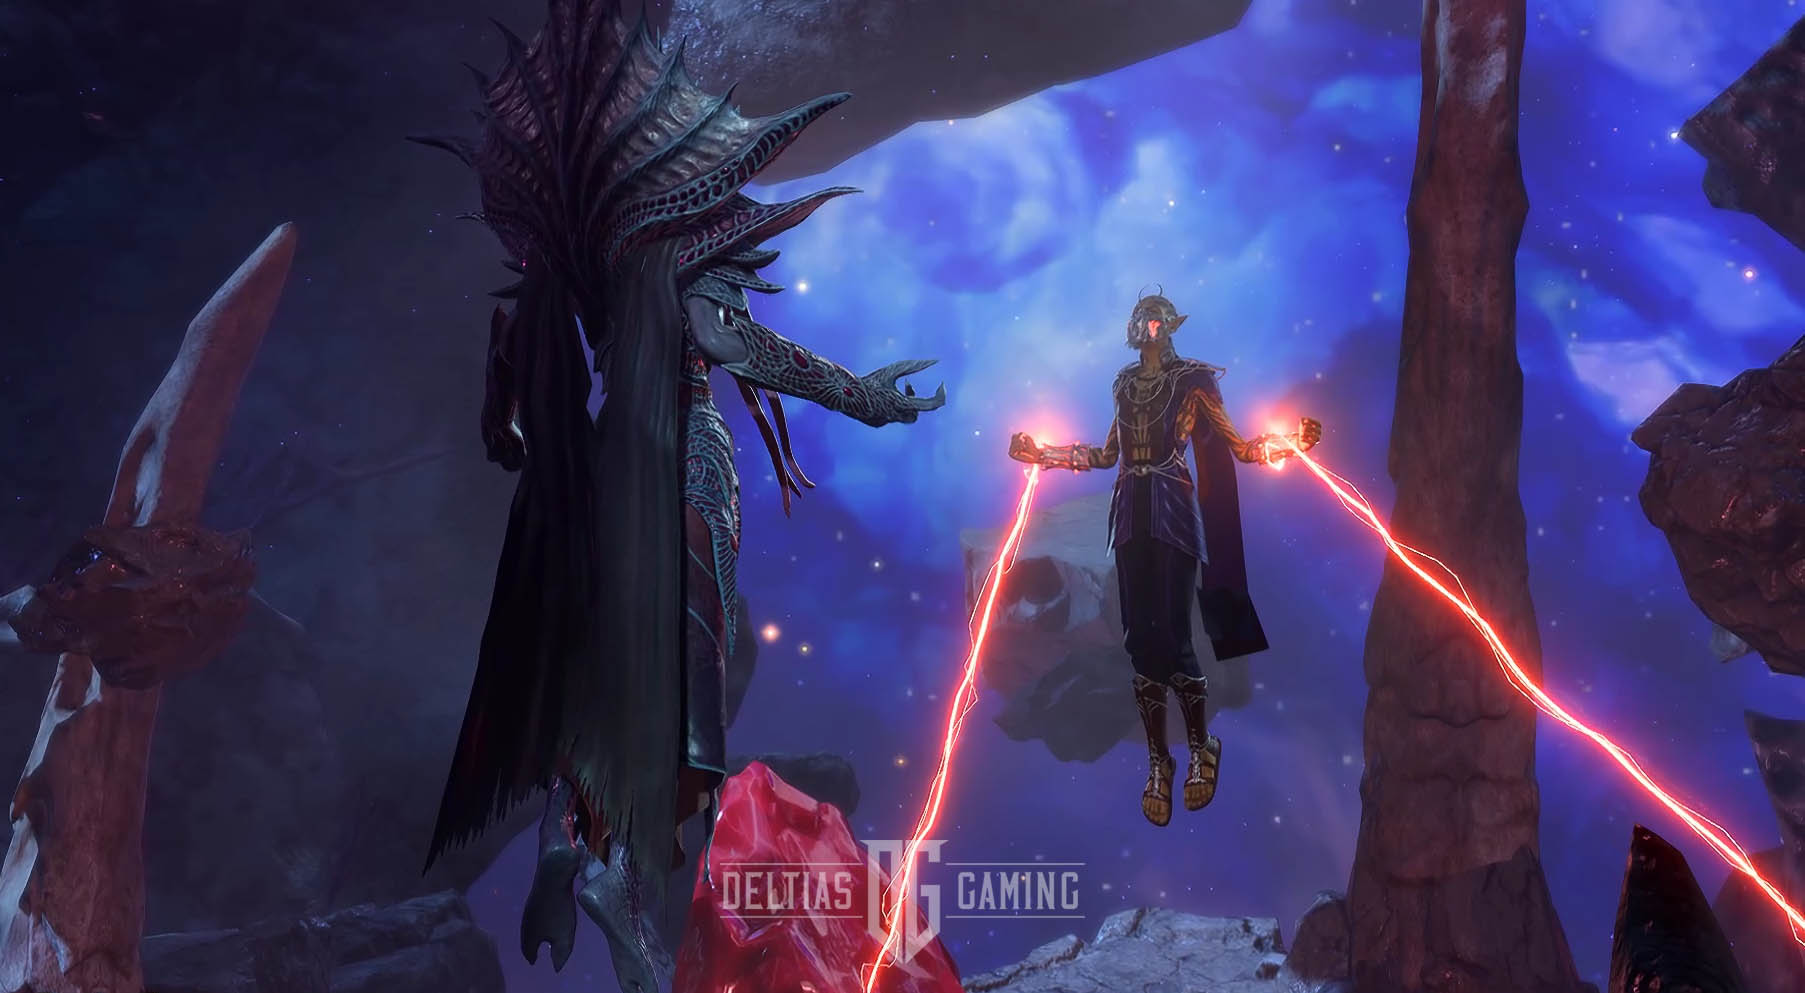
As the story of Act 3 builds to the final climax with the Elder Brain, one of the final major choices in the game will see you choose to side with the Emperor or Prince Orpheus. However, to have this choice available at all you will need to have acquired the Orphic Hammer. This will require finding your way into the House of Hope and getting safely back out again after stealing it.
The final visit to the Astral Prism will occur after you travel to the Morphic Pool. The Emperor will tell you that the only way to defeat the newly evolved Netherbrain is by using Orpheus’ powers against it directly. This will require the Emperor to consume the Prince’s brain.
But can you trust the Emperor? Can you even trust Orpheus? This difficult decision has a major impact on the end of the story and can spill over into Lae’zel’s story, as well.
Consequences of Siding with the Emperor:
- The Emperor will consume Orpheus’ brain, killing the Githyanki for his powers. You can loot the Orphic Ring from the body.
- If Lae’zel is in the party, she will leave. If you have romanced her, you have a chance to pass a 30DC Persuasion check to get her to stay.
- Voss will be incredibly angry, and vow to hunt you down, should you live through the fight with the Brain.
- You’ll give the Netherstones to the Emperor, and he will accompany you to the final fight.
- Surprisingly (or not), the Emperor does not betray you. You can defeat the Brain together. Afterward, the Emperor will peacefully part ways with the party.
Consequences of Siding with Orpheus:
- The Emperor will leave the party and return to the Brain. You will then have to defeat him in the final battle.
- Lae’zel and Voss will approve, and you will have given the Githyanki a chance to someday be free of Vlaakith.
- Orpheus will accompany the party into the final battle. He has some helpful abilities such as the Globe of Invulnerability spell.
- Someone will have to become a Mind Flayer to defeat the Elder Brain (see below).
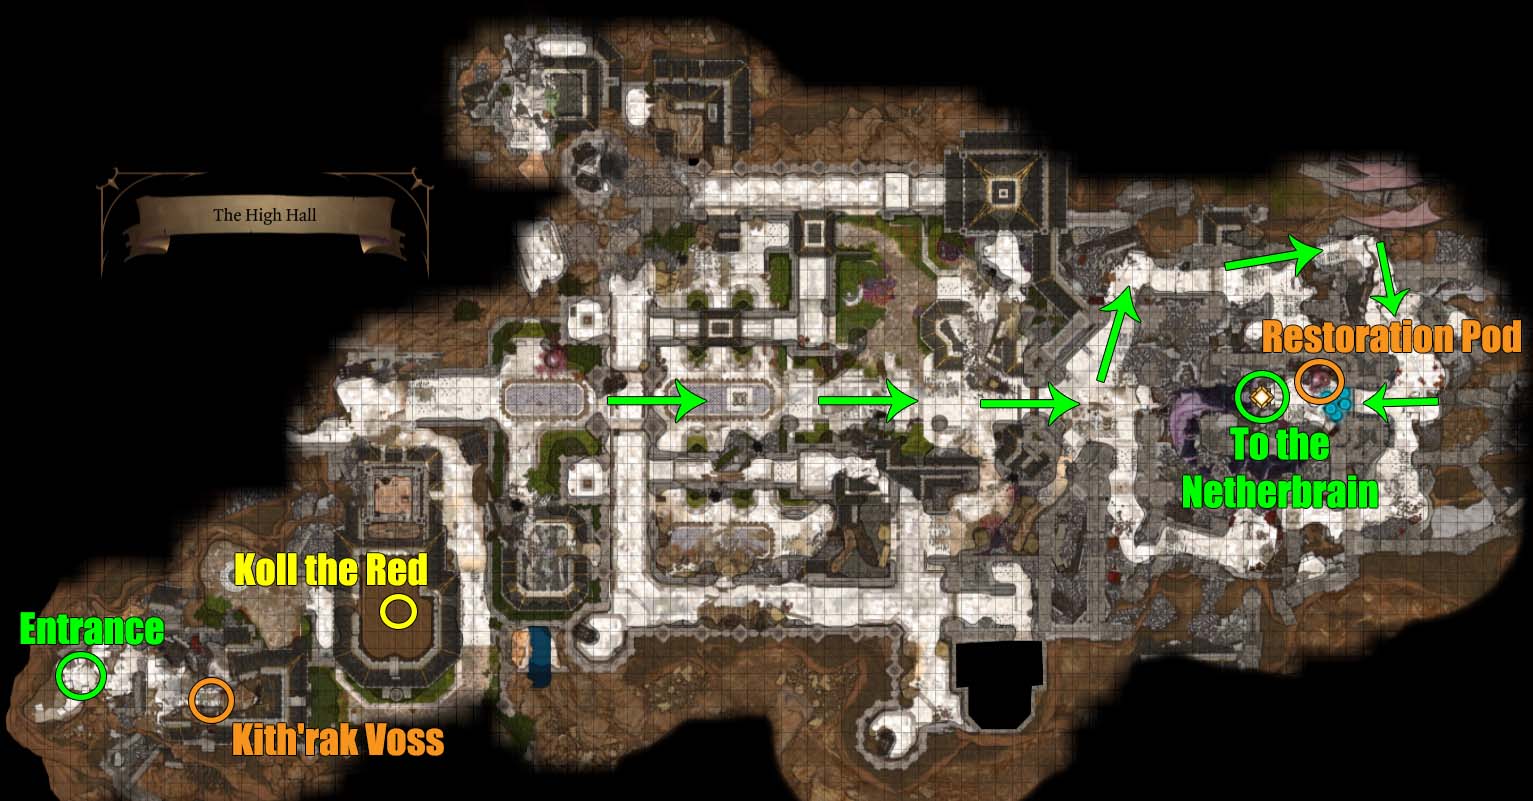
1. Choose a Mind Flayer Volunteer (Act 3)
Choosing a Mind Flayer volunteer in Baldur’s Gate 3 is a decision you will only have to make if you sided with Orpheus rather than the Emperor just moments before. The Emperor was telling the truth, at least about this. Only an Illithid has the foresight and the will to be able to cast the necessary Karsus’ Compulsion spell.
Therefore, if the Emperor is not there to do this, someone else will have to sacrifice. There are three options: Your character, Karlach, if she is at your party when you enter the Prism for the final time, and Orpheus himself. The transformation into a Mind Flayer is permanent, and there is no going back.
Consequences of Becoming a Mind Flayer:
- Speak to Orpheus after he has been freed, and volunteer to become a Mind Flayer. Orpheus will commend your sacrifice.
- You will remain an Illithid after the final battle. Dialogue choices will give you options for:
- Embracing this change, seeing it as an improvement
- Being wary of the future but choosing to live
- No trusting this new form, and killing yourself before you potentially cause harm
- If you choose to live, you will appear at the epilogue party and must resist cravings while talking to your old friends.
- Whether your Mind Flayer self retains her soul is open to interpretation.
The Consequences of Karlach Becoming a Mind Flayer
- You must have Karlach in your active party and select her to speak with Orpheus.
- Due to her fatal condition, she will have a dialogue option where she chooses to volunteer for the Ceremorphosis.
- The transformation will ‘cure’ Karlach of her Infernal Engine problem, although she will forever retain an Illithid face.
- It’s open to interpretation whether Mind Flayer Karlach still retains her soul.
Consequences of Orpheus Becoming a Mind Flayer
- Lae’zel will be unhappy, but not enough to leave the party.
- Voss is also unhappy, but will still help.
- After the Elder Brain is defeated, Orpheus will ask Lae’zel to take his dragons and face Vlaakith in his stead.
- He will also request that the party kill him, believing that he will soon lose his soul and become fully Illithid.
- Orpheus can only be convinced to live if Lae’zel is in the party and you pass a 20DC Persuasion check.
- If persuaded to live, he will leave the party, and seek to watch the Githyanki liberation from afar.
- If you persuade Lae’zel to stay with you, rather than take up Orpheus’ cause, Orpheus will despair and kill himself.
Looking For More About Baldur’s Gate 3?
Thank you for reading The Most Crucial Decisions and Consequences in Baldur’s Gate 3 guide. We also provide the latest news and create guides for Baldur’s Gate 3. Additionally, watch me play games on Twitch or visit my YouTube channel!