Facebook
 Reddit
 Email
Email
Avowed’s world has a lot of totems scattered throughout. This guide will tell you how you can find the Totem of Perseverance in Avowed.

A lot of different totems are there in Avowed for you to collect. The Totem of Perseverance is chronologically the last totem you can find, but you don’t necessarily have to find them in order.
The different parts of the totem are scattered throughout the Galawain’s Tusk area. The parts can be quite difficult to find at times because the developers made sure that the players have to work a little bit to collect all the totems. However, we will take you through the entire quest and tell you where to look.
How To Find All Parts of The Totem Of Perseverance in Avowed
Prepare yourself to turn every stone and look under every tree in the Galawain’s Tusk because this quest will take you through the gardens, lakes, and desert while you look for all of the parts of the totem. But do not worry, we will tell you everything you need to know about the Totem of Perseverance in this guide.
The Totem Core
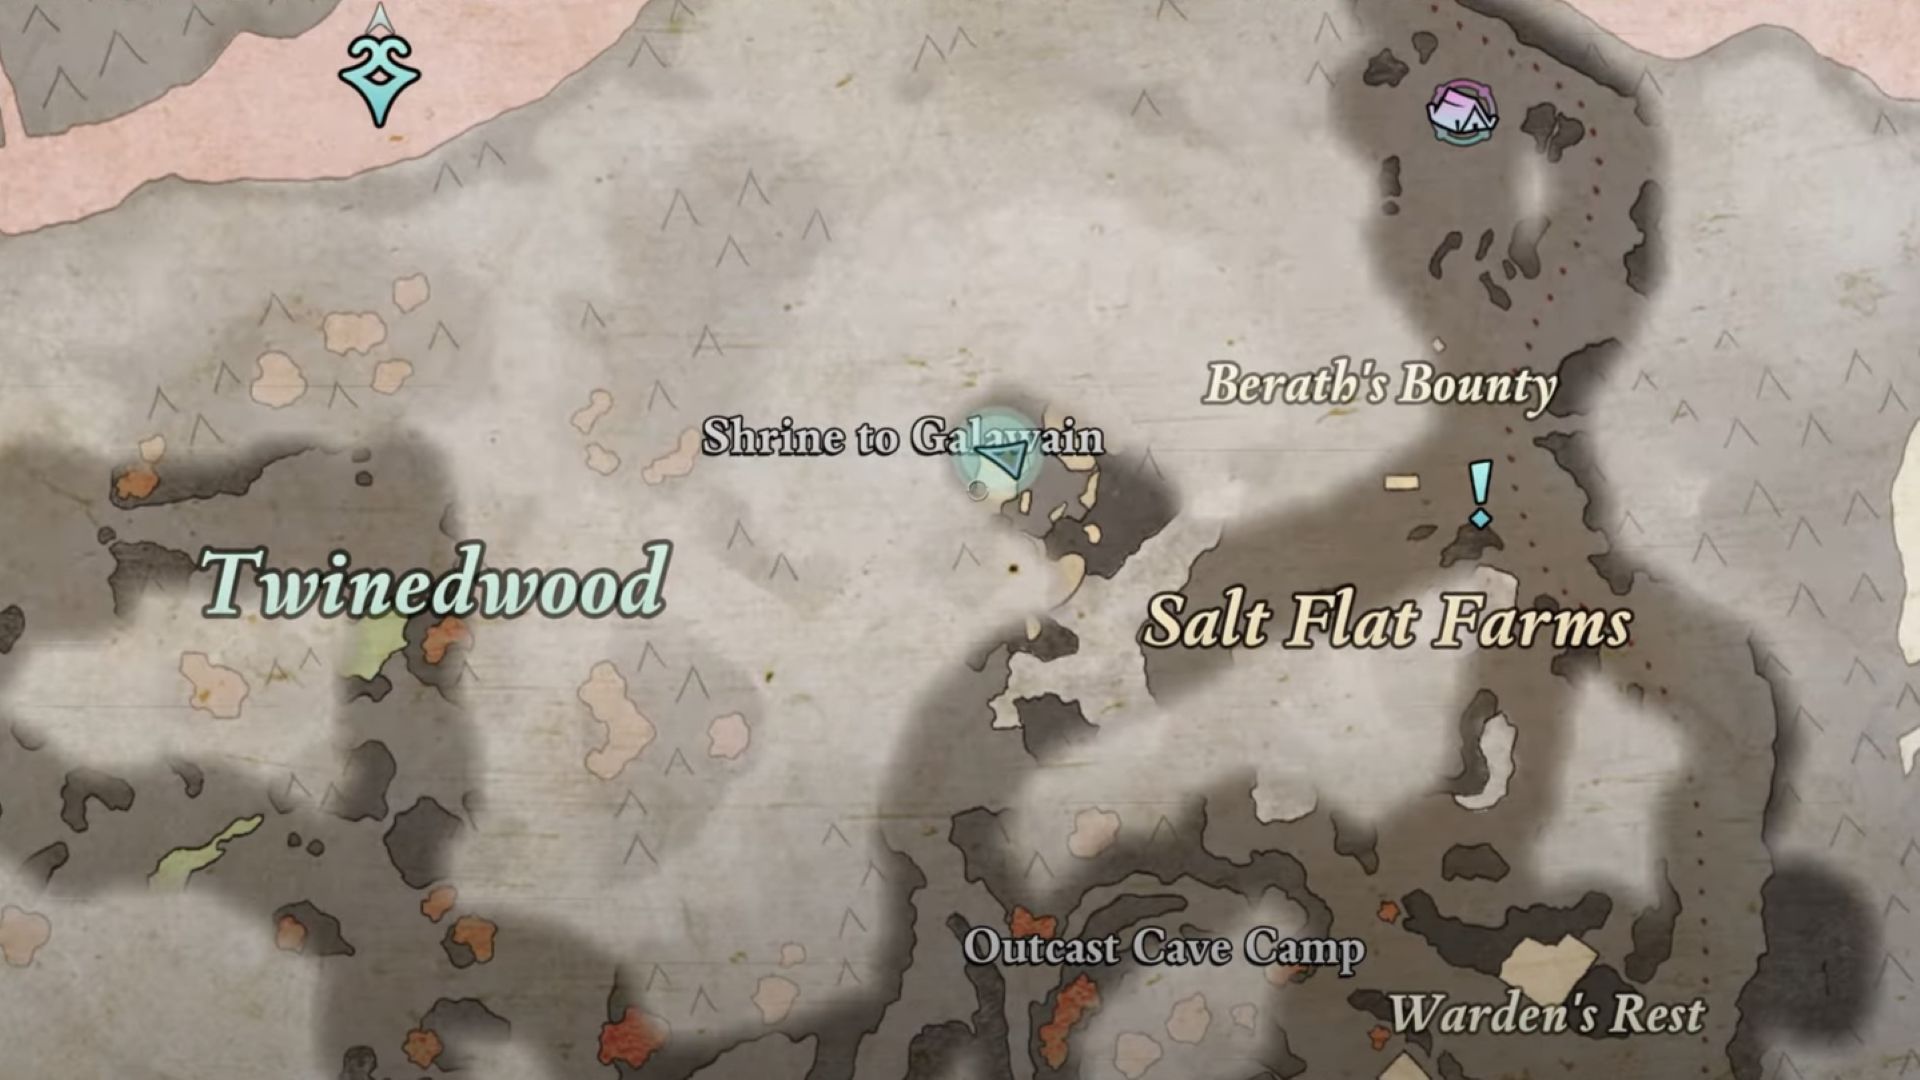
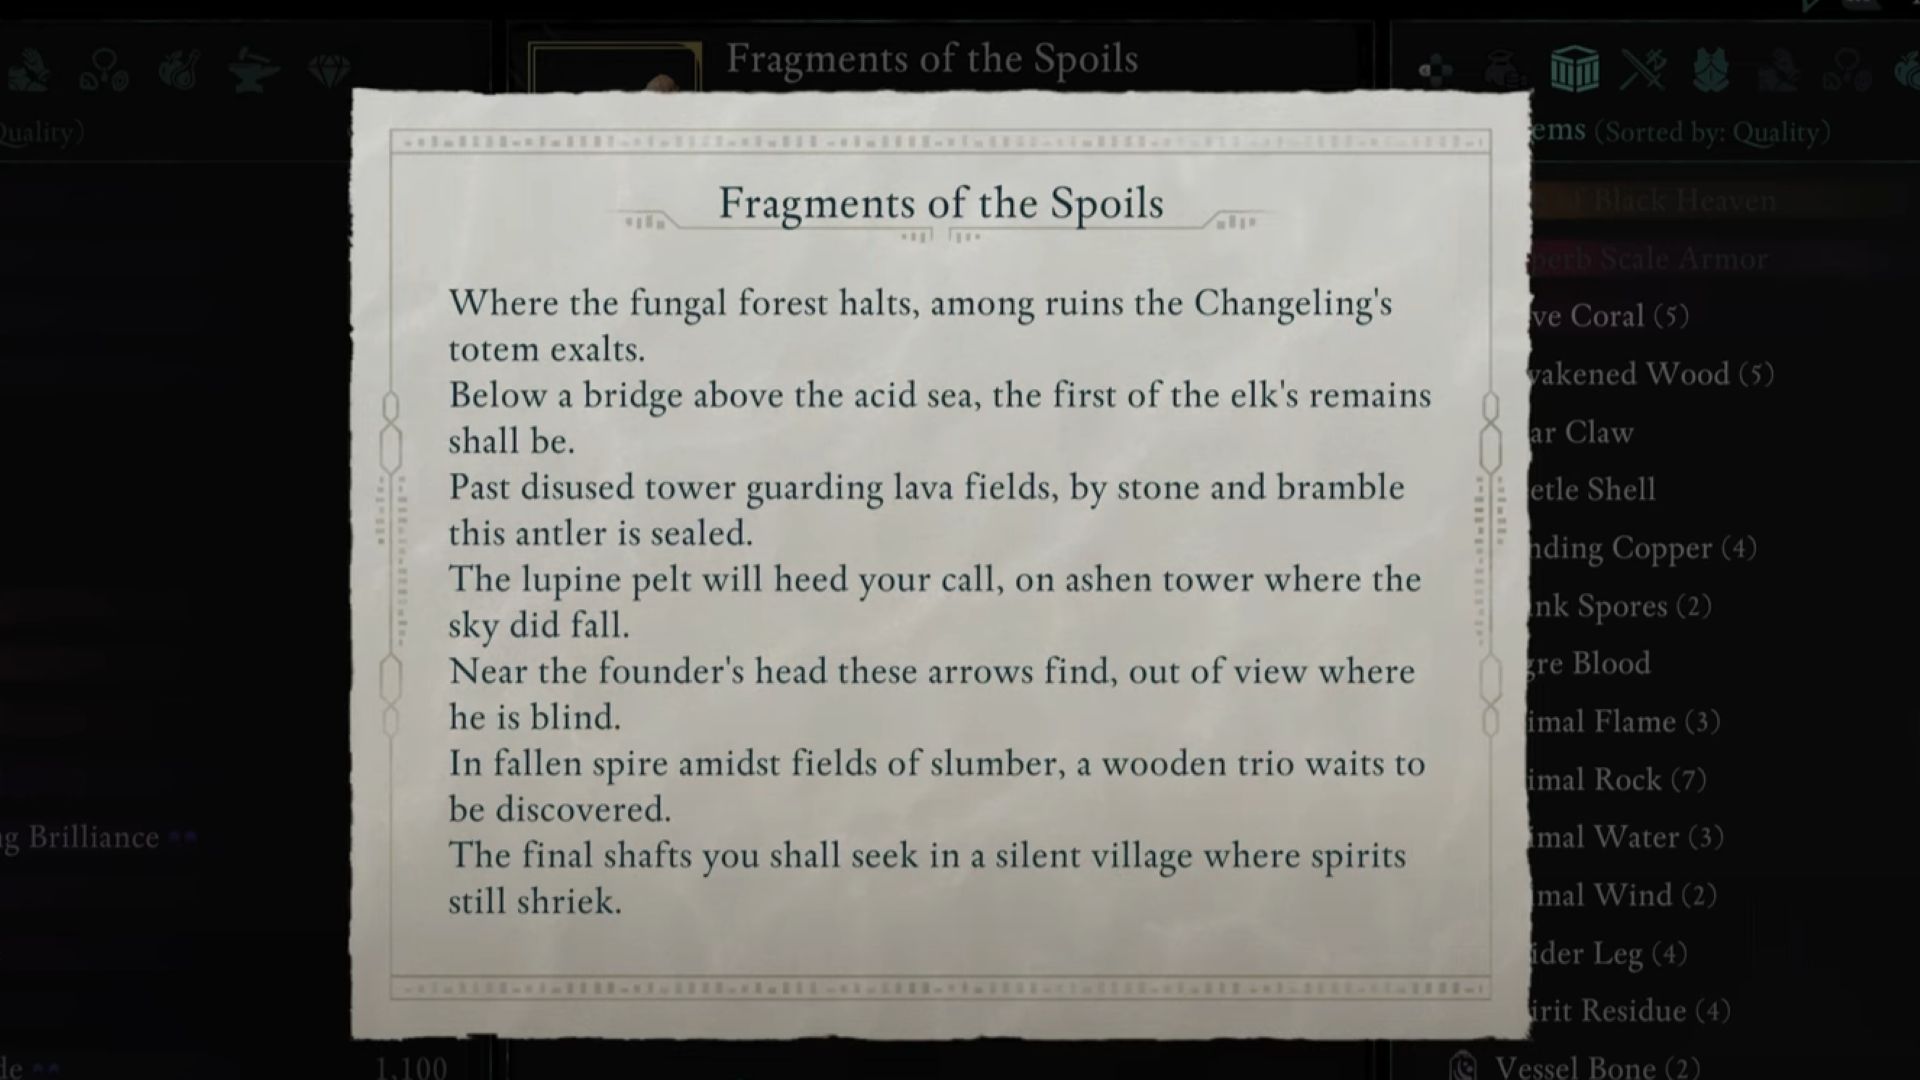
The first part of the Totem of Perseverance is, of course, the totem’s core. It is named the Huntermaster’s spoils. You will be able to find it in the shrine on the map, also known simply as the Galawain’s Shrine. Once you are in Twinedwood, go to the north, and you will notice an altar with some wolf statues. The core will be right in the middle of it, so it is pretty hard to miss.
The Antler of the Persevering Stag
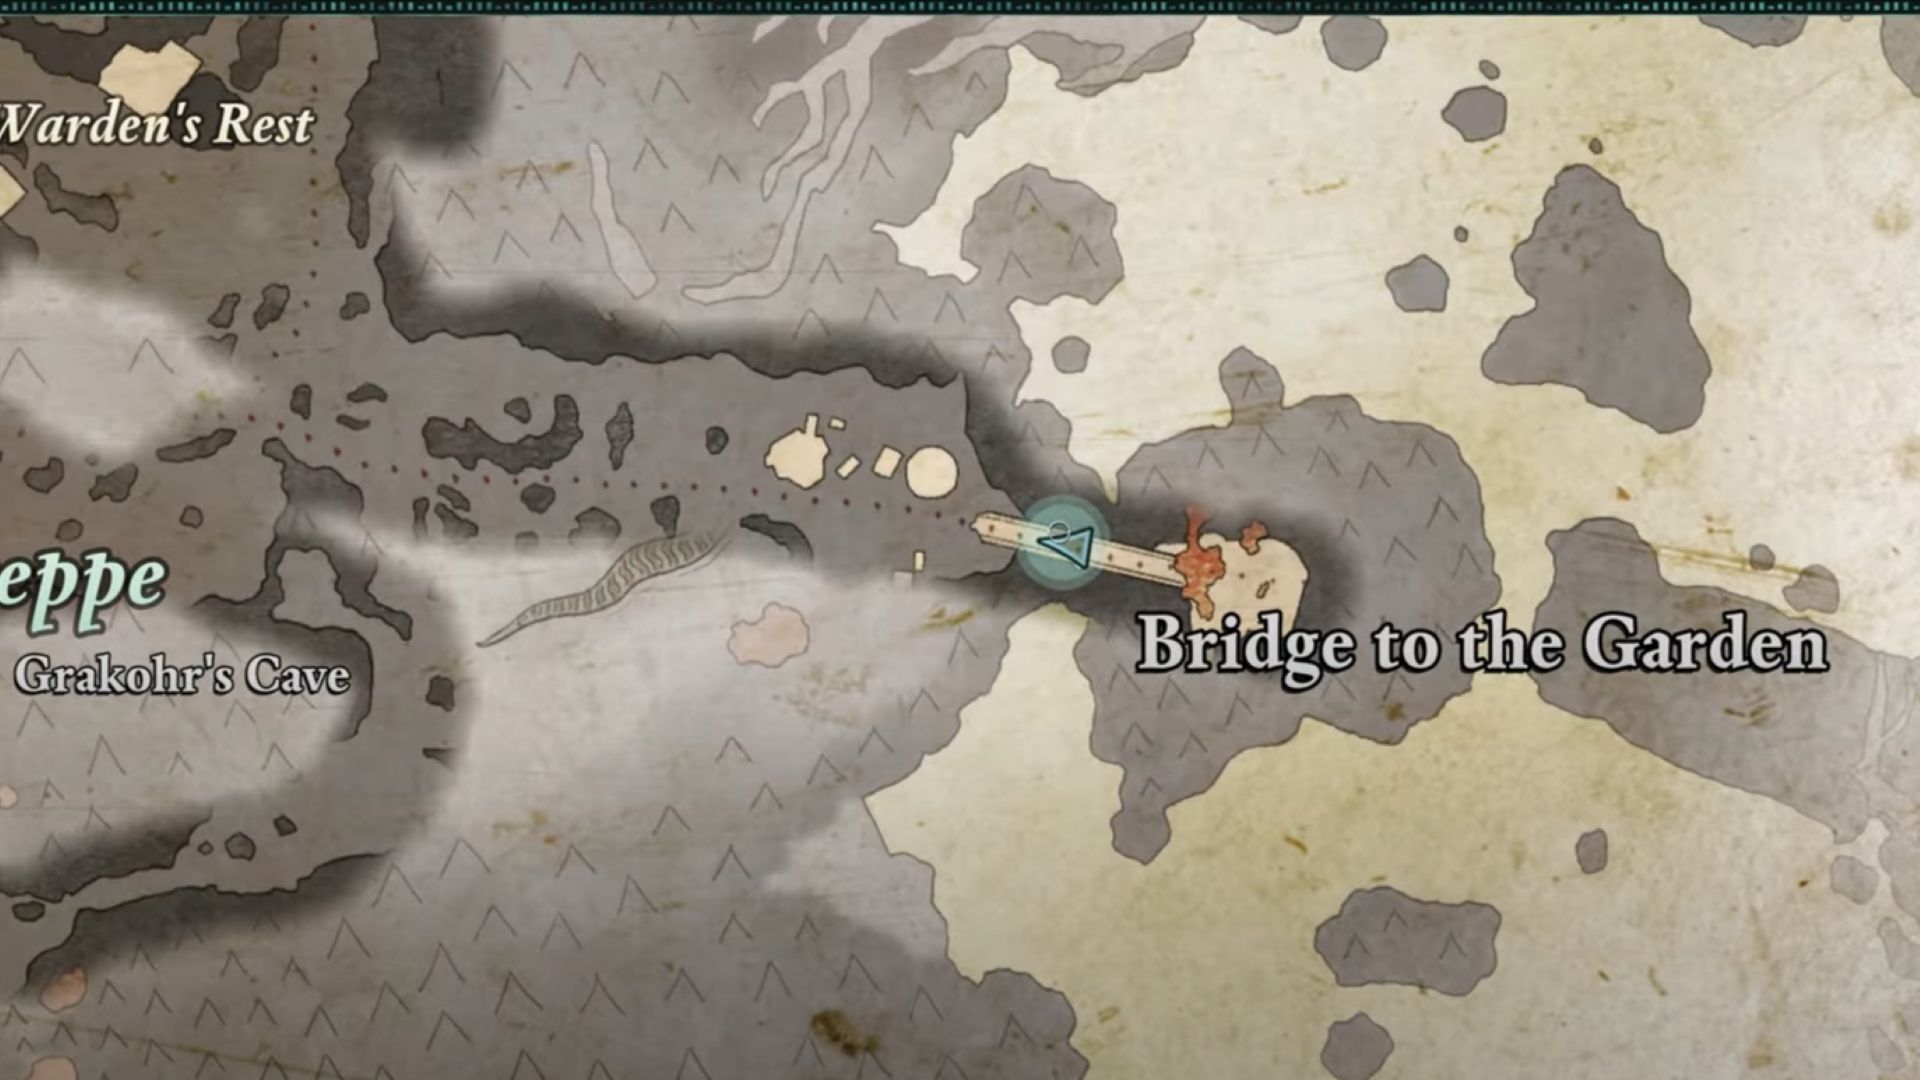
You will find a bridge to a garden on the west side of the map, which is also an important part of the story. But do not cross the bridge; instead, jump down to the left ledge, and then again drop down to another ledge, and you will find the Antler Of The Persevering Stag next to a dead body under the bridge.
The Antler Of Pursued Stag
For this part of the totem, you will need to head to the far northeast of Galawain’s Tusk. First, go to the Pagrun Cache and then proceed to the cave that comes after it. It will be blocked by an illusion, so you will need Yatzli to gain access to it. Once in, take a left and burn the vines to make an opening, and you will find the Antler sitting on an altar.
The Hunter’s Arrows Of Surviving

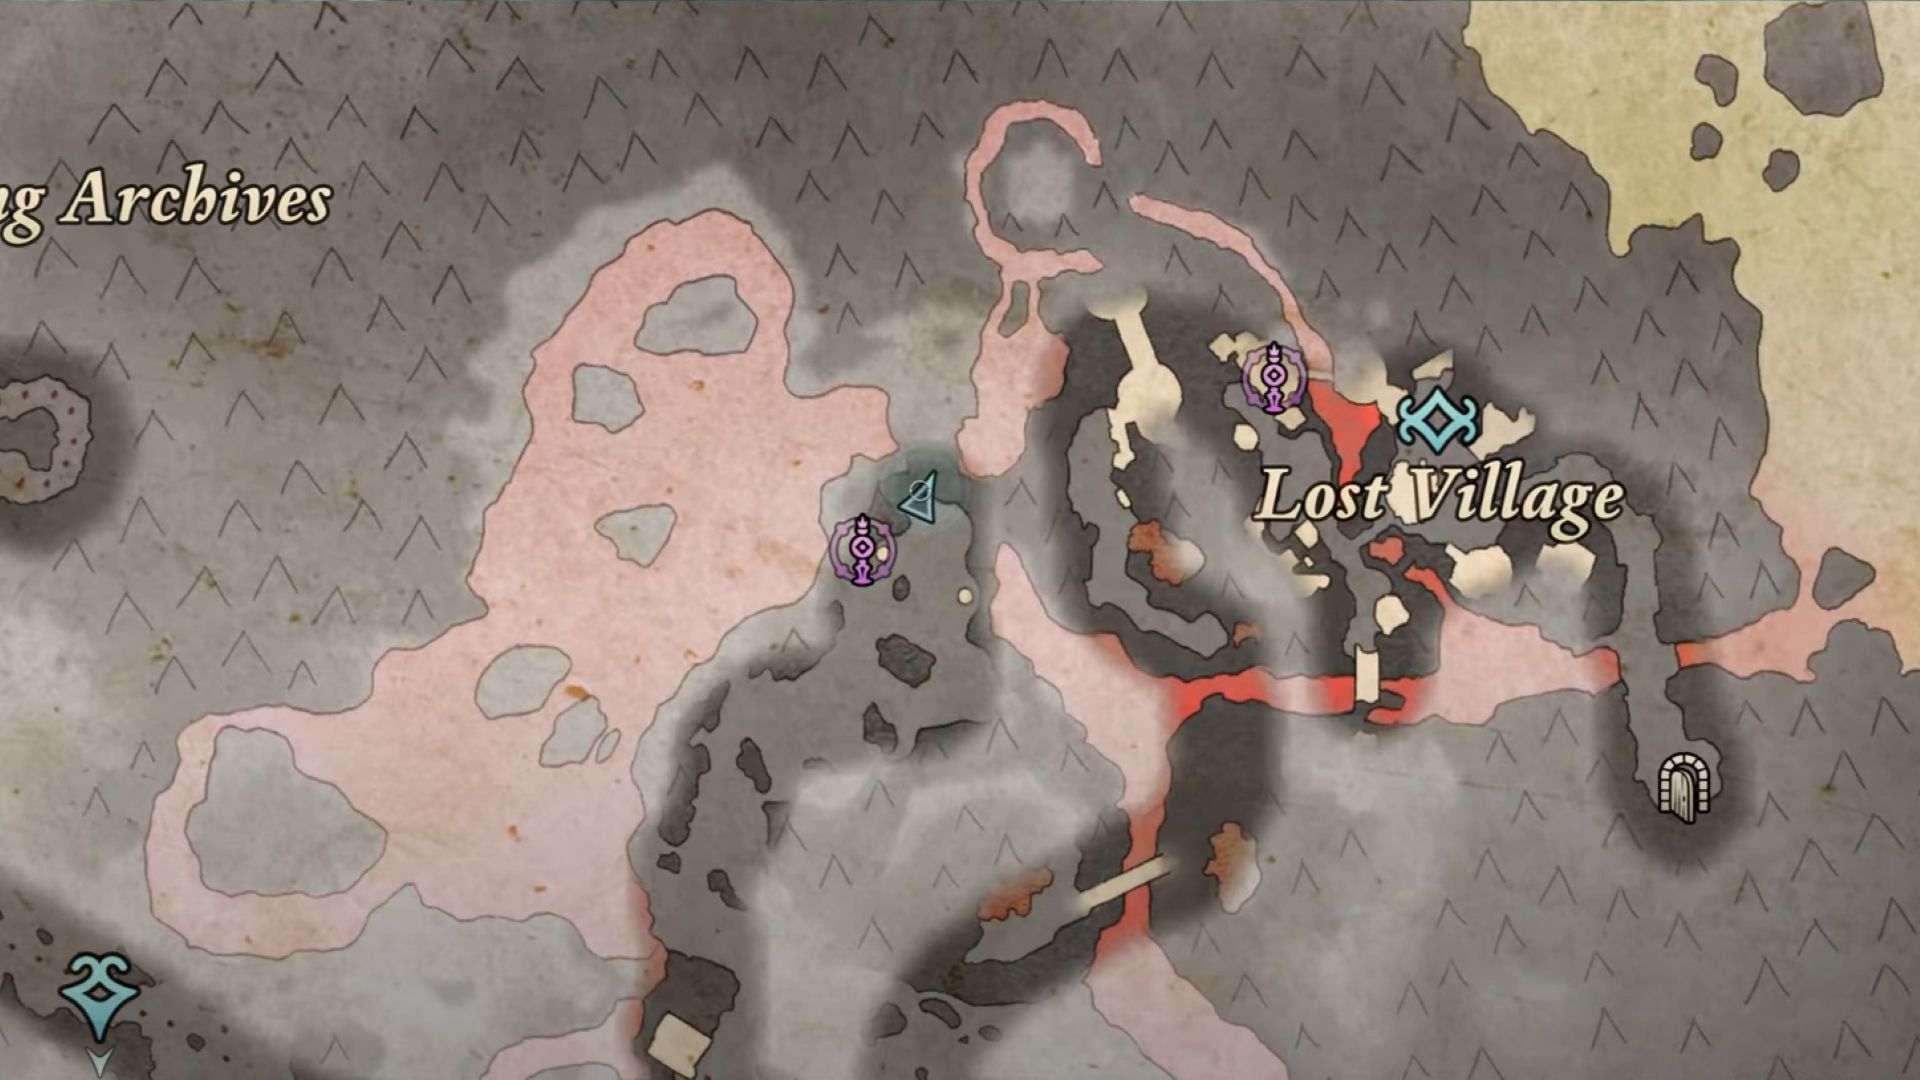
If you look at the clues in the picture we provided, you will see the mention of the lost village. To find the Hunter’s Arrows Of Surviving, first, you will again need to go to the Pagrun Cache. It will be in the far northeast of the map, as mentioned before. Then climb the rocks on the left side of the lava river and keep moving forward. At the end of it, you will come across some ruins. Look for the Hunter’s Arrows Of Surviving in those ruins; it should be on a table there.
The Hunter’s Arrows Of Slaying
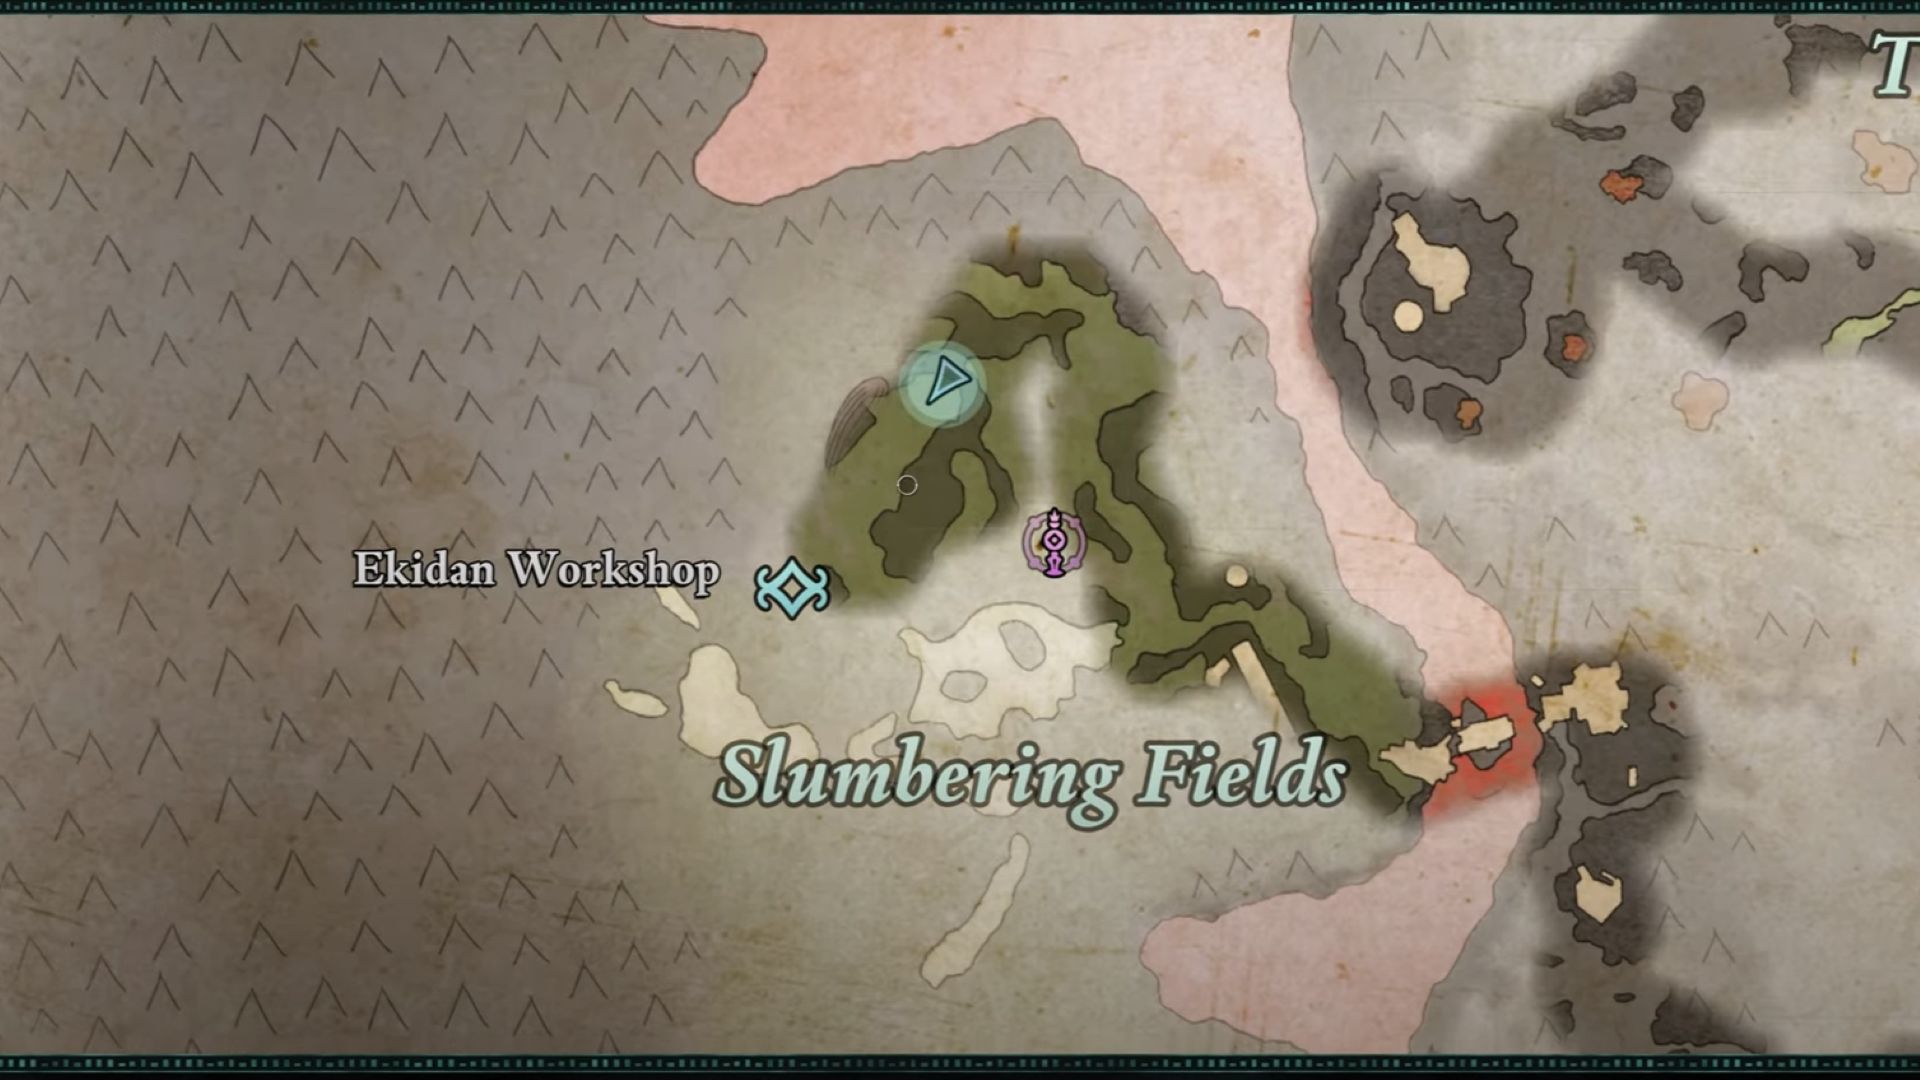
To find this part of the totem, head to the Slumbering Fields and then reach the arch directly below the north of the fast travel point there. Then take a left and climb onto the small rock formation there and then proceed to the one next to it. At this point, you will notice some ruins; climb it, and the Hunter’s Arrows of Slaying will be there inside a chest.
The Wolf’s Pelt Trophy
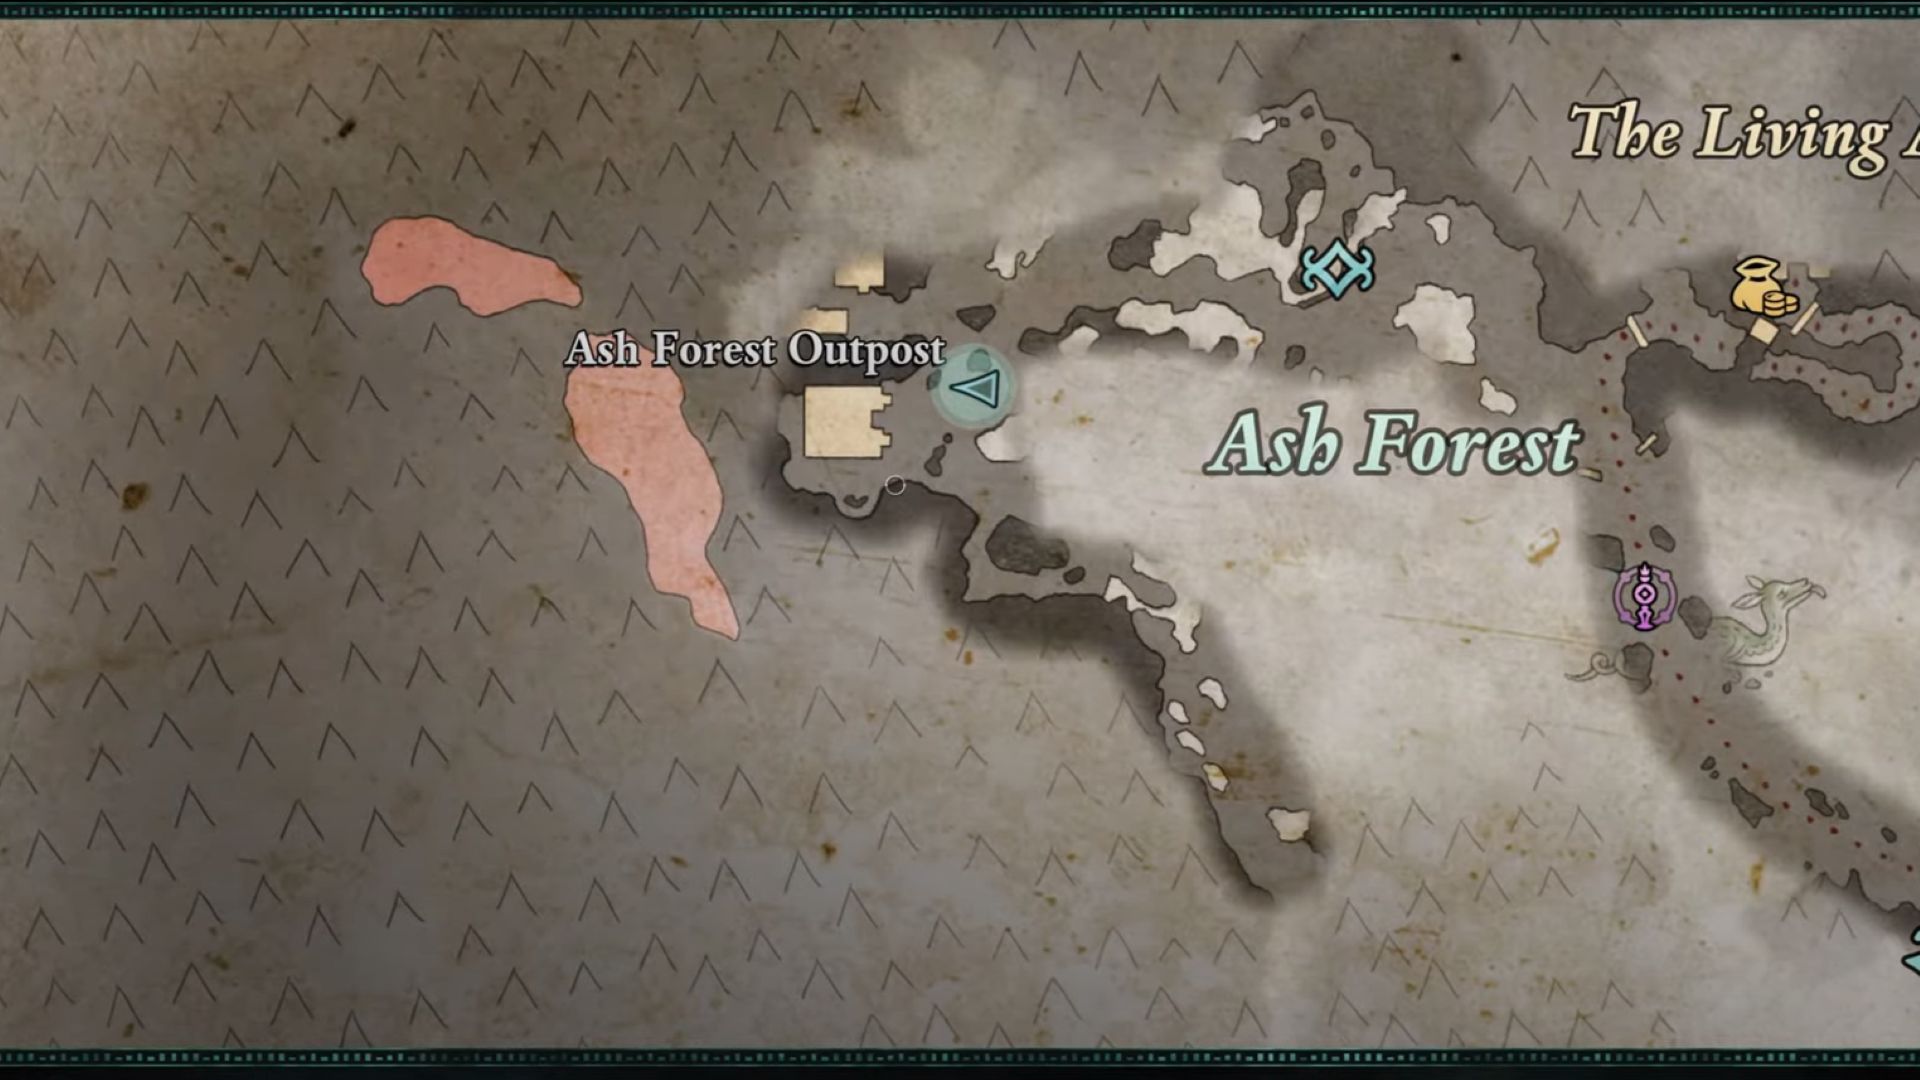
We have ventured to the northeast of the map during our previous journeys. But to find the next item on the list, we must go to the far northwest of Galawain’s Tusk. This time, the first location that you must reach is the Ash Forest. Head to the left side of the building and climb the rocks to reach the outpost’s roof. You will find the Wolf’s Pelt Trophy on the ground of the roof.
The Hunter’s Arrows Of Seeking
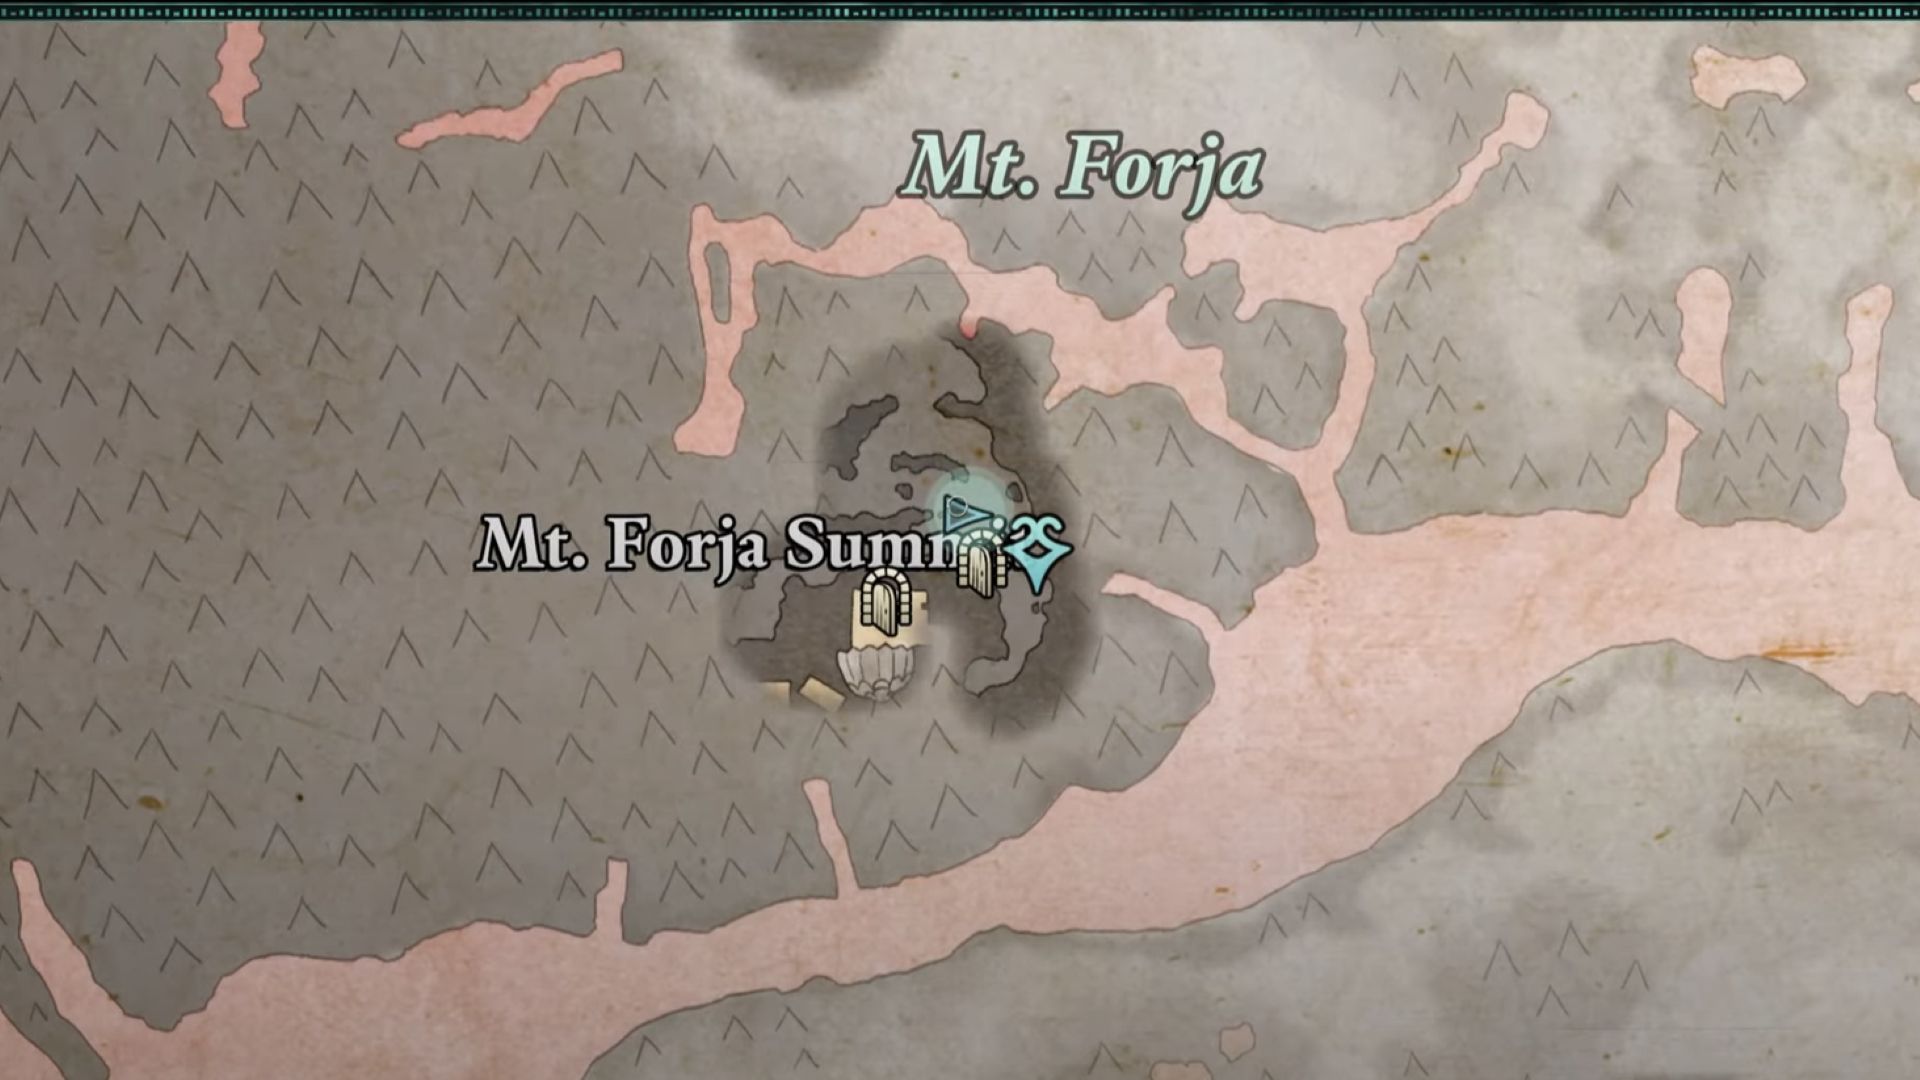
In order to find the final totem in the list, you must reach Mount Forja’s Summit. The only way to reach the summit is through the mines filled with enemies. You will normally go there through the main story, but if you have already done that or you want to find the parts of the totem first, head into it. When you have cleared your way to the summit, go to the right and climb up the rocks. The Hunter’s Arrows Of Seeking will be there, wrapped in clothes.
Reward for Each Part of The Totem of Perseverance
You will get different rewards for every part of the totem, and to avoid confusion, we will list them below:
| Totem Parts | Rewards | Effects |
| The Antler Of The Persevering Stag | Quarry To Slaughter | 75% Damage increase to proned enemies |
| The Antler Of Pursued Stag | In Victory’s Rainment | 4% Damage reduction after killing an enemy (Duration: 10 Seconds) |
| The Hunter’s Arrows Of Surviving | Hunting Howl | Second Wind Casts Barbaric Shout |
| The Hunter’s Arrows Of Slaying | Bloodied Hands | Critical Hits deal high bleed accumulation |
| The Wolf’s Pelt Trophy | The Changeling’s Power | +2 Constitution and +2 Might |
| The Hunter’s Arrows Of Seeking | On Victory’s Heels | 20% increase to moving speed after killing an enemy (Duration: 10 seconds) |
So this is the end of the guide. We have told you everything you need to know about the Totem Of Perseverance in Avowed, and we wish you luck in your journey.
Looking For More About Avowed?
Thank you for reading the Totem of Perseverance Mission guide. We provide the latest news and create guides for Avowed. Also, watch Deltia play games on Twitch or visit his YouTube channel!