This solo guide focuses on the key aspects of a Fighter build in Baldur’s Gate 3 (BG3), intended to play solo without companions.

This build page has been updated for the Patch 8 version of Baldur’s Gate 3.
Best Solo Fighter Build Guide
The Fighter class in Baldur’s Gate 3 is one of the best for solo play due to its Improved Extra Attack allowing the most attacks per turn of any class in BG3.
Fighters are the simplest and one of the most powerful classes in Baldur’s Gate 3. For this solo build, we suggest using this class without multiclassing. You gain heavy armour, and martial weapon proficiency, allowing you to use any weapon and gear combination in the game. Moreover, you have incredible per-turn action potential and the Fighter is relatively easy to play.
Unlike group builds, the best Fighter Solo build will emphasize more ranged damage. Both movement and positioning are key for survival. Moreover, you won’t have anyone to heal for you so potions and consumables are vital parts of your build. If you want something simple to play solo, with tons of gear options, the Fighter is for you. Let’s break down all the details of the Solo Fighter build for Baldur’s Gate 3.
Solo Fighter Build Changes in Patch 8 for BG3
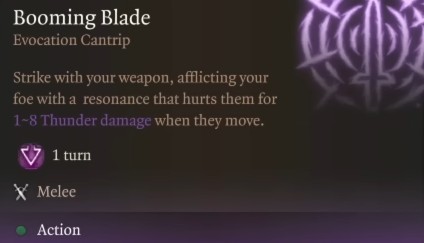
The biggest change to builds in Patch 8 of BG3 is 12 additional subclasses. Specifically to the solo fighter build, the Eldritch Knight subclass becomes much stronger with the addition of Booming Blade Cantrip. This allows you to deal extra thunder damage each action, adding to an overall damage increase for the Fighter.
While the Battle Master subclass is still great, consider the Eldritch Knight now if you want extra spellcasting utility. You can now use 11 levels of Fighter and 1 Wizard to gain even more spellcasting potential. This gives you extra utility and control when playing solo, meanwhile just loosing out on one feat. Additionally, one level of Hexblade Warlock adds a lot of utility with the same premise of losing one feat. We have a alternative build listed below.
Solo Fighter Build Features
The following list presents all the essential solo Fighter Build Mechanics and Features in Baldur’s Gate 3:
- Primary Ability: Strength
- Saving Throws: Strength and Constitution
- Armour Proficiency: Light Armour, Medium Armour, Heavy Armor, Shields
- Weapon Proficiency: Simple Weapon, Martial Weapons
- Battle Master Subclass: Gain four Superiority Dice for Manouevers abilities.
- Second Wind: Heal yourself with a bonus action.
- Action Surge: Gain one additional action, acquired at level 2.
- Extra Attack: You can make an additional free attack after making an unarmed or weapon attack.
- Indomitable: Whenever you fail a Saving Throw, you can roll again, using the new result instead.
Related:
How to Play the Fighter Solo in Baldur’s Gate 3
Baldur’s Gate 3 can be played solo by either opting to disregard companions or recruiting them and later dismissing them to your camp. Although playing a Fighter build solo presents a challenging experience, it is possible to complete the entire game solo on Tactician difficulty.
Below are some general tips on how to play the best Fighter build in BG3 Solo:
- Loot Everything: You will need a lot of gold to buy consumables, potions, and ammunition so loot and sell constantly.
- Crafting: Elixirs and potions are vital, and you need to purchase materials when trading for crafting.
- Reach Level 5: Spend the early part of the game completing every quest to reach level 5 where your power dramatically increases.
- Sell Often: Your carrying capacity will be limited so sell often, and store excessive items in your traveler’s chest.
- Stealth: Start combat in stealth if at all possible to trigger the Surprise status effect.
- Consider Illithid Powers: While it can come with an altered appearance, the powers are powerful and can help you.
- Oils + Elixiris: Combine both oils/coatings and Elixir during combat for a dual benefit.
- Persuasion: Try to avoid combat through dialogue if possible.
In summary, solo can be a difficult and rewarding experience. Our opinion is, that early in the game it can be a struggle to survive. As you reach levels 5 and 11, you dramatically increase your power. Take your time during the transition period to find the best armor, items, gear, and consumables. Also, spend time selling, trading, stockpiling, and crafting items. We will explain more about these topics throughout this guide, Best Baldur’s Gate 3 Solo Fighter Build.
Character Creation
| Category | Selection |
|---|---|
| Character | Origin – Custom Character |
| Race | Half-Orc |
| Class | Fighter |
| Subclass | Battle Master |
| Background | Soldier |
| Ability Score | STR: 16 DEX: 14 CON: 16 INT: 8 WIS: 10 CHA: 10 |
| Skill Proficiencies | Acrobatics, Perception |
Race

The best race choice for a solo Fighter build in Baldur’s Gate 3, is the Half-Orc or Duergar. The Half-Orc’s innate abilities, including enhanced critical damage, resilience, and intimidation. The Duergar Dwarf Enlarge Spell and Invisibility, aiding in damage and defensive capabilities. Lastly, Githyanki makes a great race for extra mobility and skill proficiency.
Here is the best race choice for a solo Fighter build in Baldur’s Gate 3:
| Half-Orc | Duergar Dwarf |
|---|---|
| Intimidation Skill Proficiency | Enlarge Spell |
| Relentless Endurance | Invisibility Spell |
| Darkvision (12m) | Superior Darkvision (24m) |
| Savage Attacks | Duergar Resilience |
Ability Score
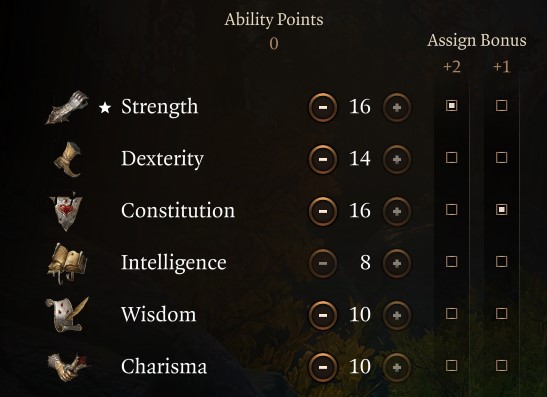
The Best Ability Score for a solo Fighter Build is 16 Strength, 16 Constitution, and 14 Dexterity. Having high Strength increases our melee damage and the likelihood to hit. Constitution is helpful for more health, while Dexterity helps with initiative and ranged weapons attacks. The downside of this split is weak conversation and dialogue skill proficiencies. The positives are optimal combat power with melee and ranged attacks.
Below is the best ability score for a solo Fighter in Baldur’s Gate 3:
- Strength – 16
- Dexterity – 14
- Constitution – 16
- Intelligence – 8
- Wisdom – 10
- Charisma – 10
It’s important to land on even numbers vs. odd because odd won’t give you any bonuses. Only even numbers give you an additional +1 score to an ability modifier. However, you can increase your ability score via a quest in Act 1. Make sure to check out our Permanent bonus guide on how you can boost your ability score through quests.
Background & Skills
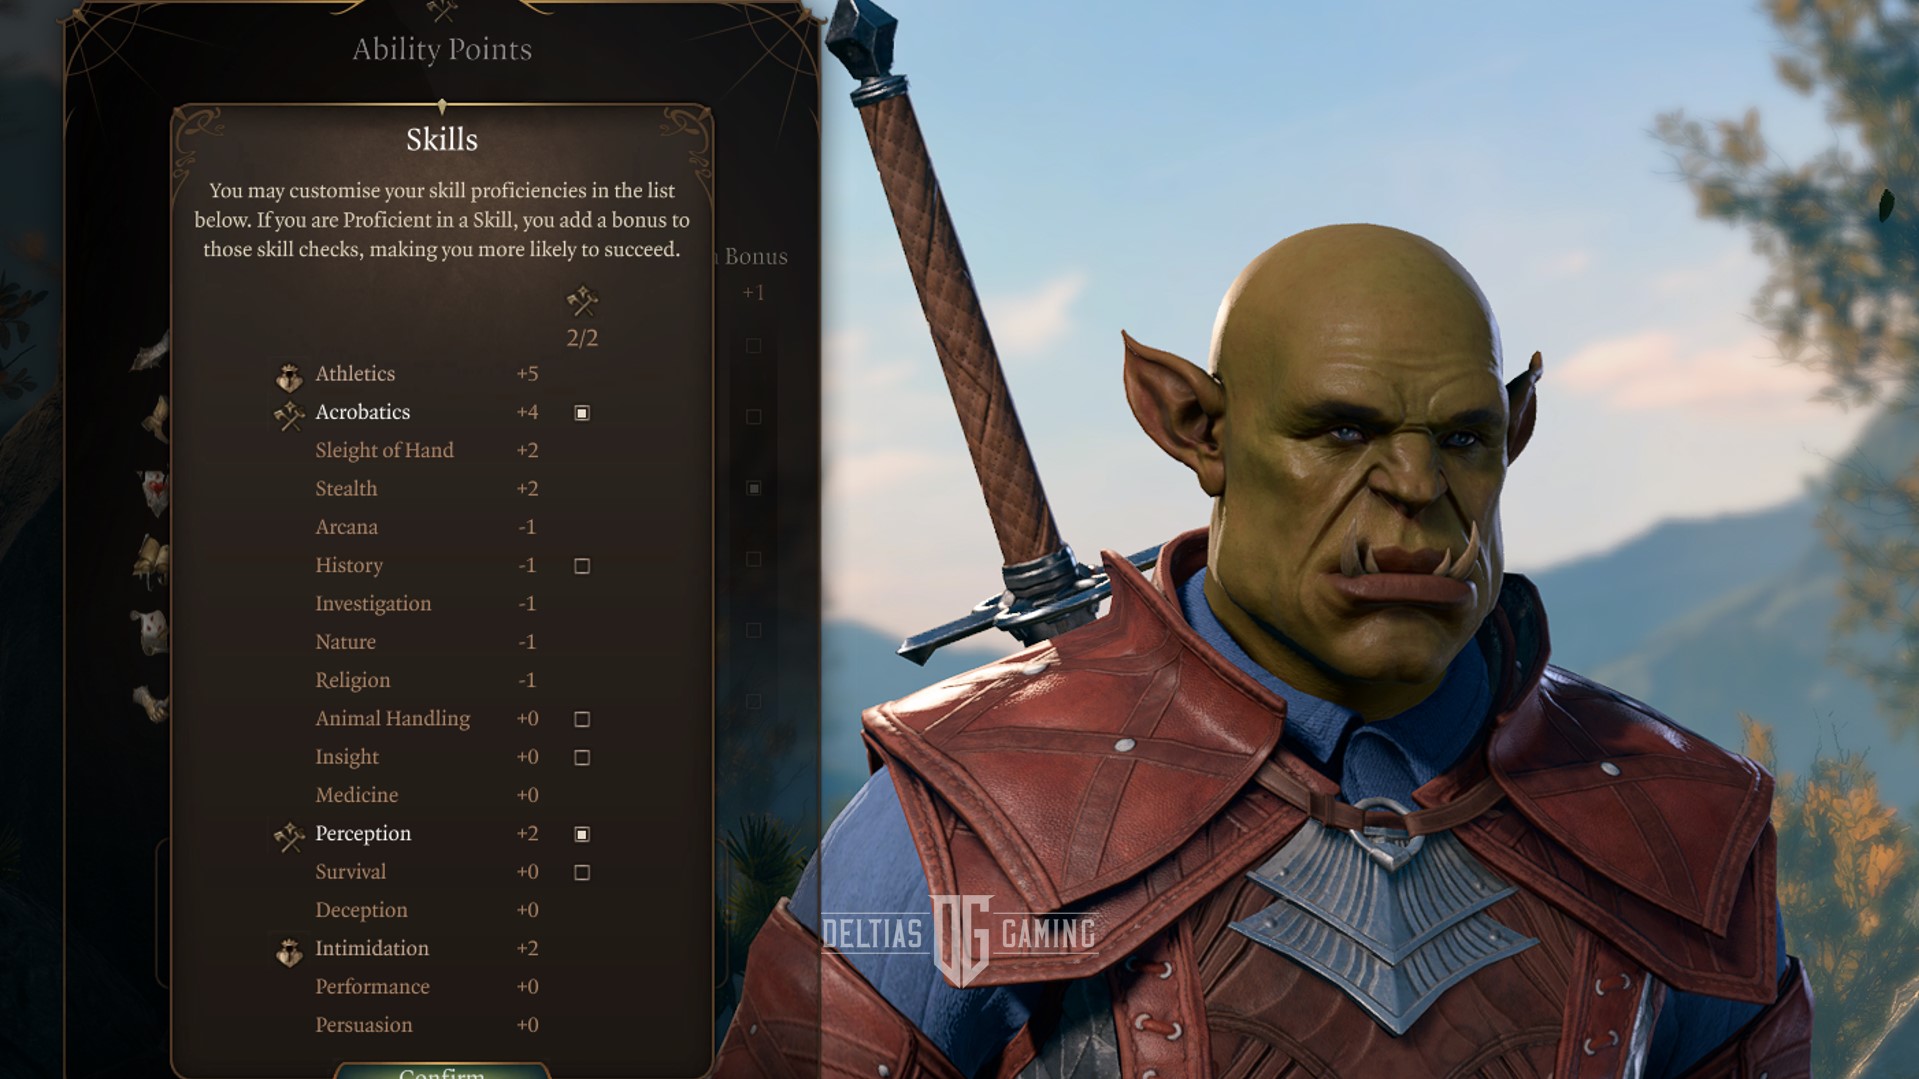
The best Background for a solo Fighter is the soldier because of proficiency with Athletics and Intimidation. Backgrounds in Baldur’s Gate 3 are a way to represent your character’s backstory and give them some starting skills and abilities.
Acrobatics and Perception are the best skills for the solo Fighter because they complement your build when exploring the environment.
Solo Fighter Illithid Powers
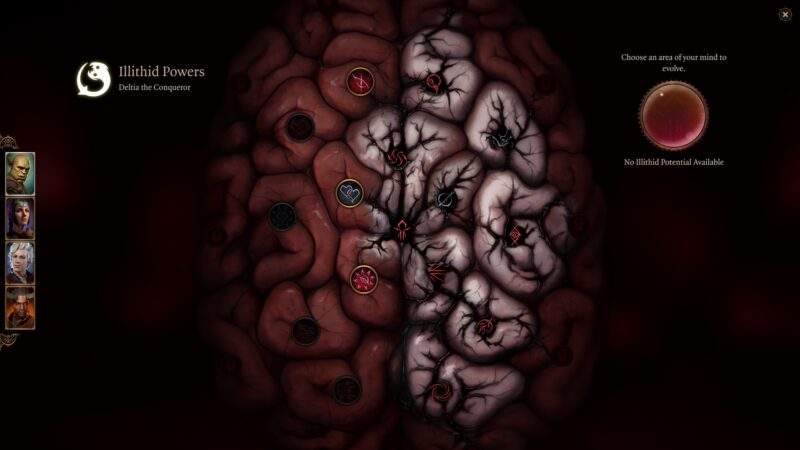
Illithid Powers are unlocked later in the game when you learn more about the Mind Flayers and Tadpoles. You can gain jars of Mind Flayer Parasite Specimens, and consume them to gain one point. This is essentially another skill tree advancement with some very strong powers. If you decide to advance this skill line, these are the choices we suggest.
Here are the best Illithid Powers for the Solo Fighter Build:
| Illithid Powers | Description |
|---|---|
| Luck of the Far Realms | When you make a successful Attack Roll against a foe, you can change that hit into a Critical Hit. |
| Cull of the Weak | When you bring a creature down to fewer hit points than your number of evolved Illithid powers, it dies and all nearby creatures take 1-4 Psychic damage. |
| Psionic Backlash | When an enemy within 9m casts a spell, you can use your reaction to inflict ld4 Psychic damage to the caster per the spell’s level. |
| Blackhole | Area-based suck-in that slows targets. |
| Repulsor | Massive area knockback that can hit friendlies. |
| Charm | This is the priority power you want to obtain because you can force enemies to attack something else. |
Related:
Best Solo Fighter Build – Level Progression in Baldur’s Gate 3
| Level | Class | Selection |
|---|---|---|
| 1 | Fighter | Great Weapon Fighting |
| 2 | Fighter | – |
| 3 | Fighter | Subclass: Battle Master, Disarming Attack, Pushing Attack, Trip Attack |
| 4 | Fighter | Feat: Alert |
| 5 | Fighter | – |
| 6 | Fighter | Feat: Great Weapon Master |
| 7 | Fighter | Precision Attack, Riposte |
| 8 | Fighter | Feat: Ability Improvement +2 STR |
| 9 | Fighter | – |
| 10 | Fighter | Evasion Footwork, Sweeping Attack |
| 11 | Fighter | – |
| 12 | Fighter | Feat: Ability Improvement +2 STR |
Alternative Solo Build – Spellcaster Fighter
For solo Fighter builds that want more spellcasting potential, take 1 level of the Warlock and select the Hexblade subclass. The Warlock Hexblade gives you extra bonus action utility, two good spells, and a powerful range cantrip. Even though it’s a Charisma class, the Warlock one level dip adds a lot of utility for the Solo Fighter at the expense of a feat. Your feats should be enough to reach 20 strength and Great Weapon Master. Take 17 in character creation if you get Auntie Ethel’s bonus in Act 1. This combination gives you great range, melee damage, and utility playing the Fighter build solo.
| Level | Class | Selection |
|---|---|---|
| 1 | Fighter | Great Weapon Fighting |
| 2 | Fighter | – |
| 3 | Fighter | Subclass: Eldritch Knight, Booming Blade, Friends, Shield, Thunderwave, Longstrider |
| 4 | Fighter | Feat: +2 STR, Chromatic Orb |
| 5 | Fighter | – |
| 6 | Fighter | Feat: Great Weapon Master |
| 7 | Fighter | Darkness, Gust of Wind |
| 8 | Fighter | Feat: Savage Attacker, Misty Step |
| 9 | Fighter | – |
| 10 | Fighter | Firebolt, Protection from Good and Evil |
| 11 | Fighter | Scorching Ray |
| 12 | Warlock | Hexblade Subclass, Eldritch Blast, Toll of the Dead, Hexed, Hellish Rebuke |
Level 1

At level 1, you should follow our Solo Fighter Build character creation steps. Select the correct background, race, skills, and ability score focusing on Strength and Constitution. You pick a subclass at level 3, so expect a slow start in terms of performance. The level 1 Fighter unlocks two class features:
- Second Wind: You regain 1d10 + Fighter Levelhit points.
- Great Weapon Fighting: When you roll a 1 or 2 on a damage die for an attack with a Two-Handed melee weapon, that die is rerolled once.
Second Wind is a helpful healer at the start of the game. Like potions, this uses a bonus action to heal and replenish on short rest. In the game’s early stages, this helps when playing solo so you can hoard potions. One of the weaknesses of this build is the lack of additional bonus actions and healing. Thus, you need to be careful when using a bonus action per turn and typically save it for a heal via potion or Second Wind.
Next, we have Great Weapon Fighting which helps keep damage consistent when using a Two-Handed melee weapon. The Fighter is best using a Two-Handed Greatsword, though solo we want to use a bit more range. However, it’s worth taking this and still having the Fighter offensive firepower to eliminate targets.
Fighter Priorities
At the start of the game, you will feel weak until level 5 where you gain Extra Attack. Your priority for the solo Fighter build is locating heavy armour, a two-handed Greatsword, and a Longbow or Heavy Crossbow. Lae’zel, who you meet in the prologue has powerful medium armour with 15 AC along with a Heavy Crossbow. Since you’re playing solo, take this from here and equip it. This will set you up until you can reach Hollowed City in Act 1 with the Best Baldur’s Gate 3 Solo Fighter Build.
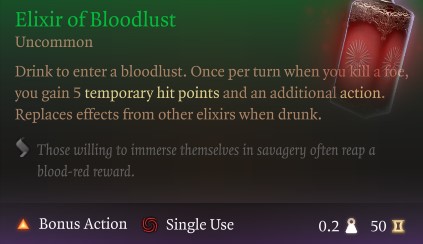
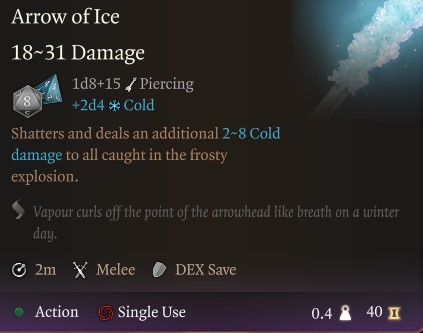
From this point, you need to hoard potions, arrows, and consumable potions. The advantage of the Fighter is not needing constant long rest. Elixir of Bloodlust or Colossus lasts until a long rest and drastically increases your damage. The Arrows of Ice and others are particularly helpful when you are unable to stun or knock enemies prone early on. You will gain more tools to aid in stuns, but play a bit more range than your typical Fighter at first. Loot, and sell everything because those consumable items are extremely powerful at level 1 until finishing the game.
Level 2

At level 2, the Fighter unlocks the ultra-powerful class skill Action Surge! When activated, Action Surge gives you an additional action. You can only use this once per short rest, but it’s one reason the Fighter is obscenely strong early on, and even late in the game.
Since you can only use this one per fight, it’s important to get the timing down. Typically, if you can stun or kill enemies, use Action Surge on the first turn. You don’t want to use it when you are closing in range and cannot reach the target in the melee range. Your heavy crossbow or ranged weapon is mainly used to stun targets that you cannot reach through movement. When you or enemies have engaged and are in close range, use an action, and action surge for a boost in damage.
Level 3
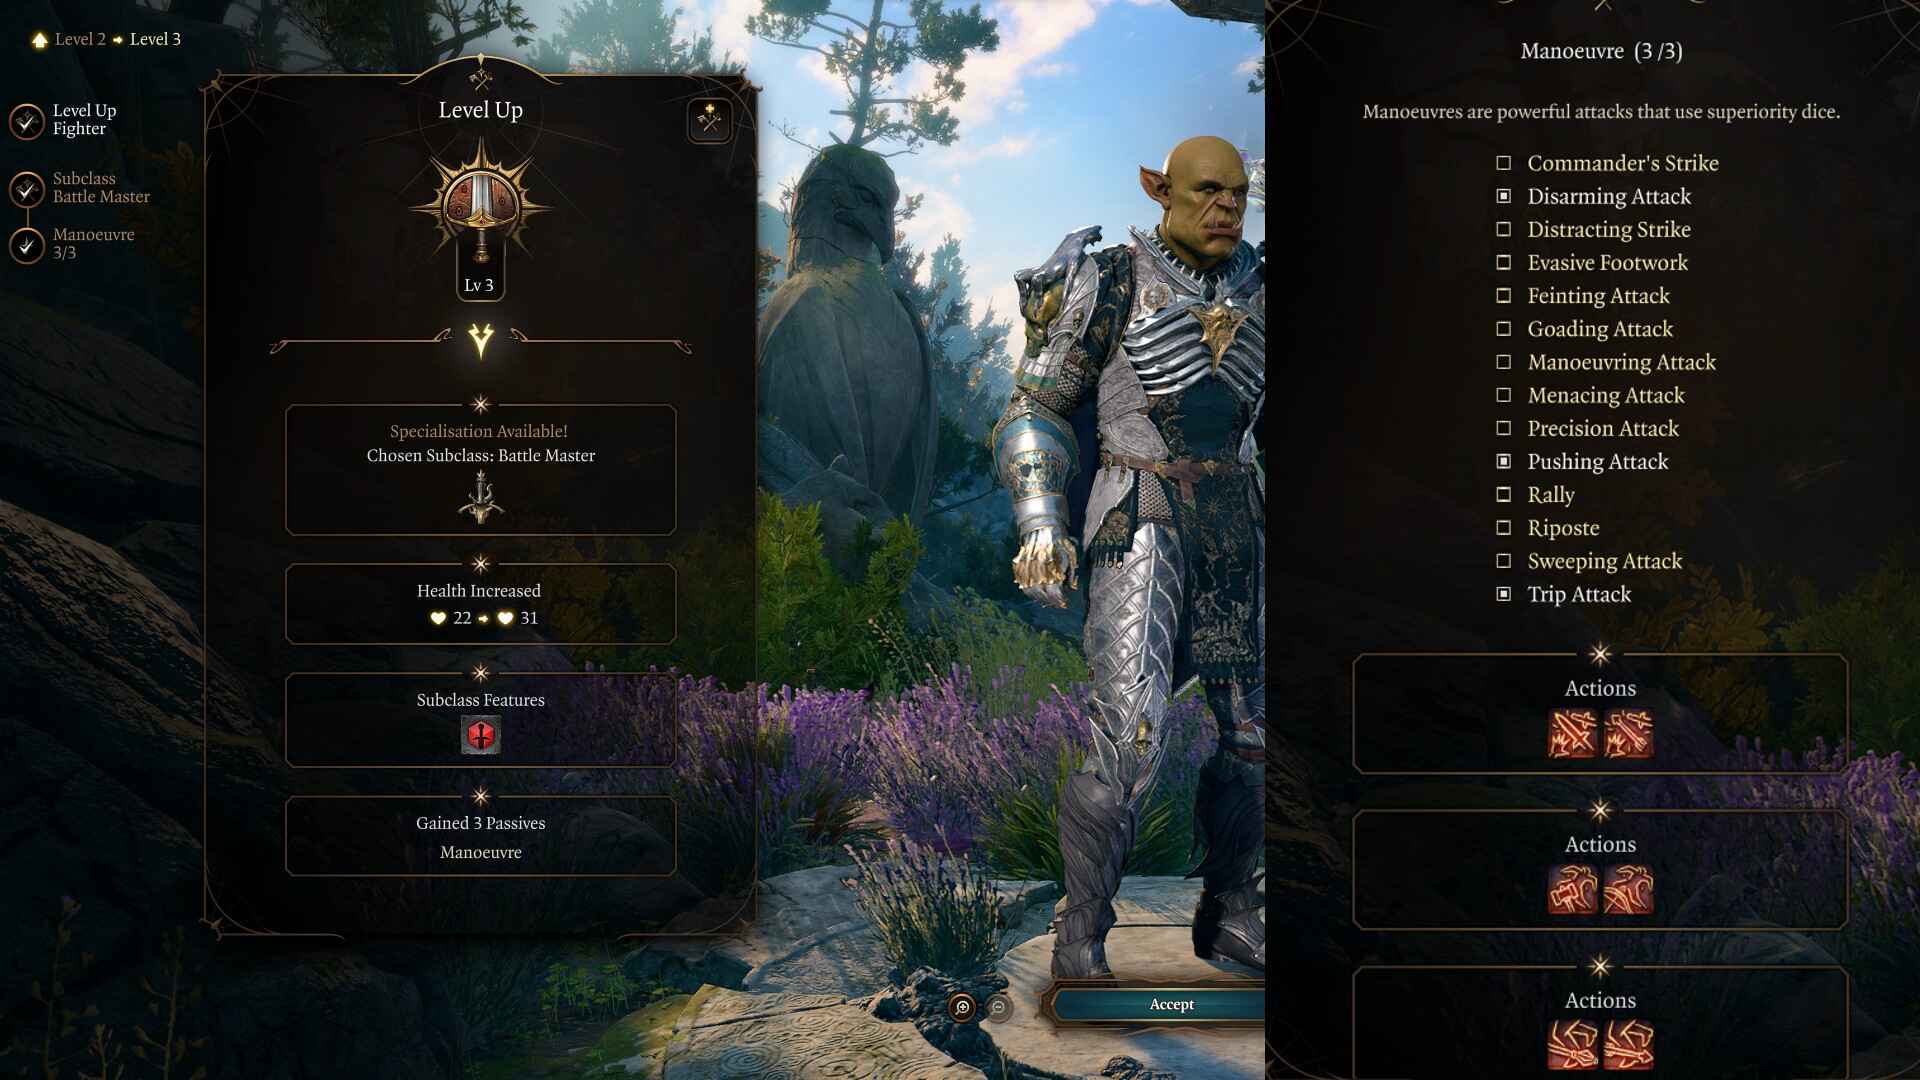
At the third level, you gain access to your subclass, and for this build, we recommend selecting Battle Master. This subclass introduces a new mechanic called Superiority Dice, represented by 1d8 dice. Consider these as additional resources that can be replenished during a short or long rest. You will have 4 Superiority Dice at this point, so you can use these abilities frequently. Essentially, maneuvers are attacks that do your normal damage at range or melee, but an extra effect is added. At this level, you can pick 3 maneuvers, which are attacks that consume Superiority Dice. We suggest the following:
- Disarming Attack: Spend a superiority die to make an attack that deals an additional 1d8 damage and possibly forces the target to drop the weapons they are holding.
- Pushing Attack: Spend a superiority die to make an attack that deals an additional 1d8 damage and possibly pushes the target back 4.5m.
- Trip Attack: Spend a superiority die to make an attack that deals an additional 1d8 damage and possibly knocks the target Prone.
The three maneuvers chosen are all selected for crowd control. When playing solo, you want to stun or disable the opposition to limit incoming damage. Disarming Attack potentially drops an enemy’s weapons. This attack is vital when facing off against Githyanki in Act 1 or anyone who relies on weapon-based damage. Next, Pushing Attack acts as a knockback that can send enemies off ledges for instant kills. Lastly, Trip Attack is a simple stun that knocks enemies prone.
At level 3, you should start to have some control over maneuvers in combination with Action Surge. Your priority is to stun or disable the highest damage producer. Moreover, target spellcasters who can stun or disable you as they pose the biggest threat playing solo.
Level 4

At level 4, the Fighter gets to choose a feat. We suggest taking Alert. Alert gives you a +5 bonus to Initiative and you cannot be Surprised. This seems like a weak feat, but it is not. The Fighter has only 14 Dexterity at this point, meaning you are likely to go middle or back of the attack order. This makes you vulnerable to incoming damage, stuns, and status effects. Ensuring you will go earlier in attack order helps prevent you from being disabled.
Other feats at this level are more damage-producing, but solo you need to play defensive especially at first. After we select Alert, the Fighter will gain additional feats at levels 6, 8, and 12. This is helpful because we can take Great Weapon Master at level 6, and two +2 Strength at 8 and 12. You should reach the maximum level in BG3 of 12 with 20 Strength, high Initiative, and Great Weapon Master Two-Handed damage feat. Next level you will become much stronger and feel the build has great potential at level 5 and beyond.
Level 5

At level 5, the Fighter unlocks Extra Attack. Extra Attack gives you two attacks per action. The fighter isn’t the only class to get his feature, but you can combine Extra Attack with Action Surge, and battle maneuvers. With the Alert feat, you are likely to go first, and you can shoot arrows to knock prone, disable, or knock off ledges. This combination we’ve set up so far ensures a strong turn one, which is the cornerstone to surviving tough encounters solo.
At or around this level, you should be able to start exploring harder content in the Underdark. Moreover, level 5 or 6 is when you transition into Act 2 or the Githyanki Creche. You want to spend some time gathering material, stockpiling gold, and acquiring the best items in Act 1 before venturing forth.
Level 6

At level 6, we take one of the best feats in the game Great Weapon Master. Below is what Great Weapon Master (GWM) does once unlocked:
- Great Weapon Master Bonus Attack – When an attack with a melee weapon lands a Critical Hit or kills a creature, you can make another melee weapon attack as a Bonus Action that turns.
- Great Weapon Master All In – When attacking with a Two-Handed or Versatile melee weapon (in both hands) that you are Proficient with, Attack rolls take a -5 penalty, but their damage increases by 10.
Great Weapon Master Explained
The first part of GWM gives you an extra attack upon a kill or critical strike. Thus, the turn-one strategy is to close the distance, kill, disable, or crit to trigger an additional bonus action attack. Keep in mind, that this bonus action attack is melee, so you will likely need to be close to another target to capitalize on the free attack. Potions of Fly are very helpful for this early in the game where movement can be difficult.
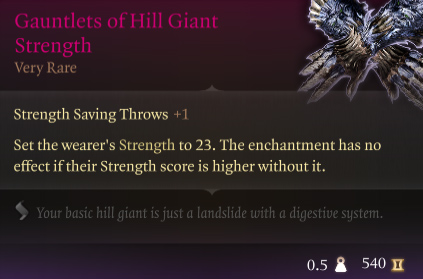
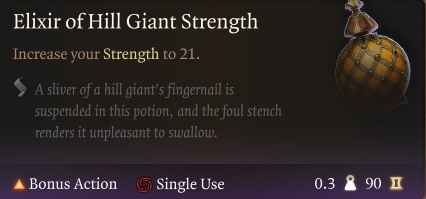
Next, we have the All In feature, which increases your damage at the expense of the chance to hit. You can use consumables like Elixir of Heroism which grants you Bless or Elixir of Hill Giant Strength which gives you 21 Strength. Either more Strength or better attack rolls offsets this lower chance to hit. You can also toggle the GWM All In feature off during combat via passives on your toolbar. This is helpful if you must land an attack to kill a 1-health target.
From this point, we have everything we need to do massive damage with the Fighter. You want to control targets with Superiority Dice Battle Manevours and melee GWM for huge damage. At this point, your goal is to increase strength through ability score improvements.
Level 7

At level 7, the Fighter gains two more Manoeuvres. These aren’t as impactful as early selections, but here are the suggestions:
- Precision Attack: Spend a Superiority Die and add its result to an Attack Roll.
- Riposte: When a hostile creature misses you with a melee attack, expend a superiority die to retaliate with a powerful attack that deals an additional 1d8 damage.
- Superiority Dice: You gain +1 Superiority Die totaling 5.
With Precision Attack you can passively consume a dice to increase damage. This doesn’t require an action or bonus action to trigger, thus makes a good way to do a bit more damage when critical. Riposte retaliates by doing free damage when someone attacks and misses you. This is helpful if you have AC and evade attacks frequently for free damage. Your gameplay remains unchanged at this level, and we suggest saving maneuvers for crowd control utility in general.
Level 8
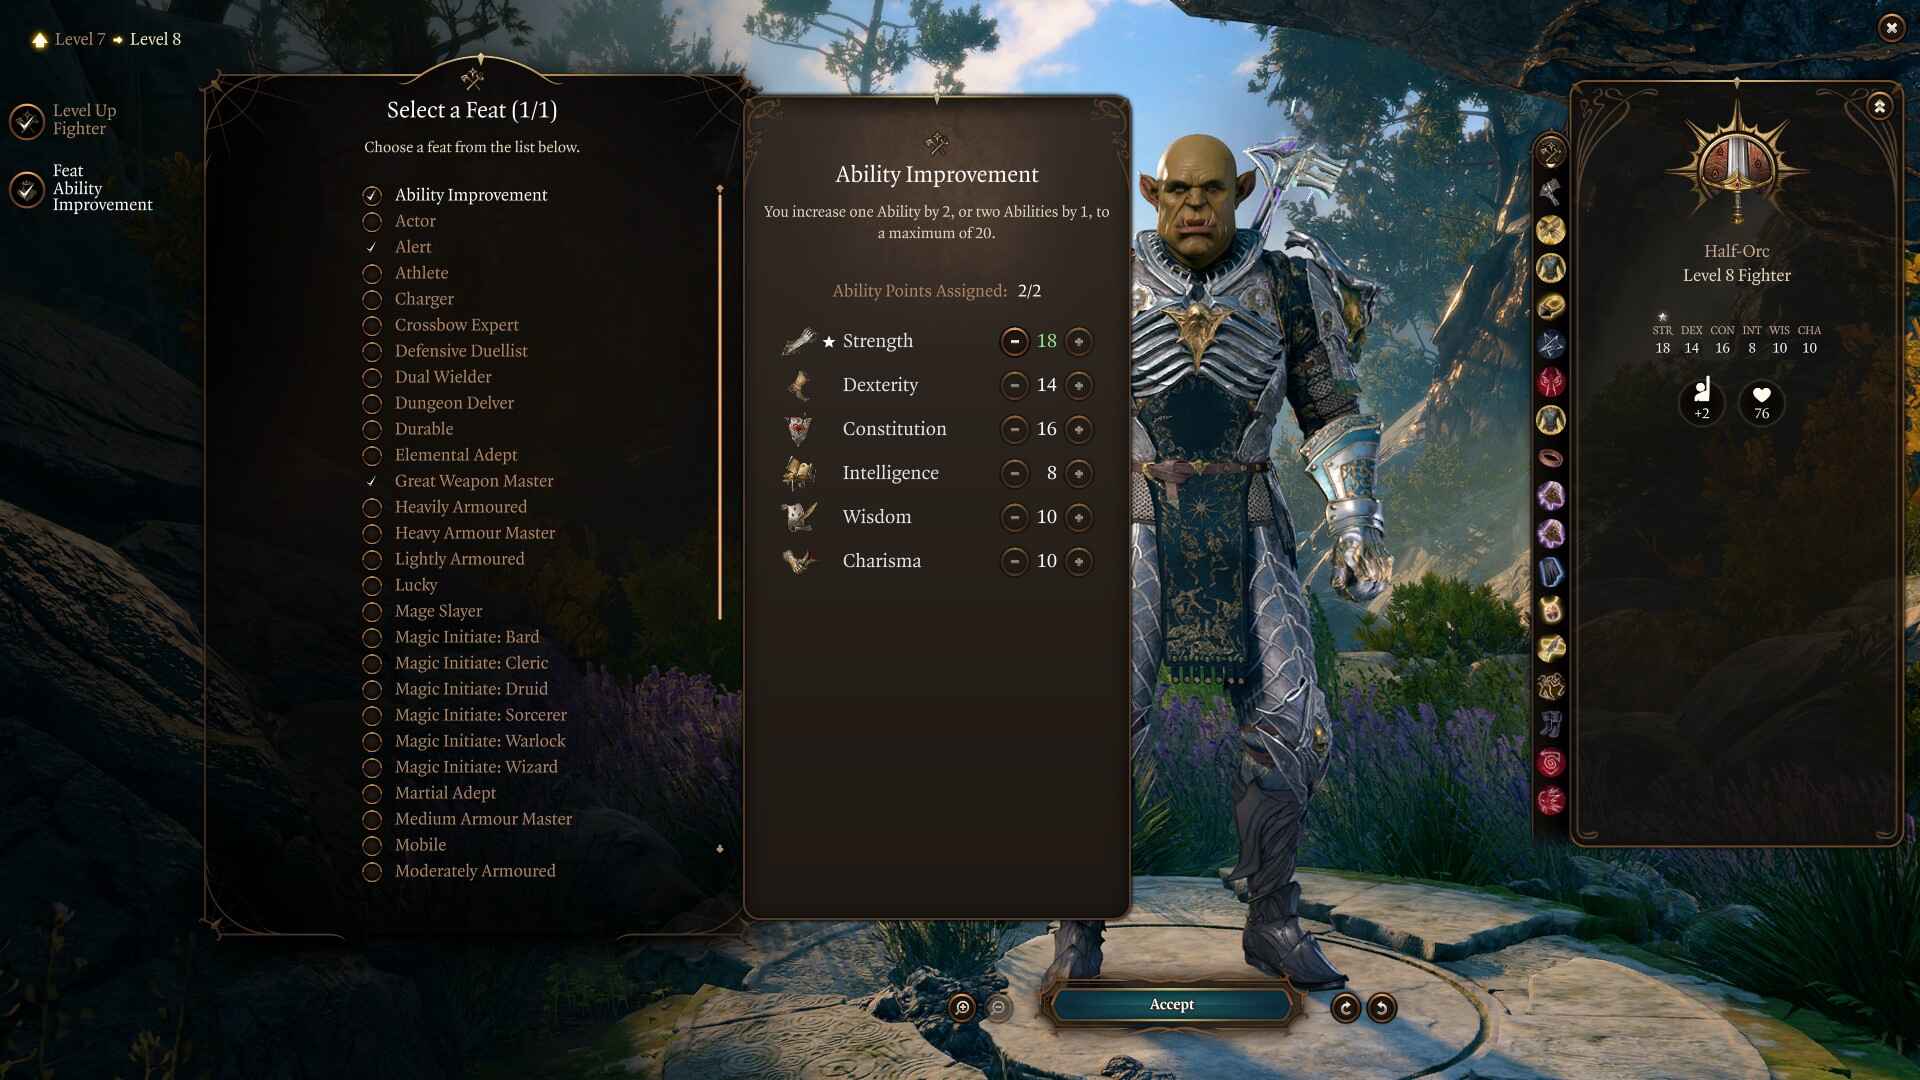
At level 8, you want to increase strength to 18. With one more feat, you can increase to 20 which is the maximum strength through ability score. This will keep your build simple and effective. You can use consumables and items to push past 20 Strength. These are typically at the end game in the gear chart below.
Level 9

At level 9, you unlock the Indominatble class feature. Whenever you fail a Saving Throw, you can roll again, using the new result instead. This can be done once per long rest and is helpful if you need to avoid an incoming stun or crowd control effect.
At this stage, the Fighter levels seem weak and lackluster. However, you want to stay in the class levels for Improved Extra Attack at level 11. This gives you a third attack per action, allowing you to attack more than any other class in BG3. If you feel inclined to multiclass, consider the Rogue and Thief. While it might sound odd, with the Thief Subclass you gain another bonus action. Moreover, those bonus actions can be used to dash and other utility mobility skills. This will free you up to use bonus action for Great Weapon Master and a potion.
When in doubt, keep it simple and stick with the heavy armored Fighter and improve extra attack at level 11.
Level 10
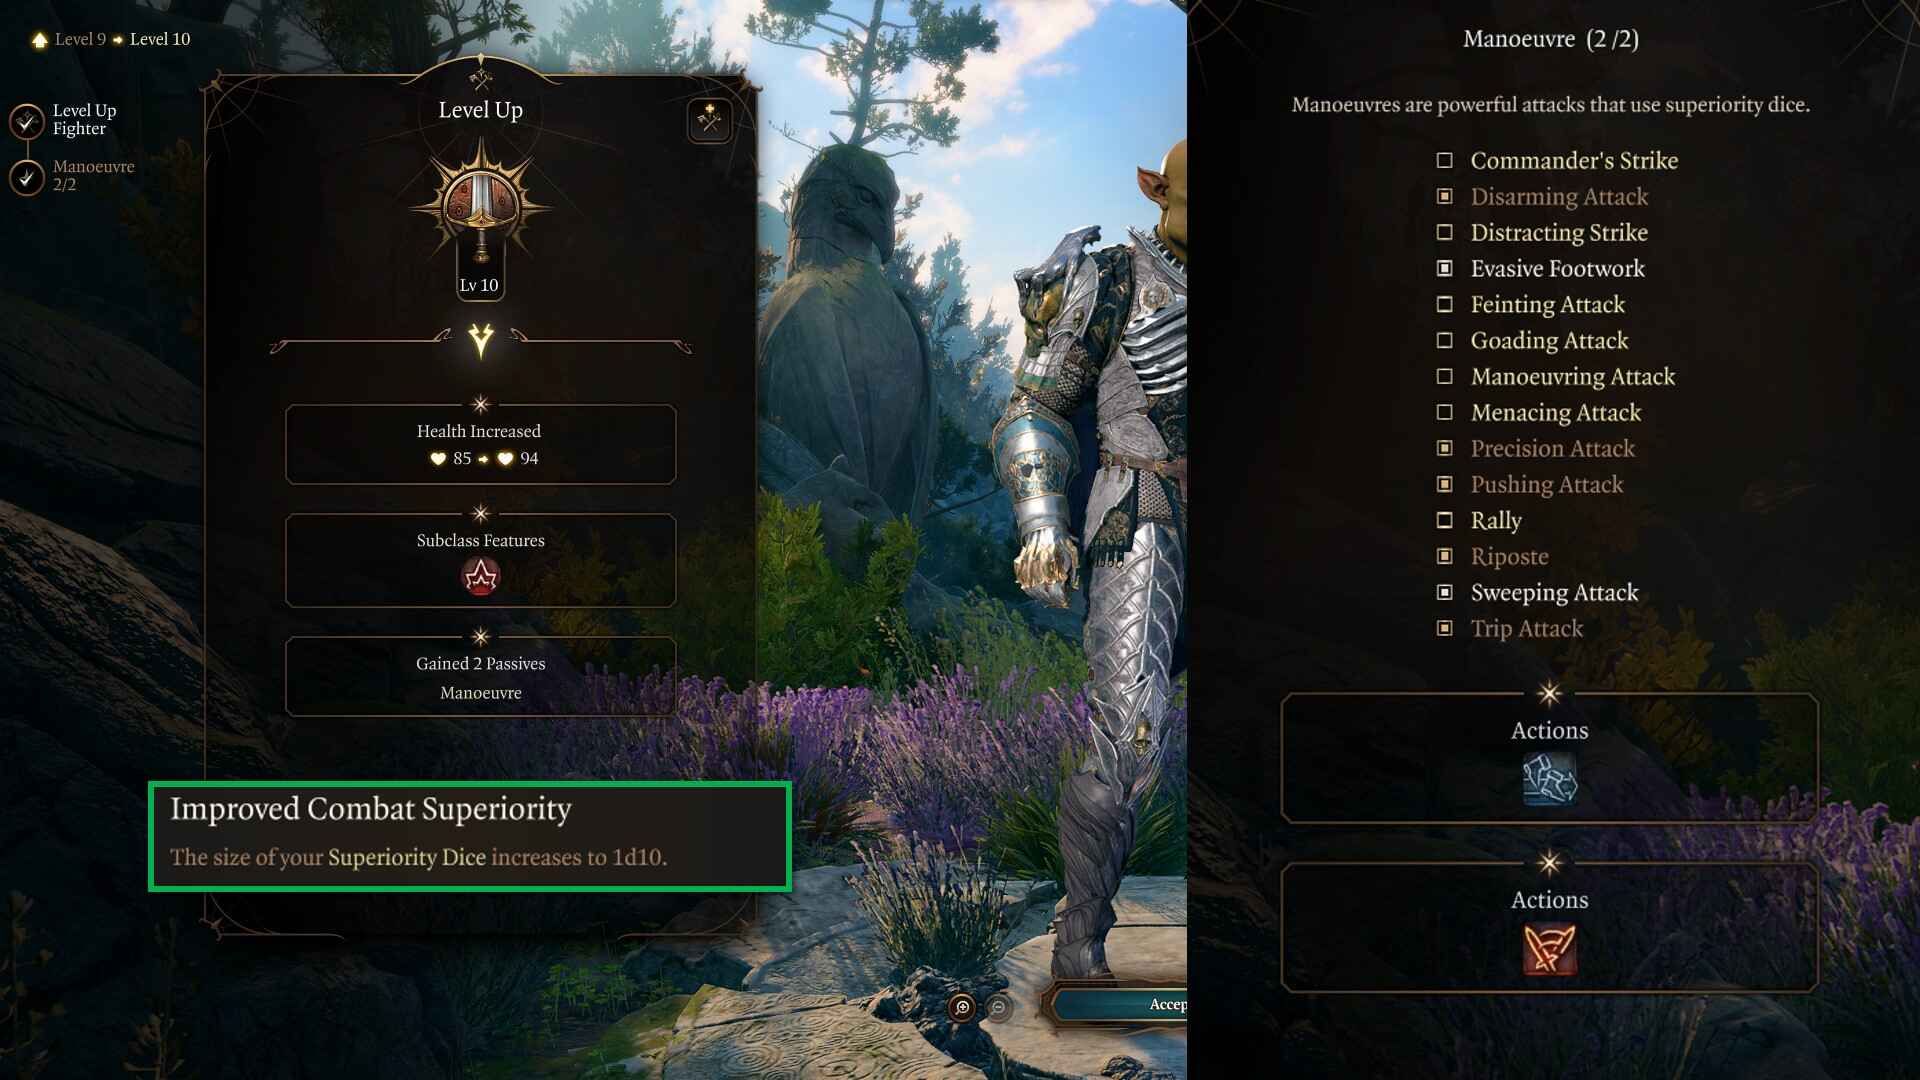
At level 10, the Battle Master Fighter unlocks Improved Combat Superiority. This subclass feature increases the size of your Superiority Dice increase to 1d10. This makes your Manoeuvres more impactful. You can also choose two more Manoeuvres, below are our suggestions:
- Evasion Footwork: You can evade attacks by imposing Disadvantage on melee attacks against you for a round.
- Sweeping Attack: Swing your weapon in a rapid, sweeping arc to attack multiple enemies at once. Roll your superiority die for damage.
When you need to evade attacks, Evasion Footwork can be a helpful maneuver. You want to use this when surrounded and expecting heavy incoming damage. The advantage of this ability is it doesn’t require an action or bonus action. Prior to ending your turn, activate if you need to survive one more time.
The Sweeping Attack maneuver is helpful because it does area-based damage. You strike in a cone, 2 meters in front of you hitting all targets in the area. Area damage, or AOE is what the FIghter lacks and this can help augment that weakness.
Level 11

At level 11, you unlock Improved Extra Attack. This gives you two additional attacks per action. In essence, one action equals 3 attacks for you at this stage. You want to use this to your advantage. Combine Improved Extra Attack with Bloodlust Elixir, Great Weapon Master Feat, and Action Surge for incredible damage. Here’s an example of what this looks like:
- Action 1: Melee Attack
- Extra Attack 1
- Extra Attack 2 (crit or kill)
- Great Weapon Master bonus action attack
- Another Action via Elixir of Bloodlust, Attack 1
- Extra Attack 1
- Extra Attack 2 (at the end use Action Surge)
- Attack 1 via Action Surge
- Extra Attack 1
- Extra Attack 2
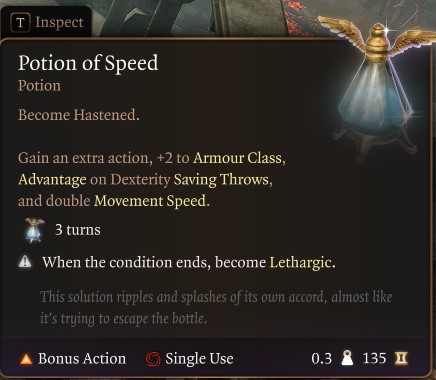
As you can see, this is 10 attacks in one turn without Haste. If you have a Haste spell or Potion of Speed, you can add another 3 attacks on top of that! This is why the Fighter is insanely strong and why you don’t want to multiclass it.
Level 12
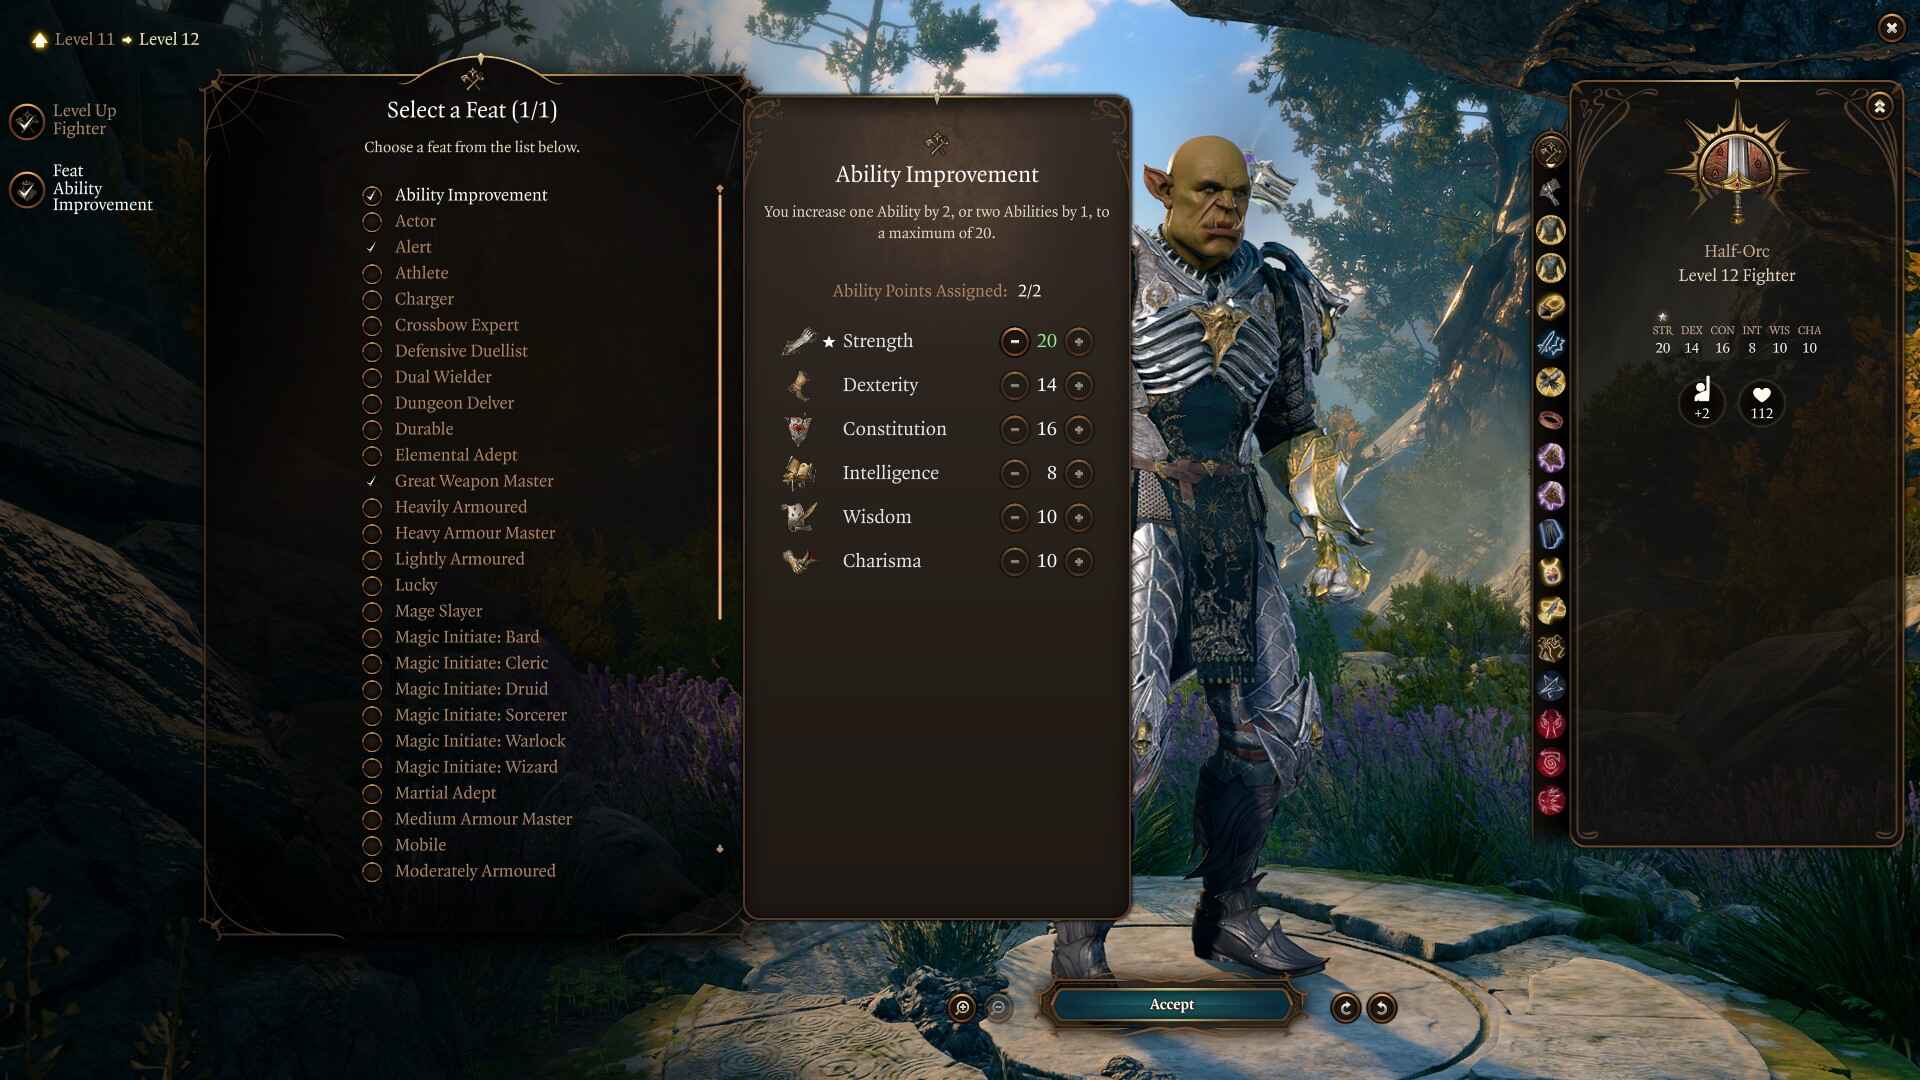
You’ve reached the maximum level with the Best Baldur’s Gate 3 Solo Fighter Build! At this level, we suggest taking +2 to Strength to reach 20. This way you can use other elixirs in combination with high strength. Keep reading below for our suggested gear as a beginner or end game.
Also Check:- BG3 Interactive Map
Best Gear for Baldur’s Gate 3 Fighter Build
In Games like Baldur’s Gate 3, you’ll explore the world, loot chests and your enemies’ dead bodies, and complete quests and all those activities can reward you with useful items, potions, armor, weapons, scrolls, and much more. There are three Acts in BG3, and Best Baldur’s Gate 3 solo Fighter Build Guide includes suggested sets and alternatives for Act 1 and Act 3.
Beginner: Starting the Game
Here’s the best beginner gear, items, and equipment for solo Fighter Build in Baldur’s Gate 3:
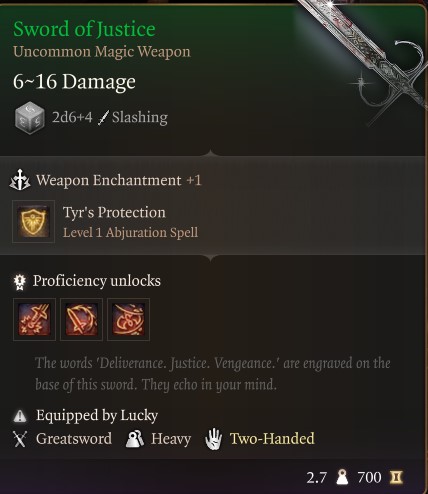
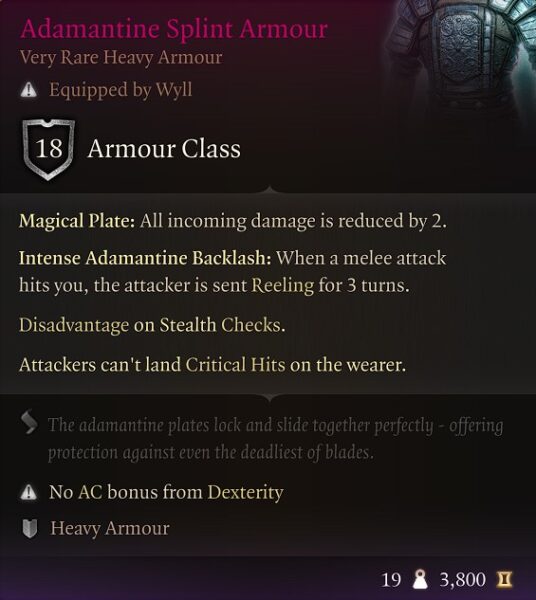
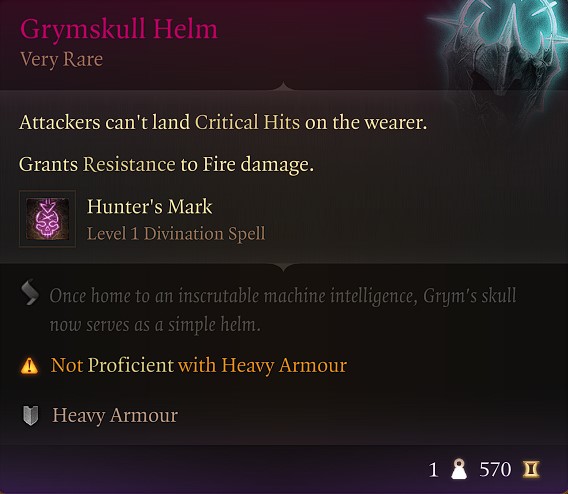
| Gear Slot | Best Gear Item | Effect |
|---|---|---|
| Head | Grymskull Helm | Increase Movement |
| Cape | – | |
| Chest | Adamantine Splint Armour | 18 AC |
| Gloves | Gloves of the Growling Underdog | Advantage on Melee |
| Boots | Disintegrating Night Walkers | Free Misty Step |
| Necklace | Moondrop Pendant | No Opportunity Attacks |
| Ring | Crusher’s Ring | Increase Movement |
| Ring | Caustic Band | Poison Damage |
| Weapon 1 Main Hand | Everburn Blade | 2d6 Slashing |
| Weapon 2 Ranged | Titanstring Bow | Add STR modifier |
- Grymskull Helm: Defeat Grym, a construct boss in The Adamantine Forge (Alternatives Haste Helm, or Cap of Wrath).
- Adamantine Splint Armour: Crafted at Grymforge (Alternatives Chain Mail +1, or Githyanki Half Plate).
- Gloves of the Growling Underdog: Chest behind Razglin’s throne room. (X:295 Y:69) (Alternatives Gloves of Dexterity, or Gloves of Missile Snaring).
- Disintegrating Night Walkers: Obtained in Gyrmforge as part of Free True Soul Nere questline (Alternatives Boots of Striding, Boots of Genial Striding, or Boots of Speed).
- Moondrop Pendant: Sealed chest inside the Owlbear Nest (Alternatives Amulet of Branding, Amulet of Misty Step, or Amulet of Restoration).
- Crusher’s Ring: Can be looted or stolen from Crusher in the Goblin camp (Alternatives Strange Conduit Ring, or Ring of Absolute Force).
- Caustic Band: Obtained from merchant Derryth Bonecloak in the Myconid Colony (Alternatives Fetish of Callarduran Smoothhands, or The Sparkswall).
- Sword of Justice: Looted from Anders near Karlach (Alternatives Silver Sword of the Astral Plane, or Everburn Blade).
- Titanstring Bow: Brem in Zhentarim Hideout Act 1 (Alternatives Bow of Awareness, Hunter’s Shortbow, or Giantbreaker).
Advanced: Endgame
The following table presents the best gear, items, and equipment for the solo Fighter Build in Baldur’s Gate 3:
| Gear Slot | Best Gear Item | Effect |
|---|---|---|
| Head | Helm of Balduran | Self-healing |
| Cape | Fleshmelter | Return Damage |
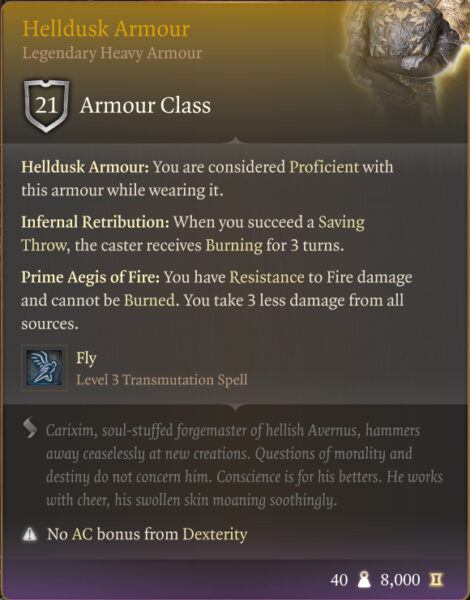
| Chest | Helldusk Armour | 21 Armour Class |
| Gloves | Gauntlets of Hill Giant Strength | 23 Strength |
| Boots | Helldusk Boots | Mobility |
| Necklace | Amulet of Greater Health | 23 Constitution |
| Ring | Killer’s Sweetheart | Auto Crit |
| Ring | Ring Of Regeneration | Self-healing |
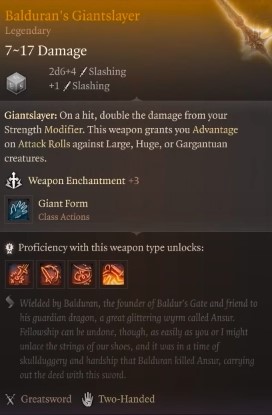
| Weapon 1 Main Hand | Balduran’s Giantslayer | Best Greatsword |
| Weapon 2 Ranged | Gontr Mael | Best Longbow |
- Helm of Balduran: Obtained in Dragon’s Sanctum on an altar X: 636 Y: -964 (Alternatives Helldusk Helmet, Sarevok’s Horned Helmet, or Mask of Soul Perception).
- Fleshmelter: Found in Chest in House of Healing Morgue (Alternative Cloak of Protection).
- Helldusk Armour: Dropped by Raphael in the House of Hope (Alternatives Armour of Devotion, Armour of Persistence, Bhaalist Armour).
- Gauntlets of Hill Giant Strength: Obtained in Archive of the House of Hope (Alternatives Helldusk Gloves, Legacy of the Masters, or Gloves of Soul Catching).
- Helldusk Boots: In a locked chest, Wyrm’s Rock Fortress X: -32 Y: 219 (Alternative Disintegrating Night Walkers).
- Amulet of Greater Health: Found in the House of Hope in Baldur’s Gate City (Alternative Surgeon’s Subjugation Amulet, or Periapt of Wound Closure).
- Killer’s Sweetheart: Obtained from the Gauntlet of Shar in Act 2 (Alternative Ring of Protection, Risky Ring).
- Ring Of Regeneration: Sold by Rolan at Sorcerous Sundries (Alternative Ring of Free Action, Shifting Corpus Ring).
- Balduran’s Giantslayer: Obtained as a reward for completing the Wyrmway trials (Alternatives Sword of Chaos, or Silver Sword of the Astral Plane).
- Darkfire Shortbow: Sold by trader Damon Act 2 Last Light Inn X: -35 Y: 169 (Alternatives Gontr Mael, or Fabricated Arbalest).
Best Consumables, Potions, Ammunition, and Items
The following list is the best consumable items that will aid in our Best Baldur’s Gate 3 solo Fighter Build Guide:
- Elixir of Bloodlust: Once per turn when you kill a foe, you gain HP 5 temporary hit points and an additional action.
- Elixir of Hill Giant Strength: Increases Strength ability score to 21 until Long Rest.
- Potion of Speed: Gain extra action, +2 AC, Advantage on Dexterity Saving Throws, and double movement speed.
- Drow Poison: Weapon poison that adds Constitution Saving Throw or becomes Poisoned and falls Asleep.
- Potion of Flying: Drink to gain a flying speed of 60ft for one hour.
- Elixir of Heroism: Gain 10 temp HP and become Blessed until a long rest.
- Potion of Greater Healing: 4d4 + 4 hit points restored.
- Oil of Accuracy: Coat Weapon. Bonus of +2 in Attack Rolls.
- Elixir of Vigilance: Drink to gain a +5 bonus to Initiative and you can’t be Surprised.
Ammunition and Arrows
The best Ammunition for a Solo Fighter Build is listed below:
- Arrow of Ice: Deals weapon damage + 2d4 Cold and creates ice surface for 2 turns in a 2m radius.
- Arrow of Roaring Thunder: deals weapon damage, knocks back 5 meters if failed strength throw.
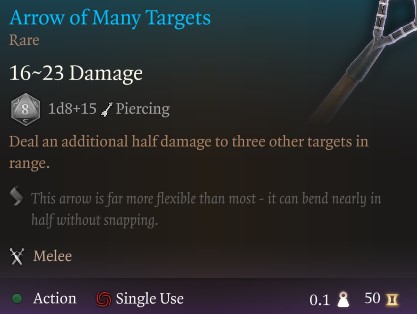
- Arrow of Many Targets: Deals weapon damage and an additional half of that damage to three other targets in range.
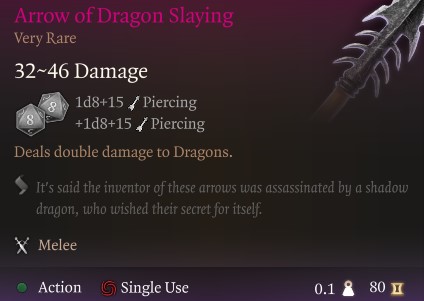
- Arrow of Dragon/Aberration/Humanoid: Deals weapon damage, and double damage against Dragon, Aberration, or Humanoid.
- Arrow of Salving: Cures a target of poisoned, paralyzed, and blinded conditions.
- Arrow of Transposition: teleports the shooter wherever this arrow is fired.
Permanent Bonuses
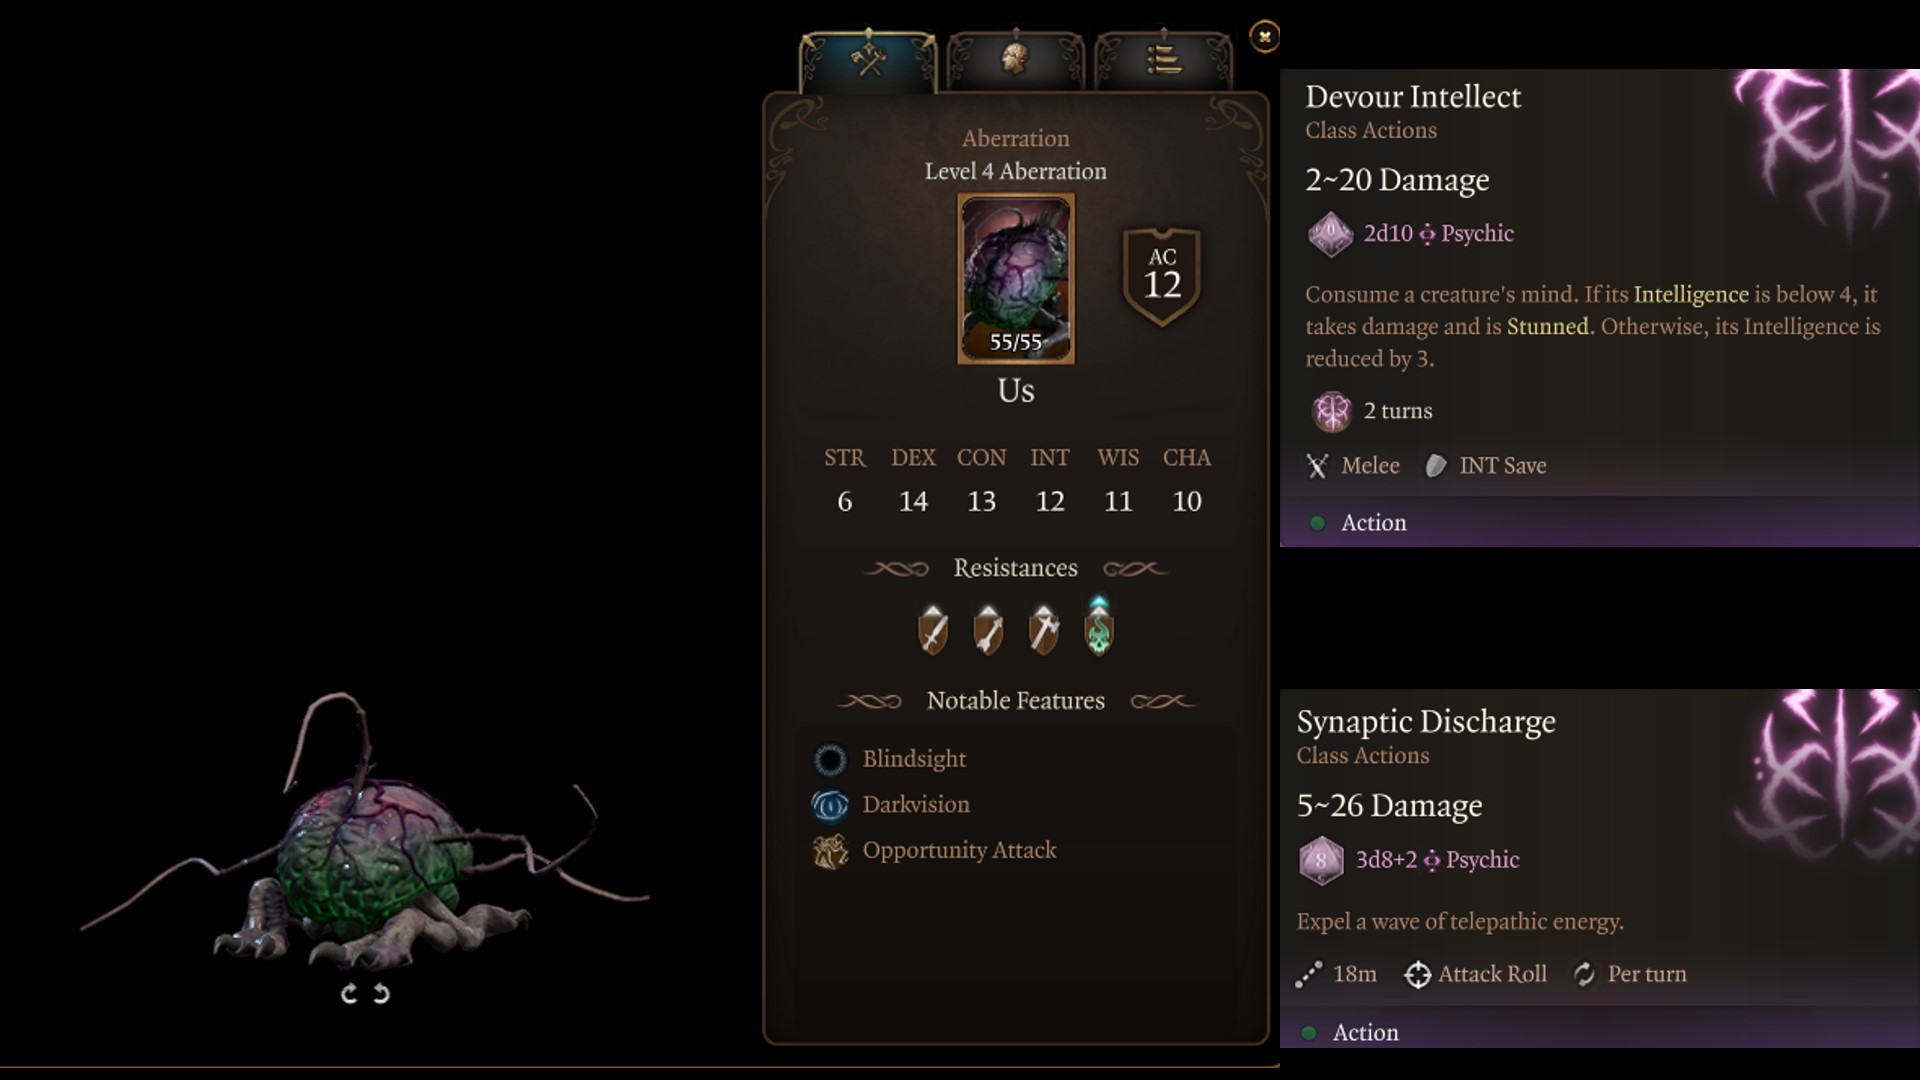
Throughout Baldur’s Gate 3, you will have the ability to gain permanent bonuses to your character. These can grant additional spells, ability scores, and other bonuses. Permanent Bonuses are not displayed throughout the campaign but are vital to increase overall combat performance. We have all permanent bonuses here in a guide, but the most important ones for you to collect are listed below.
| Act 1 | Act 2 | Act 3 |
|---|---|---|
| Auntie Ethel’s Hair: Gain +1 to an Ability Score. | Potion of Everlasting Vigour: Gain +2 Strength. | Mirror of Loss – +2 to an Ability Score of your choice. |
| Awakened: Use illithid powers as a Bonus Action. | Slayer Form: Ability to transform into the Slayer. | Partial Ceremorphosis: Access to tier 3 illithid Powers. |
| Scratch: Gain Find Familiar Scratch. | Summon Us: Allows you to summon Us. | Sweet Stone Features: Blessed permanent. |
| Cheeky Quasit: Gain Summon Quasit Shovel. | Statue of the Gods: +2 to Saving Throws | |
| Loviatar’s Love: 30% Hit Points or less, you gain a +2 bonus to Attack Rolls and Wisdom saving throws. | ||
| Necromancy Of Thay: access to powerful spells in Act 3. | ||
| Volo’s Ersatz Eye: See Invisibility |
Best Baldur’s Gate 3 Solo Fighter Build Summary
Subclass: Battle Master (Fighter)
Armor: Heavy
Weapon: Greatsword
Background: Soldier
- Strength – 16
- Dexterity – 14
- Constitution – 16
- Intelligence – 8
- Wisdom – 10
- Charisma – 10
Level Progression
- Level 1 – Great Weapon Fighting
- Level 2 – Action Surge
- Level 3 – Battle Master Subclass
- Level 4 – Alert Feat
- Level 5 – Extra Attack
- Level 6 – Great Weapon Master feat
- Level 7 – Riposte, Precision Attack
- Level 8 – +2 Strength Feat
- Level 9 – Indomitable
- Level 10 – Sweeping Attack
- Level 11 – Improved Extra Attack
- Level 12 – +2 Strength Feat
Looking For More About Baldur’s Gate 3?
Thank you for reading the Best Baldur’s Gate 3 Solo Fighter Build Guide. We provide the latest news and create guides for Baldur’s Gate 3. Also, watch me play games on Twitch or visit my YouTube channel!
 Reddit
 Email
Email
